

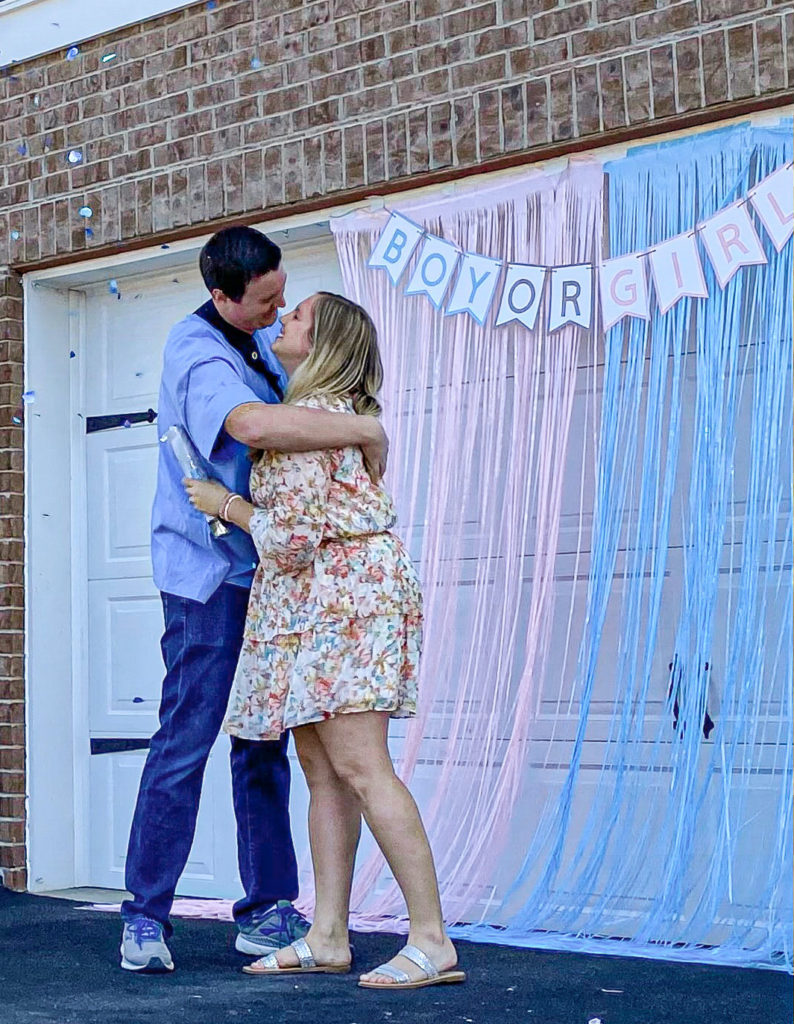
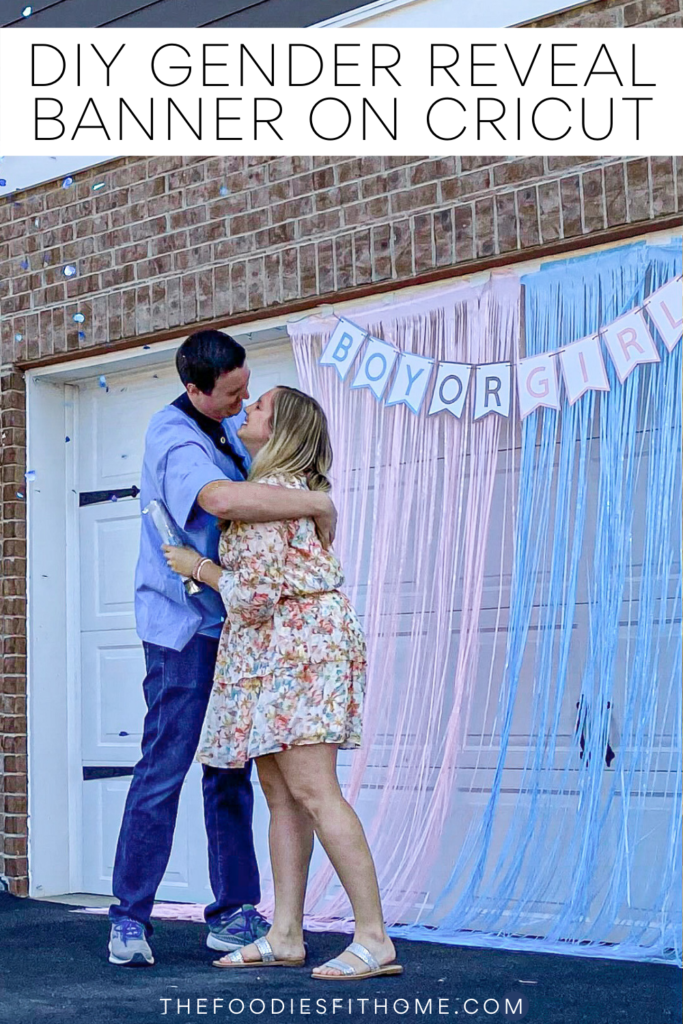
I’d never made a banner on my Cricut before, so I was extremely pleased with how well my DIY Gender Reveal Banner came out. It’s really not that hard, so I’m excited to share my experience and steps to make your own. Plus, a bonus mini tutorial for the ‘Team Boy’ and ‘Team Girl’ poster we had at our reveal!
DIY Gender Reveal Banner Supplies
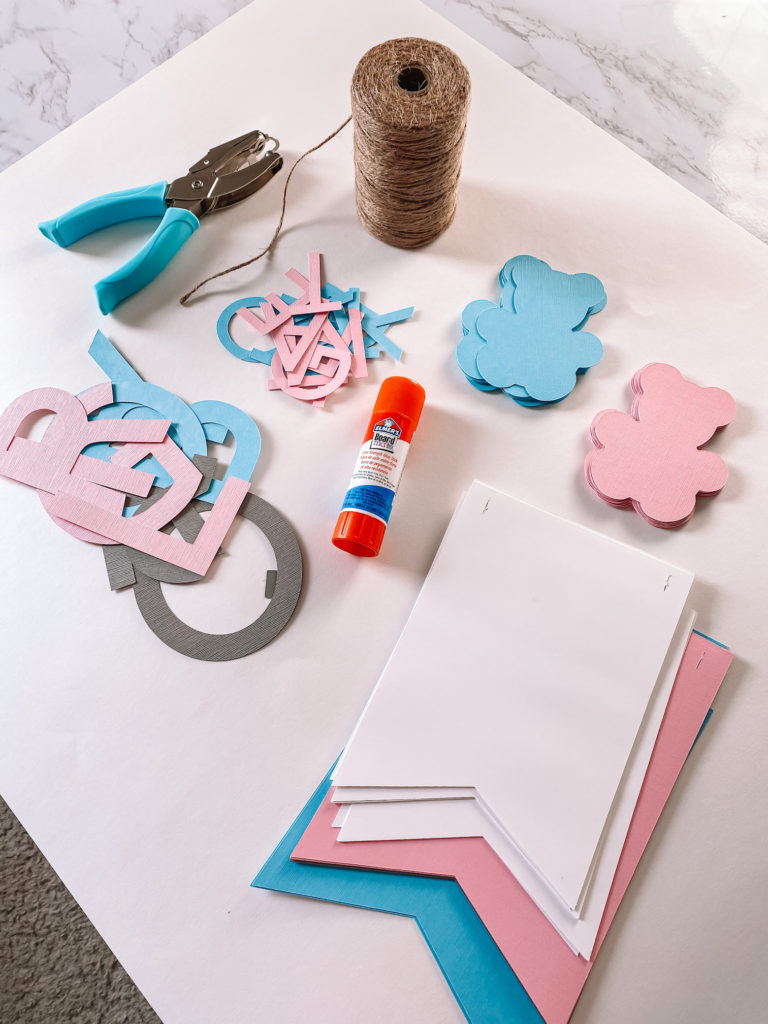
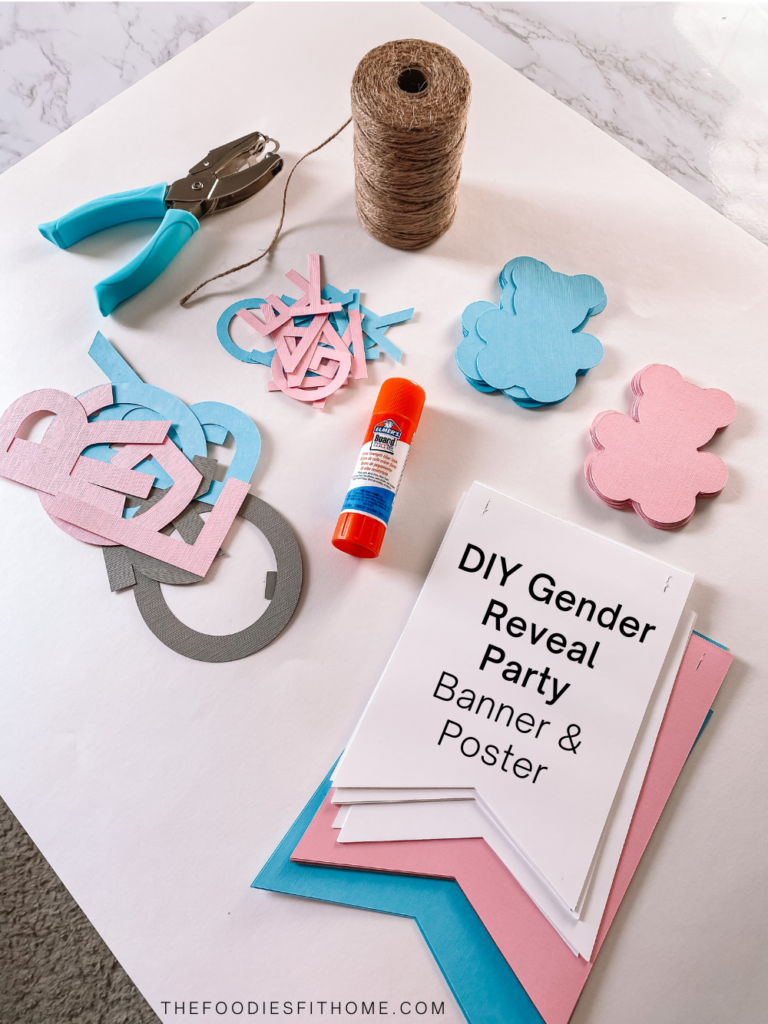
Provided you already own a Cricut and some of the tools, your supplies shouldn’t cost much at all. Even less if you hit up Michael’s with a coupon!
- Cricut Explore Air 2 (or whichever Cricut machine you own)
- 4 sheets of pink card stock paper (12×12)
- 4 sheets of blue card stock paper (12×12)
- 8 sheets of white paper (8.5×11)
- 1/4 inch hole punch
- Twine
- Glue stick
- Gorilla Glue (optional, but highly recommended)
Designing the DIY Gender Reveal Banner
First things first, we need to get your shapes set up in Cricut. I choose a free pennant shape they had available in the “Shapes” menu on the lefthand side in Cricut Design Space and made two different sizes.
As you can see, since these are Cricut shapes they’re more intuitive than uploading a regular pennant shape. What I’m referring to is the two slits at the top of each pennant so the Cricut will cut them for you! They’re great if you don’t plan to hole punch where your string will go, and also if you are because it gives you a very precise idea of where to hole punch, which I personally used as a guide.
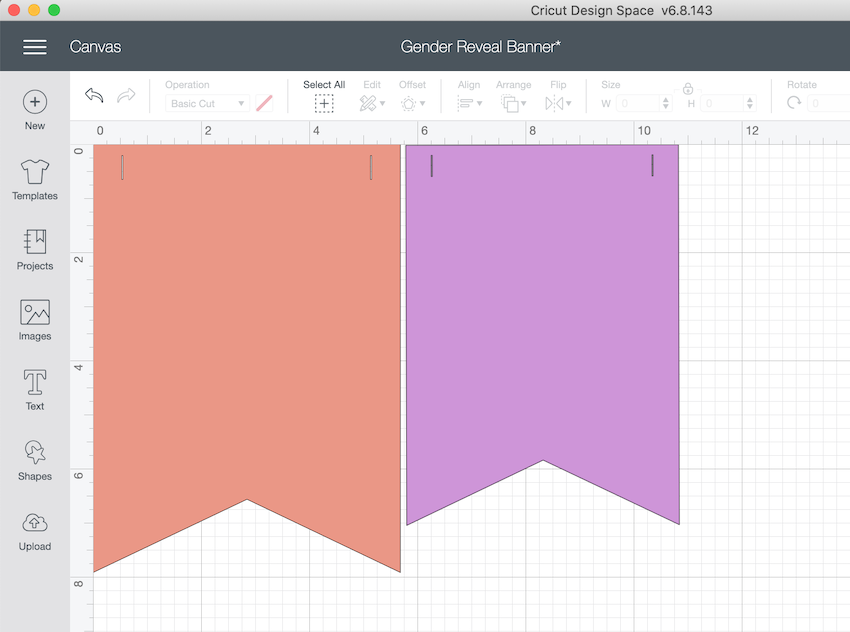
The bigger pennant will be the colorful card stock paper and the smaller one will be your white paper. Use the measurements pictured to cut the banner with the exact looking borders as mine.
Whether you use my measurements or your own, I suggest cutting one of each first to make sure they lay in a way you want. From there you can set up a few to print at a time on each type of paper until you have enough.
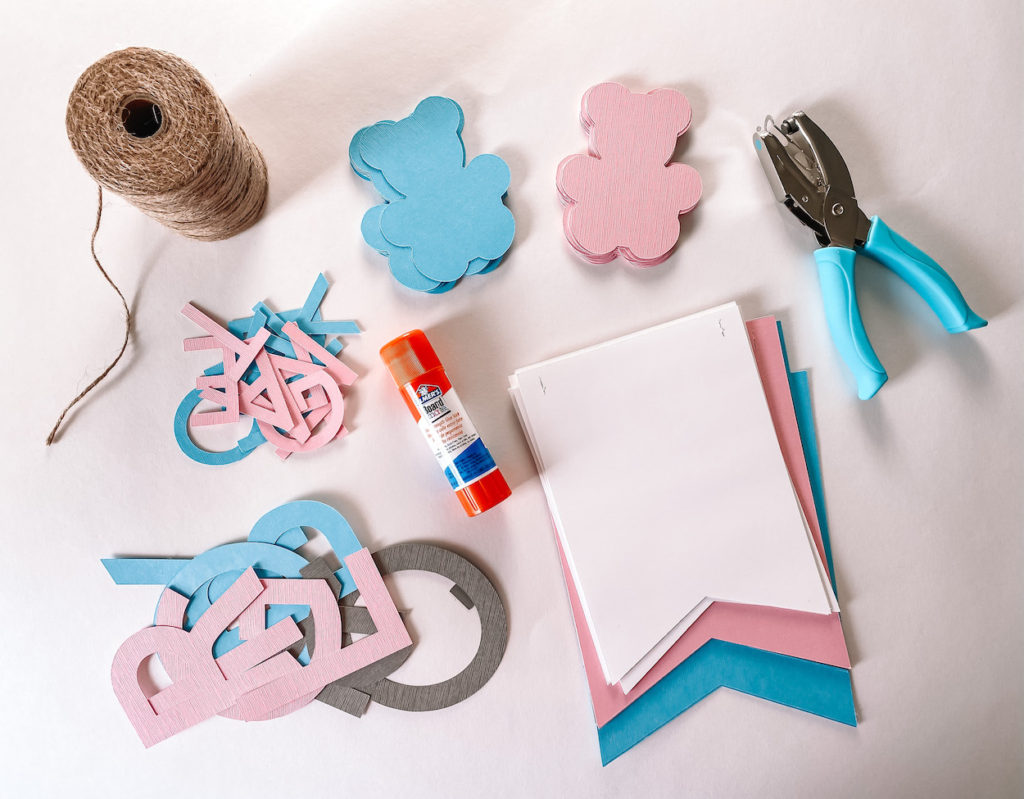
Cut These Cricut Shapes
- Four large pink
- Three large blue
- Three large gray
- Ten small white
Cutting Cricut Pennant Banner Lettering
Next, we’ll cut out your letters. You’ll need one per pennant as pictured.
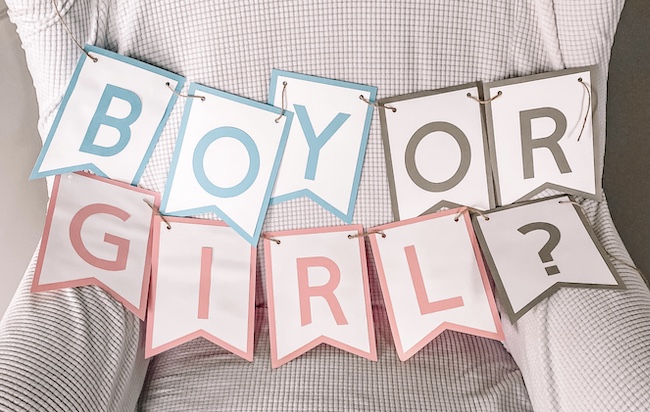
The letters on the banner are 4″ tall each. If you used my exact same size pennants, these letters should also be cut my exact same size. The font used here is called Cricut Sans.
Assembling Your Cricut Gender Reveal Banner
Now that all your pieces are cut out, start by attaching your white pennants to the larger colored ones. Simply apply a light glue stick layer to your white pennants and attach them to the center of the colored ones. No specific science here, just eyeball it.
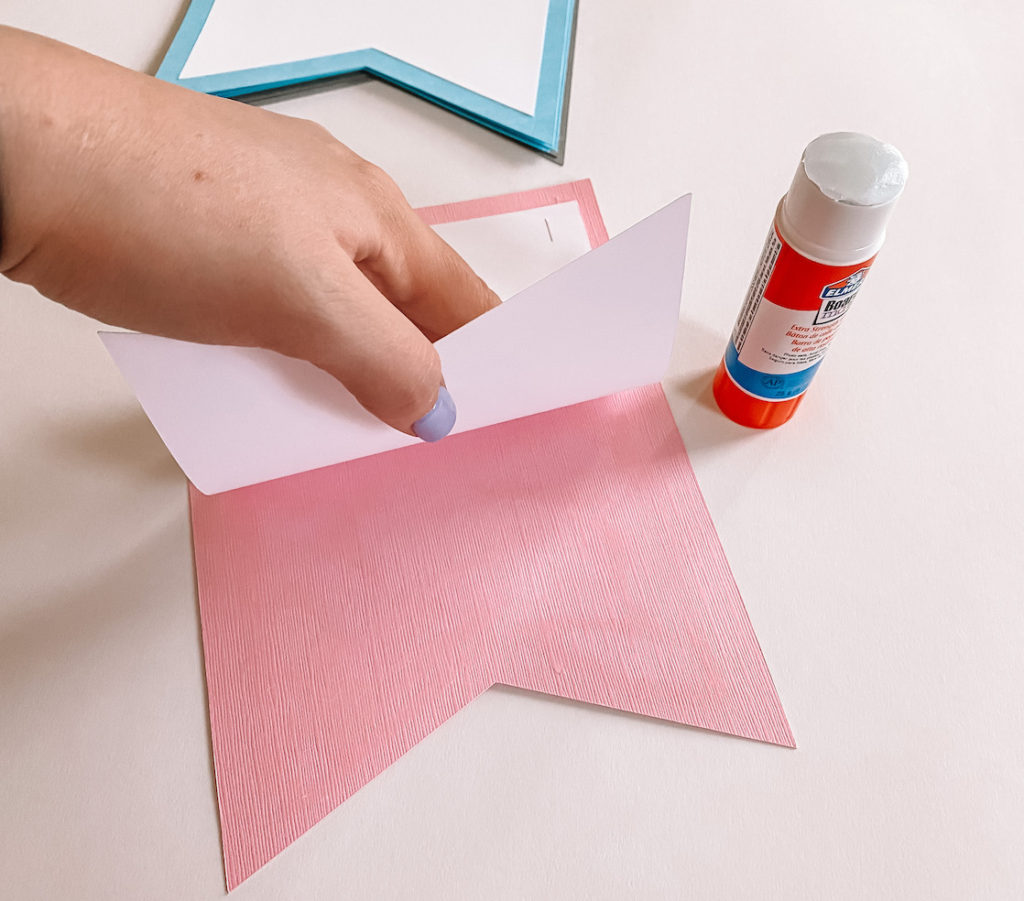
Once the white and colored paper are attached, glue on the letters. Then cut holes on either side of the top so you can thread the twine through. If you were just doing a single layer banner you could use the slits Cricut cuts, but since they don’t line up here you need a new hole.
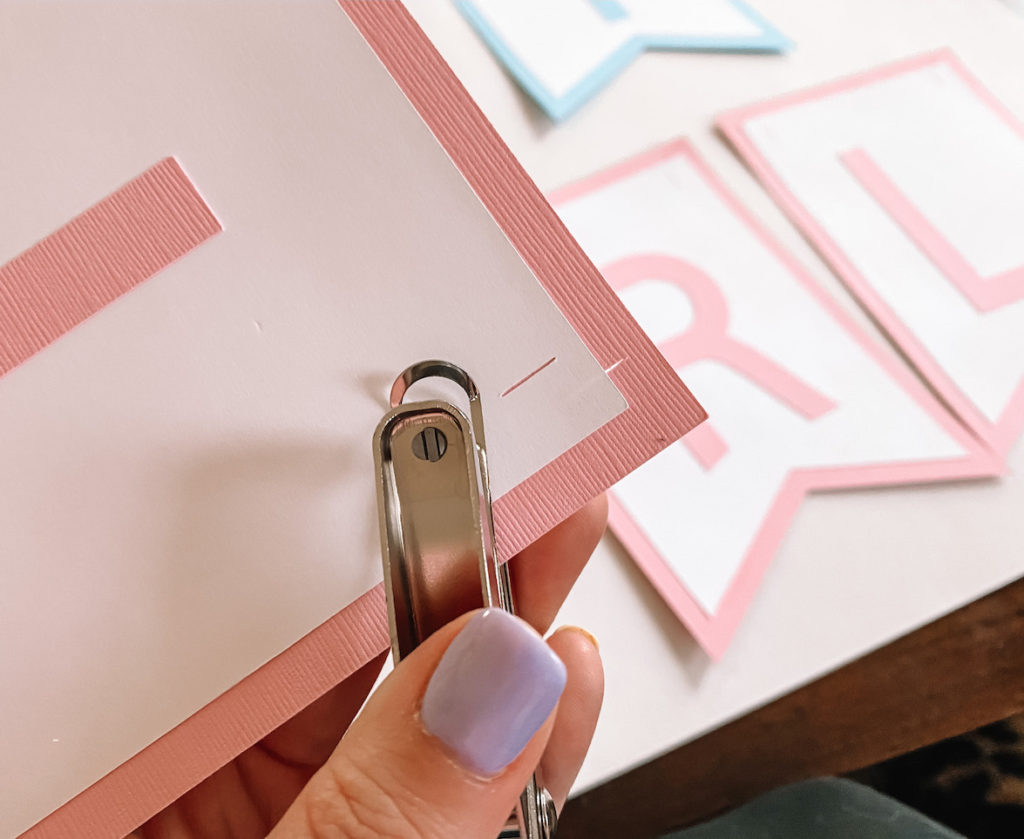
This 1/4″ circle hole punch was perfect. I cut right over where the slit was on the white pennants so those extra cuts weren’t visible on my final banner.
I’m pretty sure 1/4″ is the standard size hole punch for most office hole punches/3 hole punches if that’s all you have home, so that’d work perfectly. If not, Michael’s sells this one for super cheap, grab it while you’re getting your card stock!

Lastly, you’ll string the twine through and space the banner pennants out evenly. As an extra precaution I Gorilla Glued mine on the back so the pennants wouldn’t move once it was hung and the banner looked even at all times! This isn’t necessary, but it’s very windy where we live so it was very helpful!
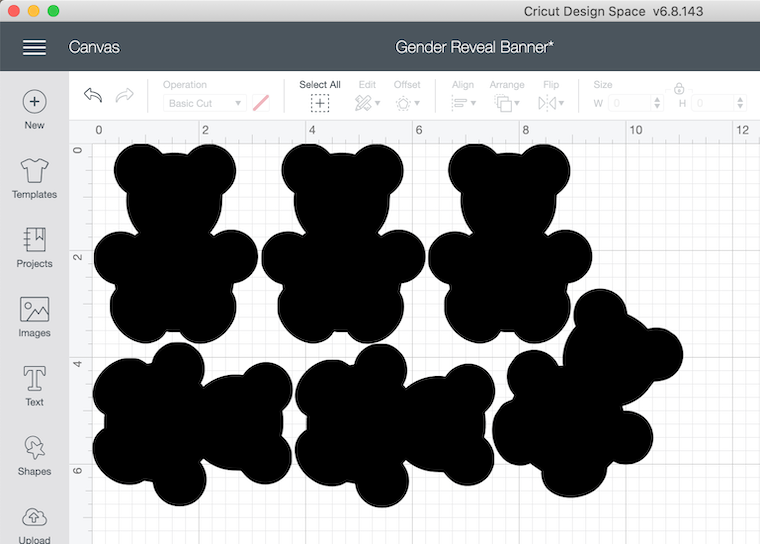
Team Boy/Girl Gender Reveal Poster
Once you’ve made the banner, this bonus project will go quickly!
The only extra you need is this bear shape. Save it to your computer so you can upload it as a simple shape in Cricut Design Space.

There’s really no set size you need to make these bears, it’ll depend what your poster looks like. Below is a scale of how I got the most out of my card stock for a standard sized poster board, so you can tell from this how big they were.
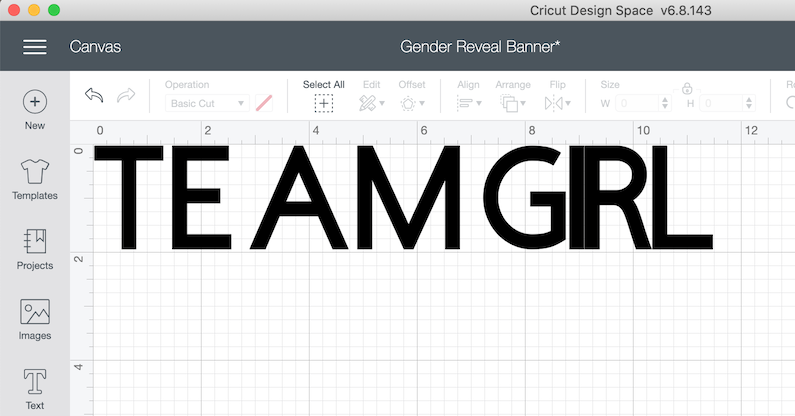
For the “Team Boy” and “Team Girl” letters I used the same Cricut Sans font and made them 2″ tall before cutting.
Once the letters were all cut I simply glued them on the poster board and once everyone gave me their guesses, the bear cutouts all got placed as well.
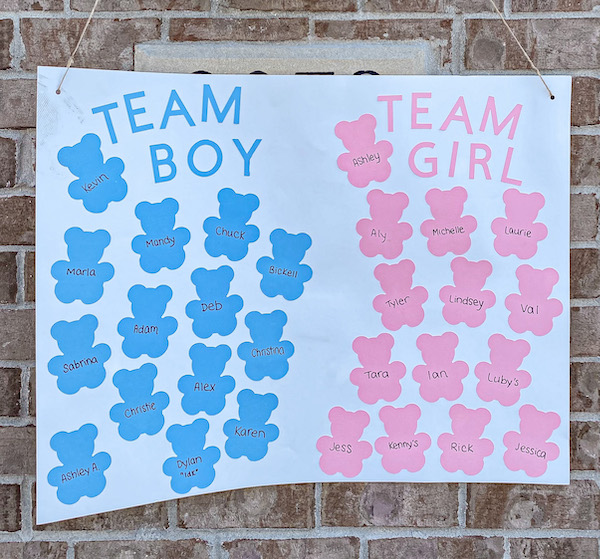
Despite having a very even split, Team Boy was ultimately the winner that day!
Will you be giving this DIY a whirl? Let me know in the comments! Tag me on social if you post because I love me a good gender reveal, and would love to show off your banner in my stories!
More DIY and Maternity
- Gender Reveal Dress Ideas
- Our Gender Reveal Party Decorations
- DIY Sour Patch Kids Onesie Costume
- My First Trimester Experience
This post contains referral/affiliate links. A small commission may be earned if products are purchased through my links. Thank you for supporting the brands that support this blog.

This post contains referral/affiliate links. A small commission may be earned if products are purchased through my links. Thank you for supporting the brands that support this blog.


