
After a month of duvet cover shopping and zero luck, I decided to look into the idea of making my own DIY duvet cover. Once I found the perfect colored fabric, I decided to just go for it.
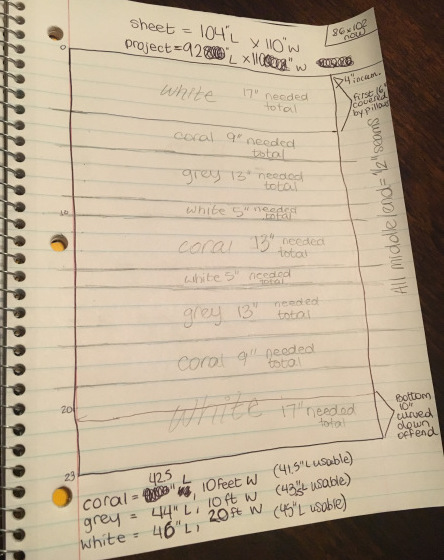
My pattern is made for a king-size duvet comforter from Ikea that measures 86″ x 102″. Most king-sized duvet covers are identical or close to the dimensions below. To be safe, always double check your measurements on the duvet that you’ll be covering and adjust accordingly.
Your DIY Duvet Shopping List
Assuming you own a sewing machine and all the basics, here’s what you’ll need to make your duvet cover.
- Fabric, more than enough to cover the size duvet you own
- Thread to match your fabric (go darker with multiple colors)
- Snaps for the closure (or a zipper, ties, etc.)
- Flat sheet (buy one in the size you plan to make your duvet), this will be the backside unless you’d like to make a more specific pattern of your choosing
- Other decorative notions i.e. tassels, fringe, etc. (optional)
Before You Sew
There’s a considerable amount of to-dos before you even hit the sewing machine. See below to properly prep for your new duvet’s assembly.
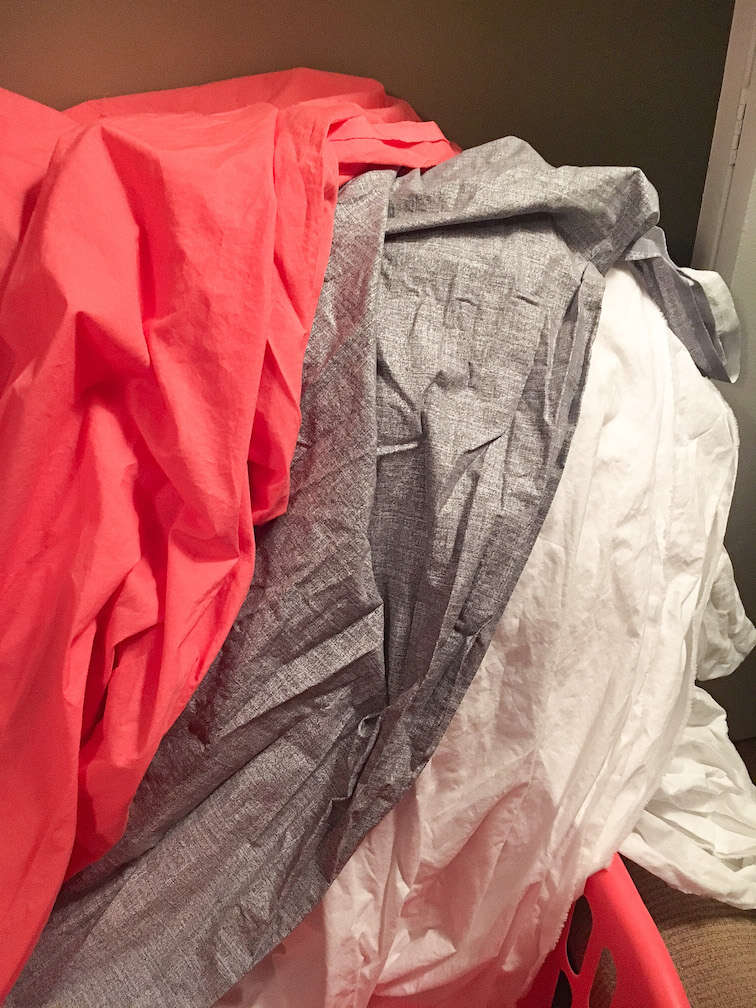
1. Wash your fabrics. If you don’t, they may shift when you wash the duvet for the first time. Use fabric softener and a dryer sheet so they’ll come out nice and soft.
2. Map out your pattern. In a complex pattern like mine, you’ll need to map out the pattern. Account for seams so you can cut the strips perfectly the first time.
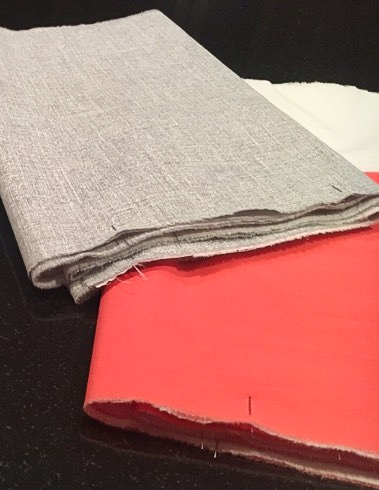
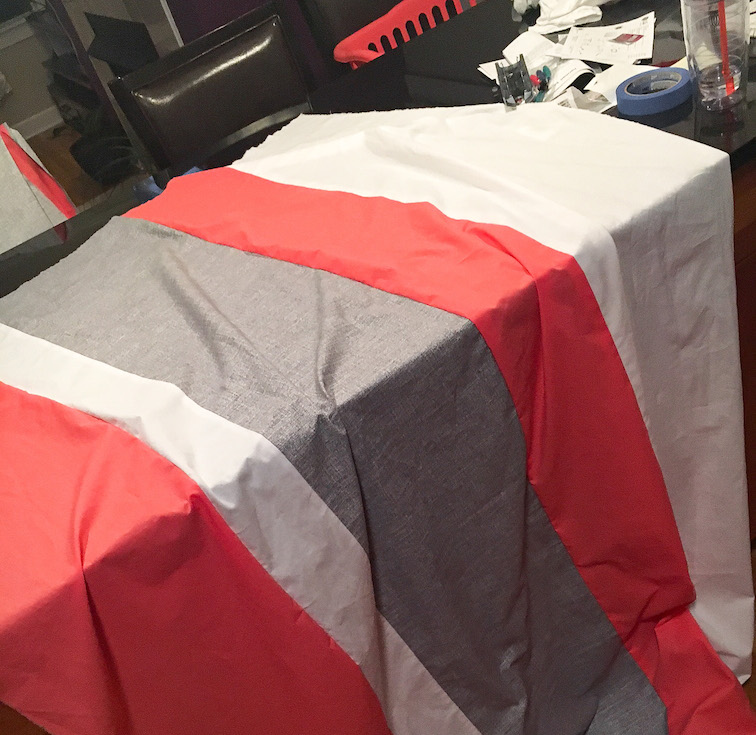
3. Cutting the fabric. This is most applicable if you’re using more than one fabric on a given side (like my striped duvet). You want all of your stripes, shapes, etc. to be cut before you start sewing pieces together. This way you can ensure you have enough fabric and it’s all in the right shape and size.
Pro Tip: If you fabric is cotton, cutting it will be much quicker and more accurate if you rip it instead of cutting it. If you’ve never done this, watch this quick video showing you how easy it is. Fabric rips along the seams perfectly straight versus a freehand cut. Just add 1/4 inch into your measurements to account for very normal fabric fraying.
4. Iron the fabric pieces. The pieces are going to be worlds easier to sew, and with far greater accuracy, if they’re all ironed before sewing.
5. Pinning the fabric pieces. Before you sew, it’s important to triple check they’re all pinned perfectly in place. Then, when it’s time to sew your fabric together it won’t shift.
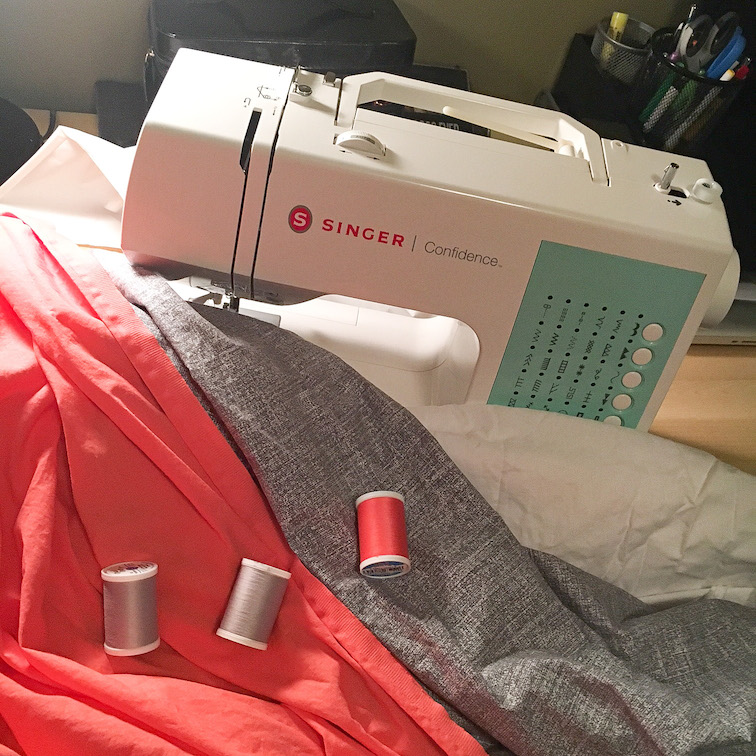
Sewing the Duvet Cover
This will be a two-part process. First, we’ll address piecing together the front of your duvet cover. Then, we’ll talk about sewing the front to the back.
Sewing the Front of your DIY Duvet Cover
1. Thread your bobbins. Fill up all of the bobbins you need to, at least one for each color fabric you are working with, most likely. Don’t be shy either, even if you are only making a full-sized duvet that is a lot of fabric to sew.
2. Check your sewing machine settings. This step is the catch-all for your particular setup/machine, be sure all of the right settings are locked in before you get sewing.
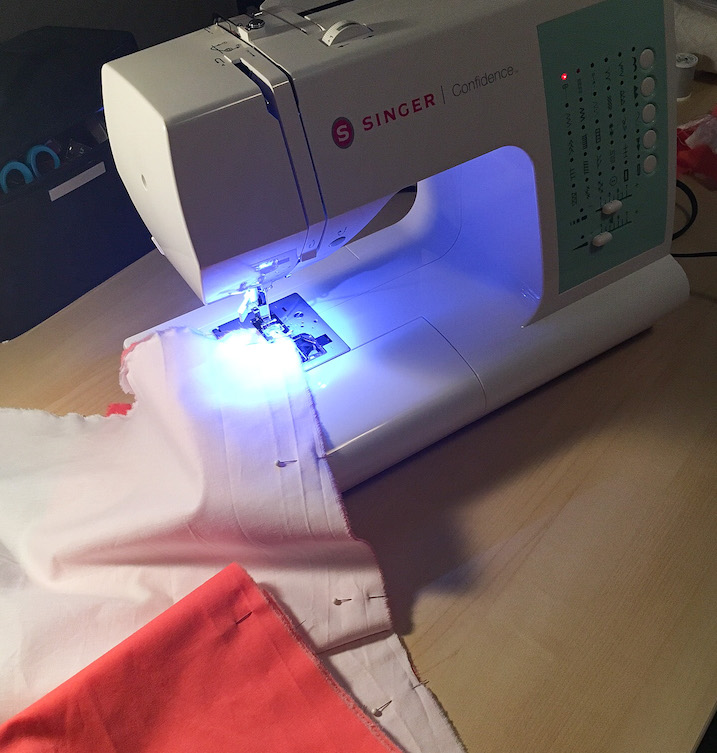
3. Sew your fabric pieces together. I suggest sewing as many panels together one-to-one rather than attaching each one to a growing piece of fabric.
For example, I had nine stripes to sew together. The first eight seams I made were two single panels being sewn together, making them very easy to manage. Then, my next four were simply attaching those double pieces together until the duvet was complete. The less fabric you’re trying to manage at once, the easier it is.
4. Iron your seams. As with any other project, you want to iron the seams from the inside once they’re attached together so that the outside seam lays as flat as possible. You can do this after all of your panels are attached or each one as you go, dealer’s choice.
Sewing the Front to the Back
My most mind-blowing hack? Using a flat sheet for the back side of your duvet.
Unless you want a dual-sided duvet, a very easy backside is a single-colored flat sheet. Buy one in the size bed you are covering and cut that to sew to the frontside pattern. This is a GREAT option because most duvets are wider than the fabric. This saves you from piecing more fabric together for the backside.
For mine, I bought this inexpensive king-sized flat white sheet.
1. Measure and cut/rip the back panel. The same fabric ripping trick works on your flat sheet. I did this with mine; it took five minutes from start to finish, including measuring.
2. Pin the front to the back, measure one last time. Get those pieces pinned together and measure one final time before sewing.
Pro Tip: Check your bobbin thread often! You’re sewing a LOT and don’t want to run out without realizing it, causing yourself double work.
3. Don’t sew the ENTIRE thing together. Nothing worse than not leaving an opening for your comforter. On my king-size duvet I left a 38″ opening, which was about 1/3 of the bottom’s width. I modeled this from my old duvet cover and believe 1/3 of the bottom is a good standard for any size duvet.
Pro Tip: Be sure there’s a healthy amount of seam for the snaps, buttons, etc. to be attached (1.5″ at least, if you have more you can do a double fold-over to keep it even cleaner).

4. Adding your closure and the finishing seam. I used four snaps as my closure on the 38″ opening. You can also use zippers, buttons, fabric ties, ribbon or maybe even hook-and-eyes, etc. Once you’ve added your closures, be sure to finish with a clean, straight stitch. You’ll see this part of the duvet when removing the comforter to wash, and if it’s not finished neatly, guests may even notice the sloppy work.
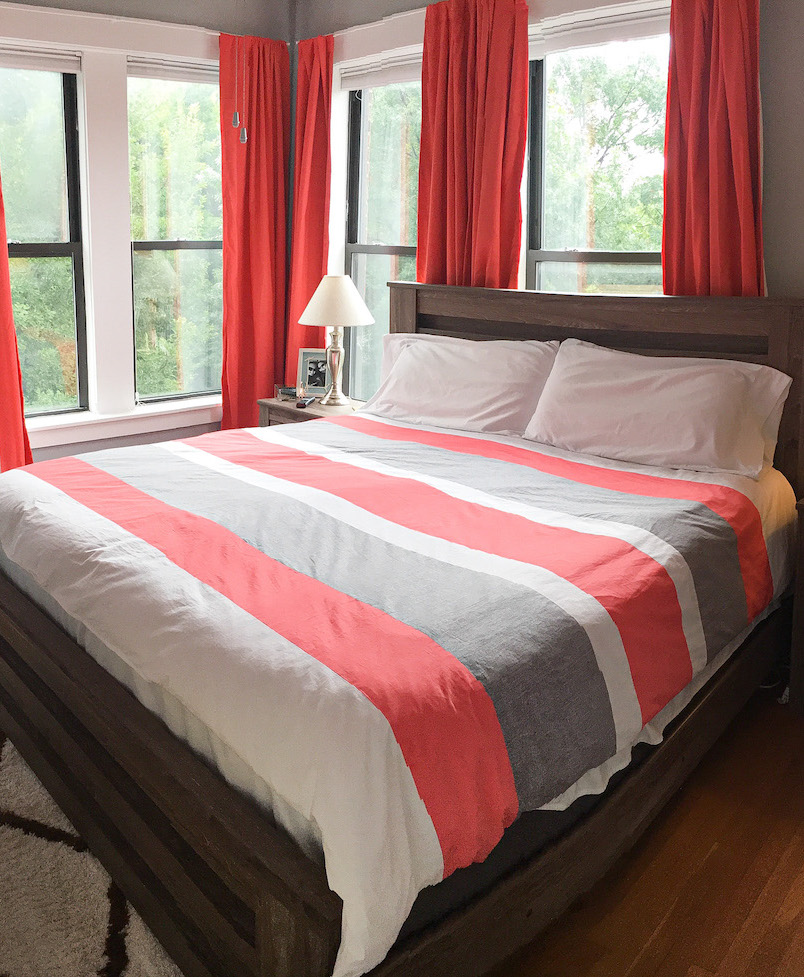
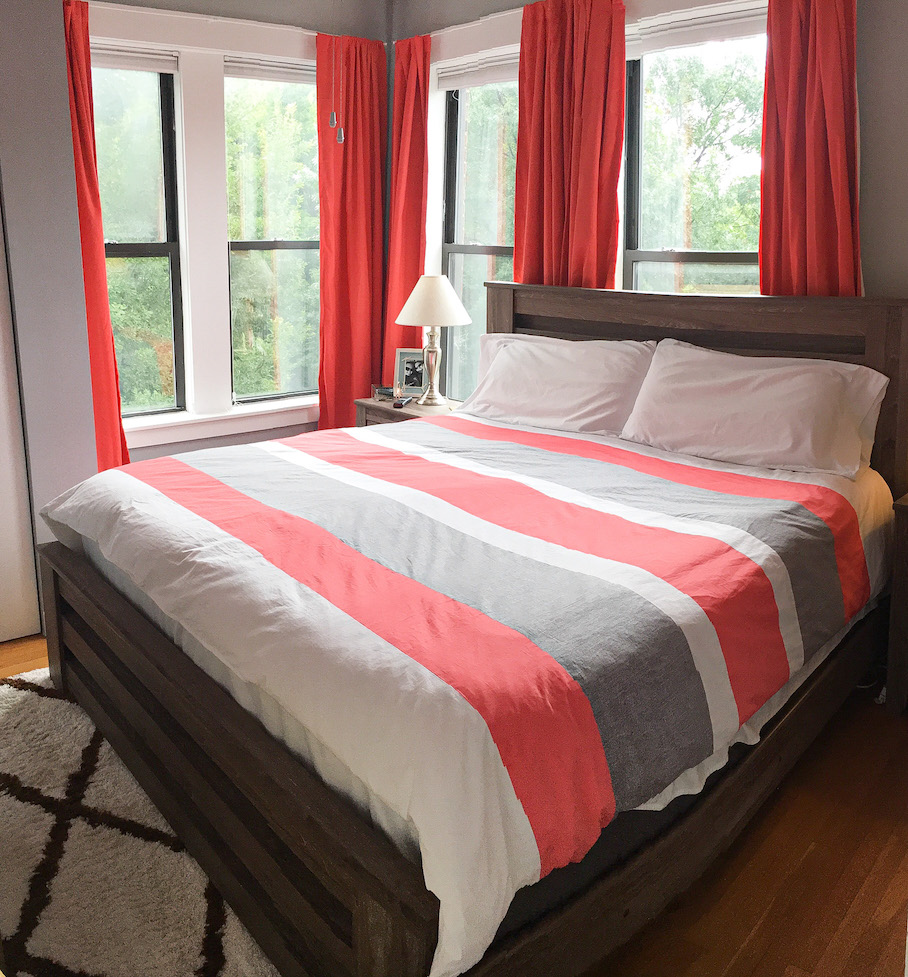
The Finished DIY Duvet Cover
Flip the duvet right-side-out to see your finished product! Check for any open seams, unfinished stitches, tears, etc. If everything went according to plan, poke your corners out, insert your duvet comforter and enjoy your hard work!
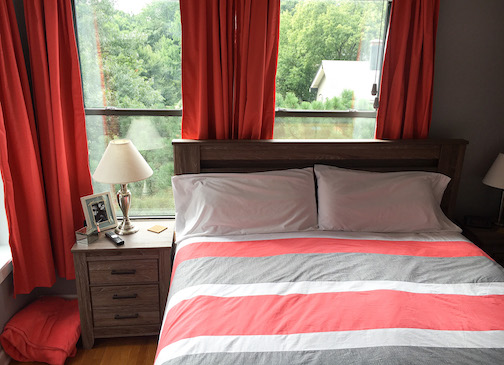
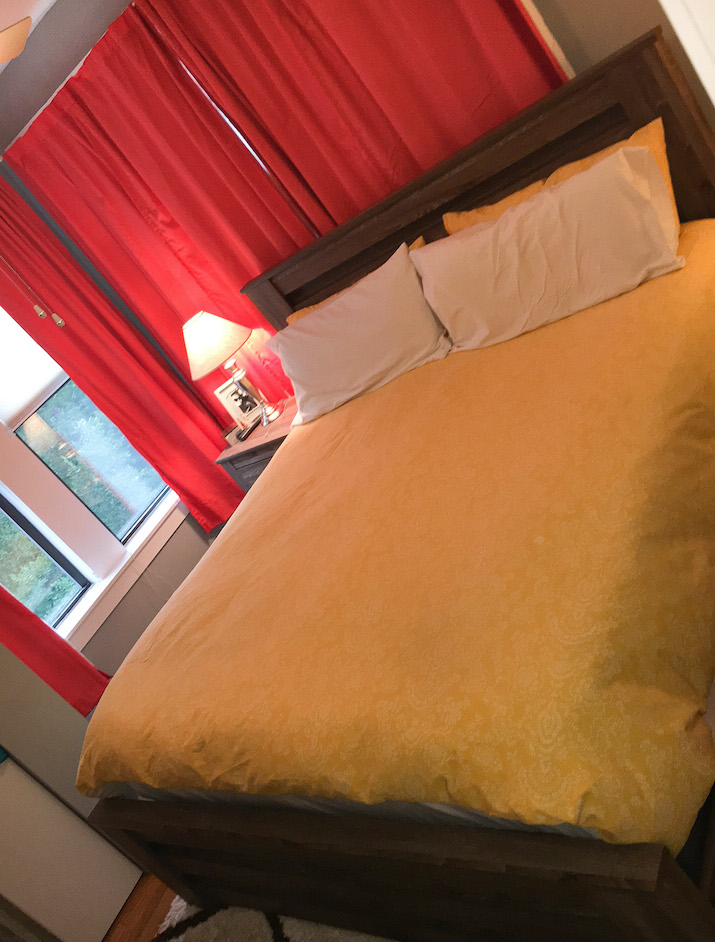
Before and After
While the yellow was great at our old apartment, it really didn’t match our new bedroom. So glad I took on this project and refreshed this space!
Final Project Cost and Tips
- JoAnn Fabrics always has coupons on their website, never pay full price!
- Keep an eye out for sales on notions, threads, etc. and strike while the sale is on.
- Get your bed sheet at Target and save 5% with your RedCard.
Total Timeline of Project: 1 week
Total Cost of Project: $95*
*estimate based on amount of fabric actually used, not purchased
Make Matching Pillow Shams
Once I got done with the duvet cover I realized my yellow pillows no longer matched. With the same gusto I tackled making my own DIY pillow shams. Make your own with my matching DIY Pillow Sham Tutorial!
While my DIY duvet cover is certainly no small project, it’s incredibly gratifying. Have you considered giving it a try? Let me know in the comments, and definitely drop a link or picture if you’ve done it yourself!
More DIY and Home Improvement
- How to Stain a Wood Clock
- Modern Bathroom Remodel Under $1k
- Renewing Outdated Decor with Spray Paint
- Modern White Dresser DIY Project
This post contains referral/affiliate links. A small commission may be earned if products are purchased through my links. Thank you for supporting the brands that support this blog.

This post contains referral/affiliate links. A small commission may be earned if products are purchased through my links. Thank you for supporting the brands that support this blog.


