
Have you seen these viral Pottery Barn terracotta pumpkins? Because they’re all over the internet, and they’re terribly overpriced. However, they’re super adorable and you still want some, right? Because, same. My DIY terracotta pumpkin craft will cost you around $10 and get you the same end product.

Find Your Pumpkin
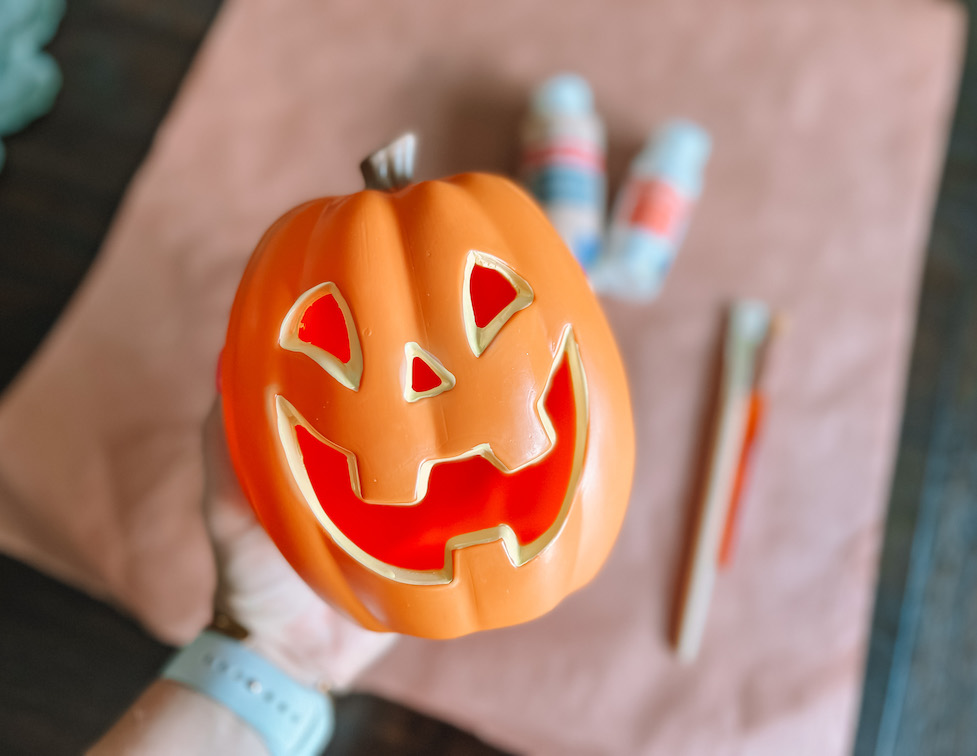
This battery powered light up pumpkin is the one I used. I love it because it cuts out the need for a candle and it even has a timer setting so it’ll come on and off all through spooky season on its own! They also have a 4″ smaller pumpkin in the same collection that I’m going to get and terracotta next because then I’ll have a matching set!
Other options include this Jack O’ Lantern-perfect ceramic pumpkin that appears to have a light in it as well, and this unfinished plaster pumpkin. Both of the last two are already white also, which will save you a step!
Terracotta Pumpkin DIY Supplies
If you’re a basic level crafter you’ll likely already have a few of these home already.
- A pumpkin
- Paint color of choice (mine is Natural Beige)
- White paint (optional, any kind, recommended if your pumpkin isn’t already white)
- Larger, soft bristle craft paint brush (the larger ones in this set are perfect examples)
- Baking soda
- White flour
- Lighting (optional, but these Amazon Jack O’ Lantern lights come with a remote!)
Making a DIY Terracotta Pumpkin
First, prep your area. Lay down something so paint doesn’t get through to your surface. You don’t necessarily need paint containers for this, but if you’d like, grab some bowls or a palette. I mixed all mine right on my thick paper workspace.
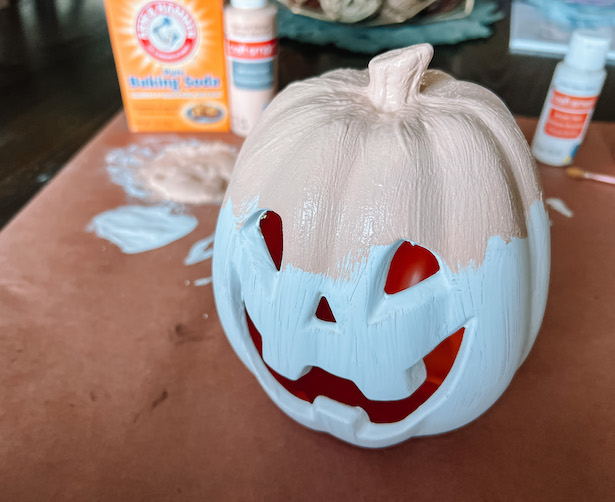
Paint Your Pumpkin White
Step one is painting your pumpkin white, if it isn’t already. This is key, DO NOT skip this step! You won’t get the true intended color you’re planning on if you start by painting over a different (especially a darker/bolder) color.
If your pumpkin is already white skip ahead to the next step.
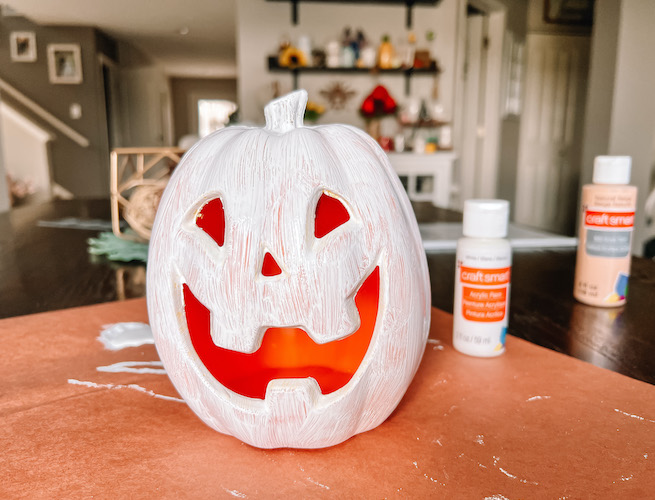
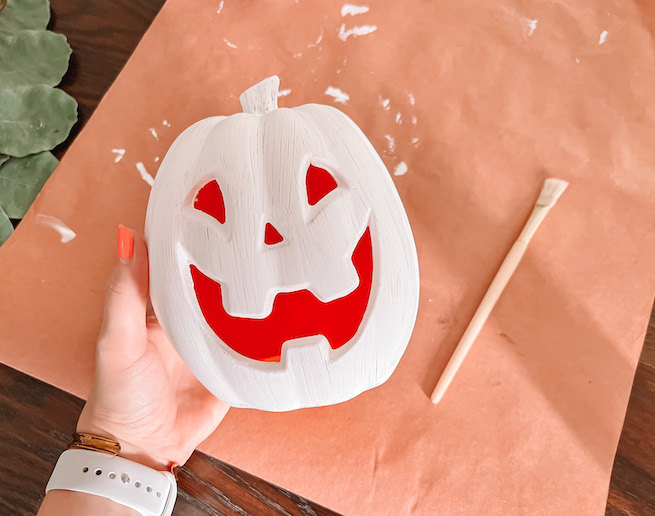
It’s a lot harder for the color of your paint to show truly if the surface below it is dark like my pumpkin’s color. I applied two coats of white paint back to back with little drying time in between and it worked out great. As you can see above, there’s a big difference between one and two coats, but the choice is yours if you’re okay with only one coat.
Mix Your Colored Paint and Baking Soda
Next, let’s mix up your paint with some baking soda to give it a nice thick texture.
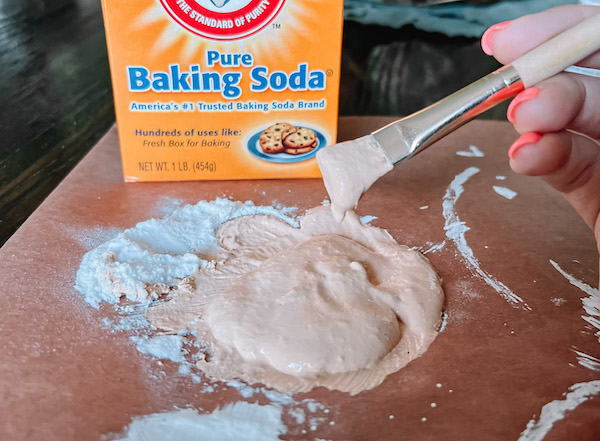
At first, I got nervous because it looked like I poured WAY too much baking soda into the paint. Turns out, there’s no such thing! It all mixed in eventually, just keep stirring with your brush. At points the paint even looked like it was going to stay separate from the baking soda, but it won’t, it’ll give in.
My beige paint was so thick and creamy it went on to imitate an authentic terracotta surface. For reference, we’ll call this your terracotta paint.
Painting Coat One of Your Terracotta Paint
For the first coat, I applied a regular coat of paint, keeping the brushstrokes vertical and in-line with the pumpkin’s lines from stem to base. Let this coat fully dry before you move on to the next due to the technique we use in the second coat.
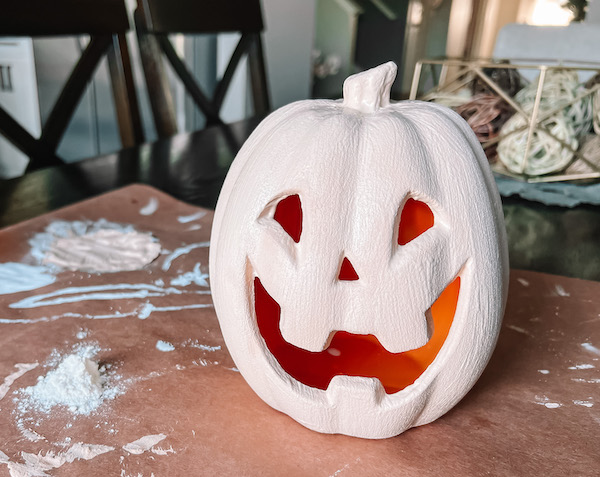
This is after one coat. The paint is smooth and runs vertically as described.
Painting Coat Two of Your Terracotta Paint
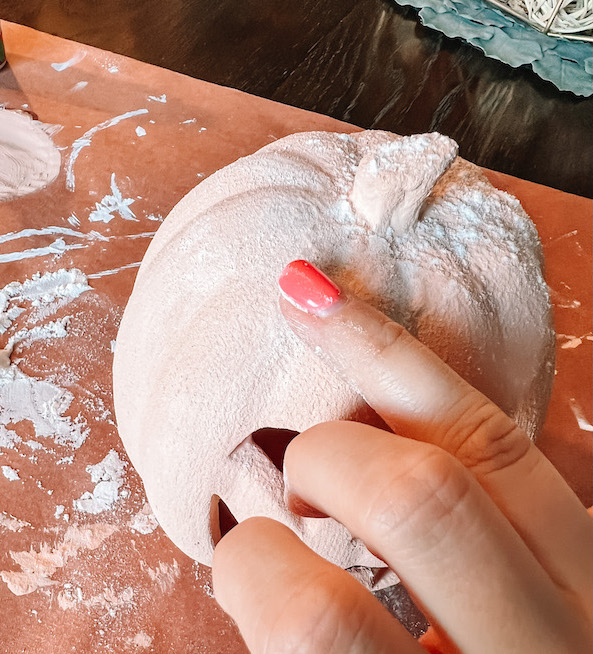
For the second coat you’ll be applying it in a non-traditional, splotchy type of style. I wish I’d taken more pictures of this but it’s not hard, so I have all the faith you’ll nail it with just my direction!
To create the terracotta look, apply the second coat by spreading globs of your terracotta paint by blotching versus brushing. I don’t mean leaving large chunks of paint on the surface, those will be noticeable when it dries. Instead, take a big glob of paint on your brush, place it on the surface and spread it around evenly by blotching the surface with the brush instead of painting via brushing the surface.
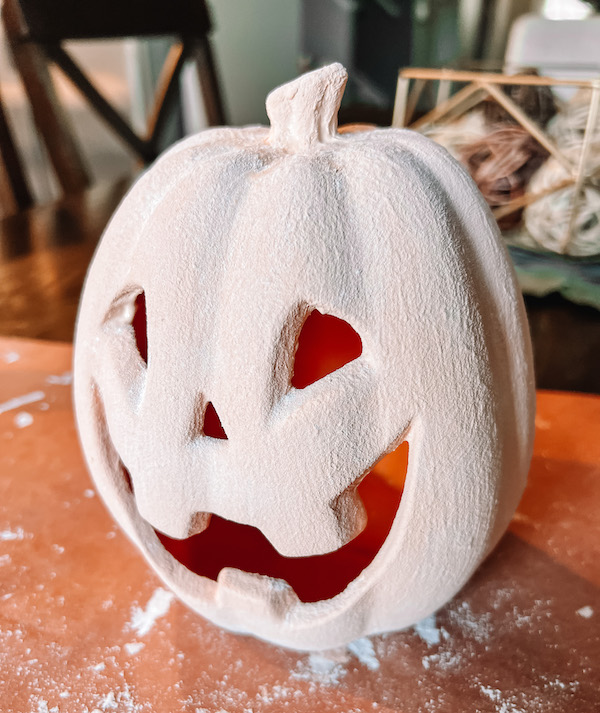
By spreading the final layer of terracotta paint this way, you’ll create the naturally uneven, imperfect look of terracotta. The above photo is a close up so you can see how the paint dried to look like a plaster/terracotta surface.
It’s hard to believe this is a plastic pumpkin, acrylic paint and some baking soda!
Finishing Your DIY Terracotta Pumpkin
The final step is adding some plain white flour to the pumpkin. This gives your DIY terracotta pumpkin a washed look, committing even further the to the terracotta vibe.
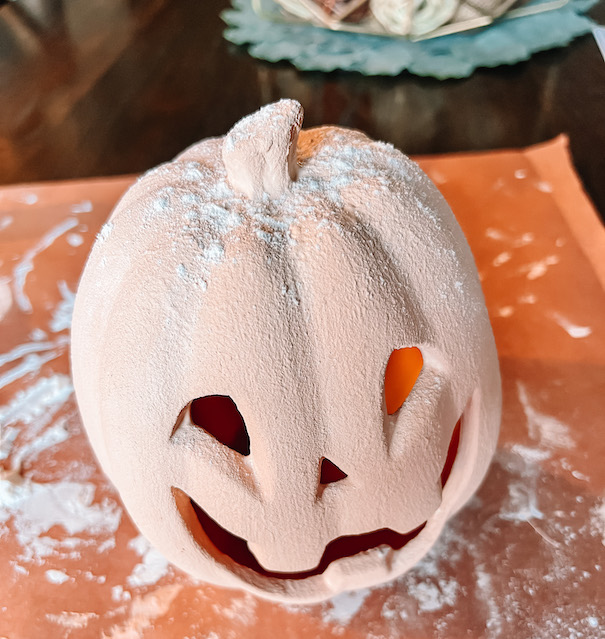
To apply, sprinkle a bit of flour over the top when your final layer of terracotta paint is 95% dry. You don’t want the paint to be too wet because you’ll make finger prints in it, but it can’t be totally dry because the flour needs to stick to something.
Start small and spread that gently with your finger first, then add more flour and repeat as needed. You can always add more, but removing it will be nearly impossible, so don’t overdo it!
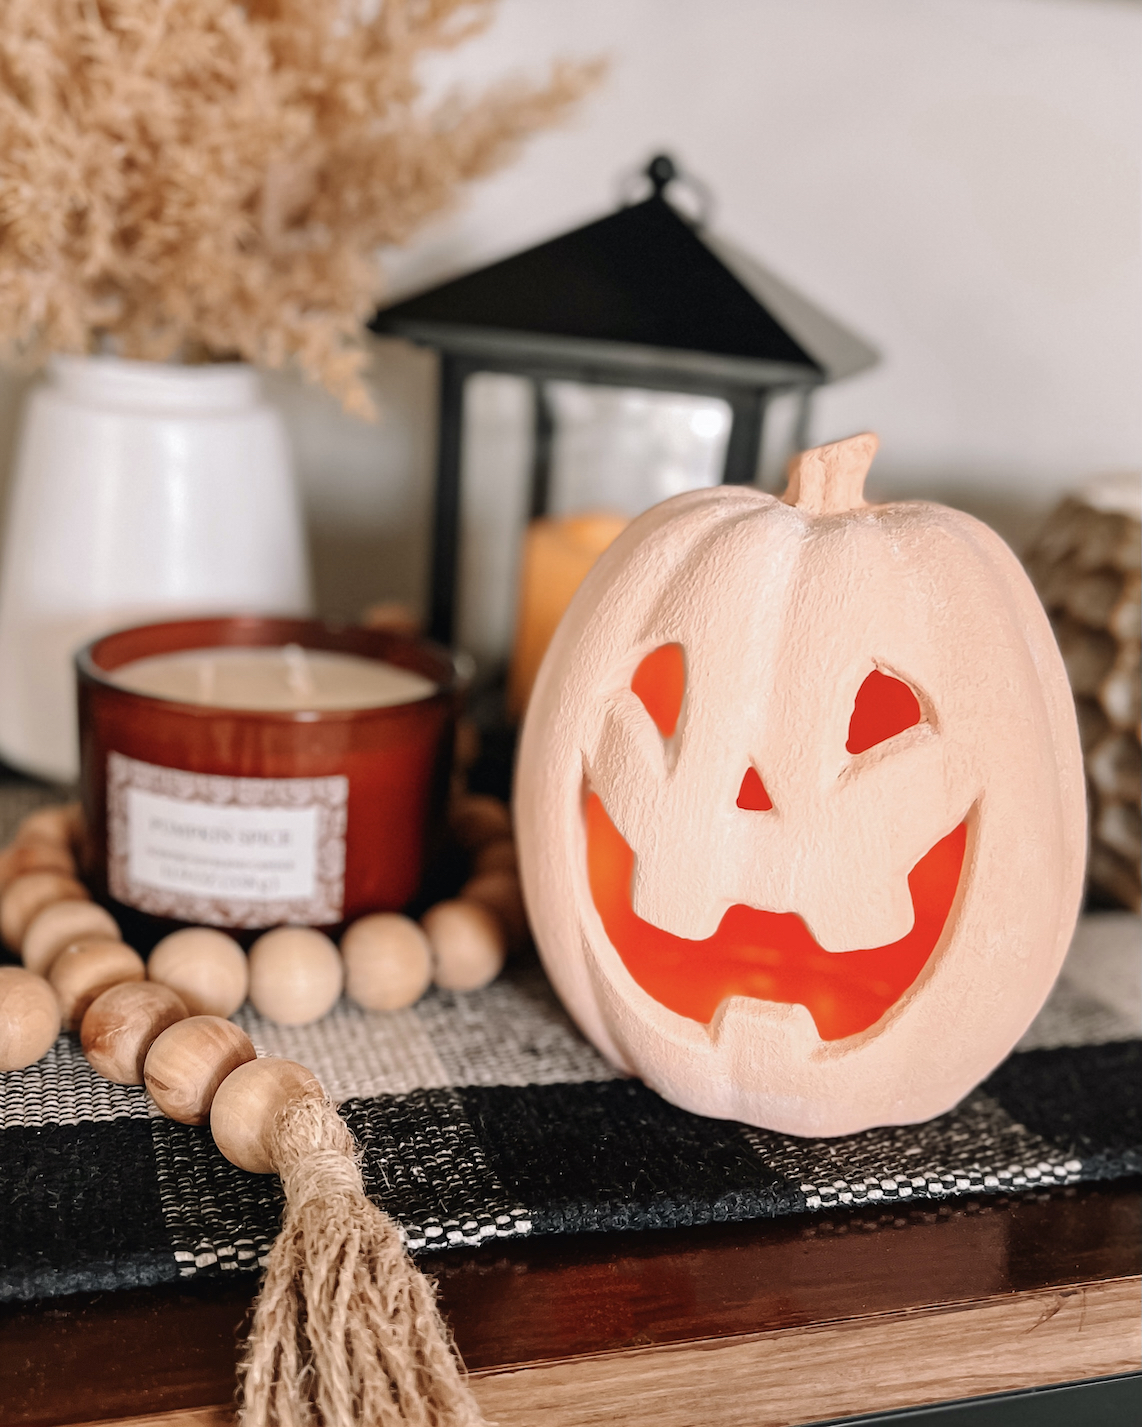
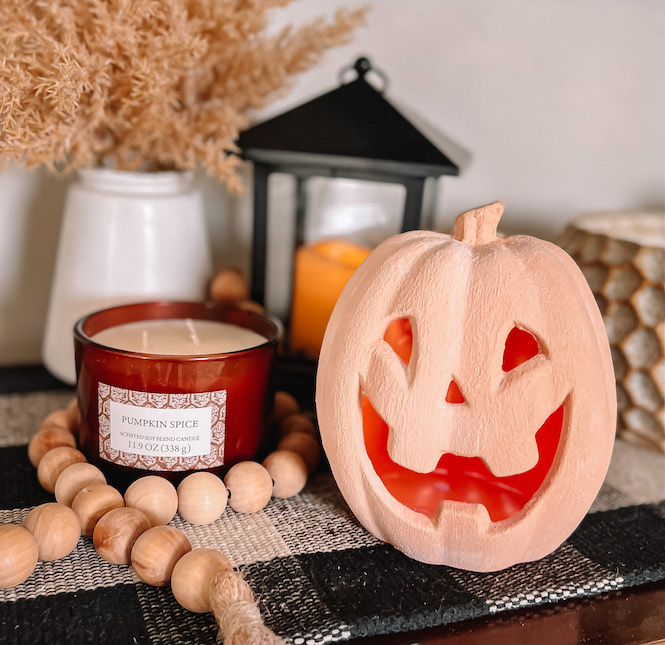
Your Final DIY Terracotta Pumpkin
Viola! Place your final product among other beautiful fall touches like my pumpkin spice candle or some wood bead garland and you’re ready for the season!
Let me know with any questions or comments about this craft or your experience making your own DIY terracotta pumpkin in the comments. See below for some more fall and Halloween ideas and crafts!
More Halloween & Crafts
- DIY Crayon Wax & Glitter Pumpkins
- Easy Halloween Craft & Recipe Ideas
- Sour Patch Kids Onesie Costume + Cricut Templates
- DIY Three-Wick Candle Turned Candy Jar
This post contains referral/affiliate links. A small commission may be earned if products are purchased through my links. Thank you for supporting the brands that support this blog.


This post contains referral/affiliate links. A small commission may be earned if products are purchased through my links. Thank you for supporting the brands that support this blog.

