
As part of my loft remodel I bought a new wall clock, but it’s not quite the exact shade of wood I want for my space. However, it was on clearance for about $30, so I couldn’t pass that up! It’s huge and otherwise exactly my style. The project is very easy, so follow along to learn how to stain a wood clock for yourself.
Wood Stain Clock Supplies
I had everything home except the stain color I wanted, which made this an extra easy DIY project.
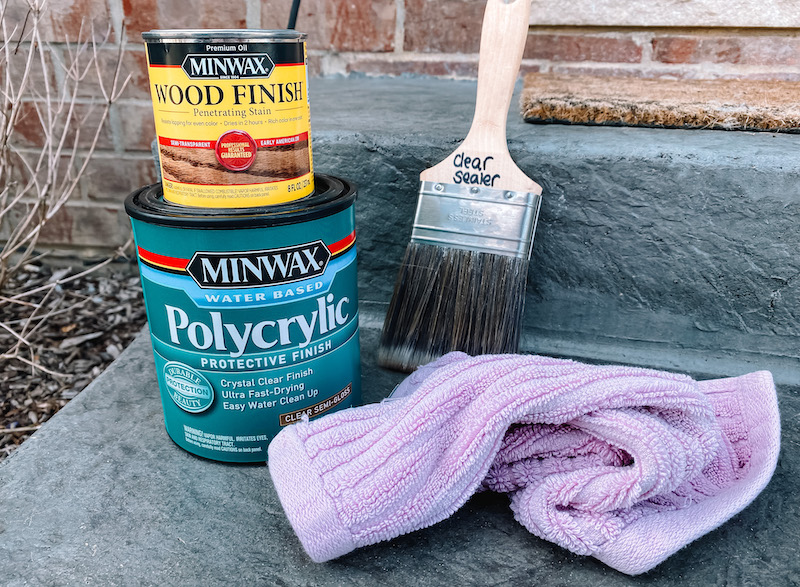
- Minwax Wood Finish Stain, in Early American
- Minwax Polycrylic Protective Finish, in Clear Semi Gloss
- Old rag for applying and wiping stain (these are great if you need ones)
- Dedicated brush ONLY for clear finisher/sealer (has never had color on it)*
*there’s always a chance color runs into the clear finish, always have a single brush dedicated to ONLY clear sealers at home for projects
Picking a Stain
There are a few key things to know when picking a wood stain:
- If you’re between shades, always go lighter. In my experience, stain dries darker.
- If your stain still isn’t dark enough, you can apply additional coats easily to adjust the shade.
- You rarely need more than the 1/2 pint size. Even the staircase in my garage only used 1/4 of the 1/2 pint size can. Stain goes SO much farther than paint!
Staining a Wood Clock
First, set up your work station. I have old, thick canvas curtains that serve as repurposed drop clothes. If you need some, these Amazon drop cloths are inexpensive and have good reviews. I always recommend canvas over thin plastic because it’s much thicker to protect your surfaces.
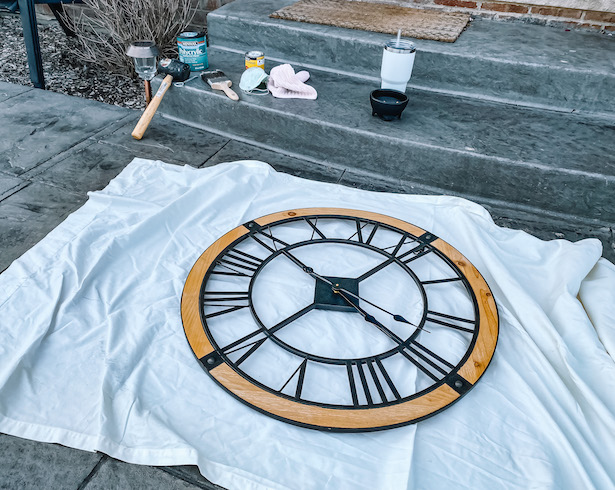
Additional things you’ll need include a paint key to open the cans and a rubber mallet (a hammer works too) to shut the cans when you’re done. I also use a mask to avoid inhaling too many fumes, but that’s totally personal preference.
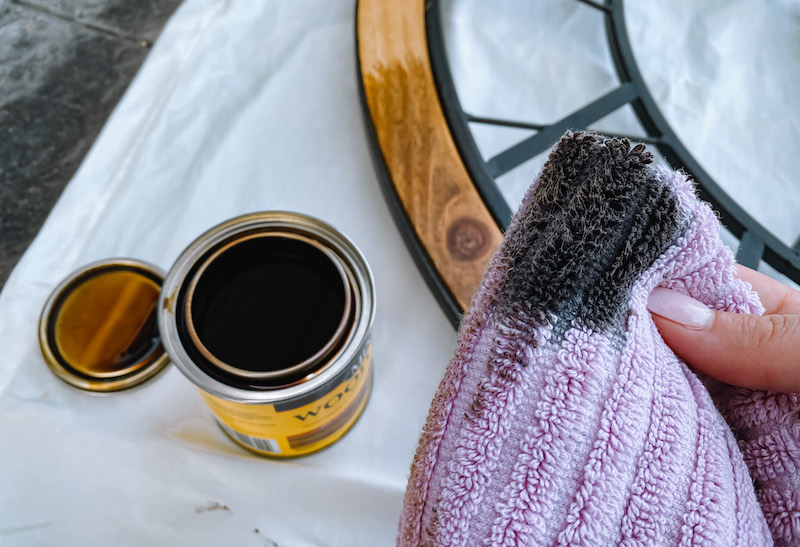
Once you’re ready to start, dip your rag just slightly into the stain and gently apply with the grain of the wood. Apply a thin coat of stain to your entire piece before going back over previously stained areas. This’ll help you keep track of where you’ve already applied stain so you don’t darken some spots more than others.
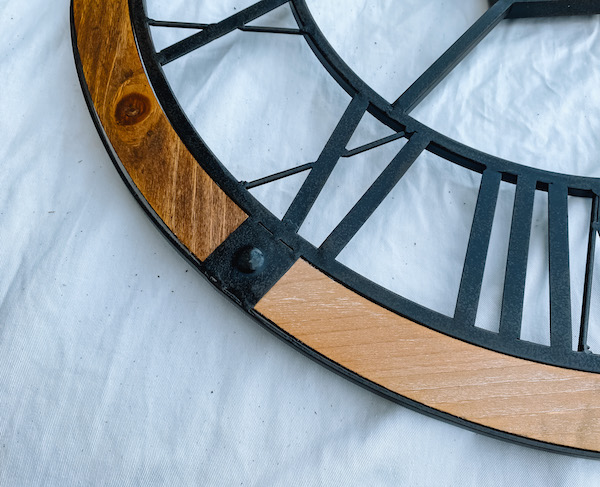
Allow stain to dry 5-10 minutes between coats, wiping off the previous coat prior to applying a new coat. Personally, I applied two coats of the Minwax Early American to my clock to achieve this rich look.
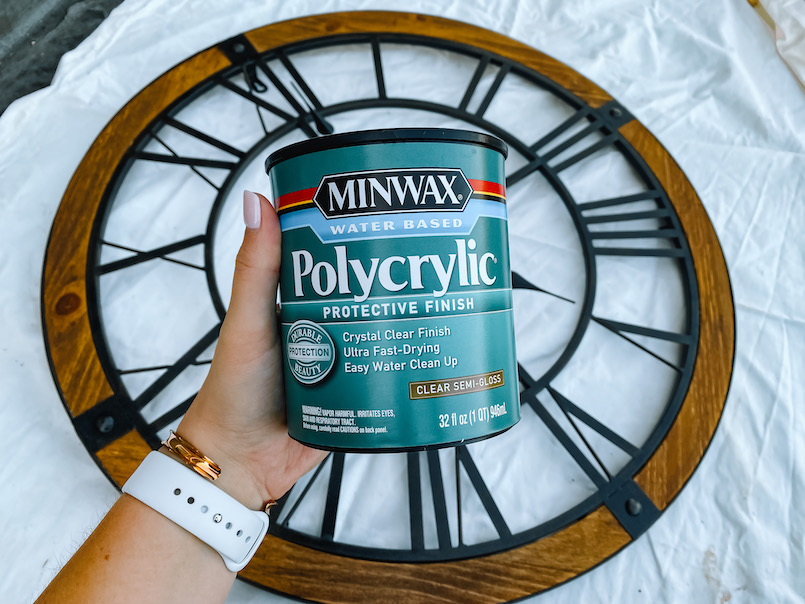
Once you’ve finished applying and wiping away all coats of stain, allow it to dry for at least an hour before applying a clear sealant. I use the Minwax Polycrylic Protective Finish in Clear Semi-Gloss. Then, I let the clock dry in place for about 3 hours before bringing inside to hang the final product.
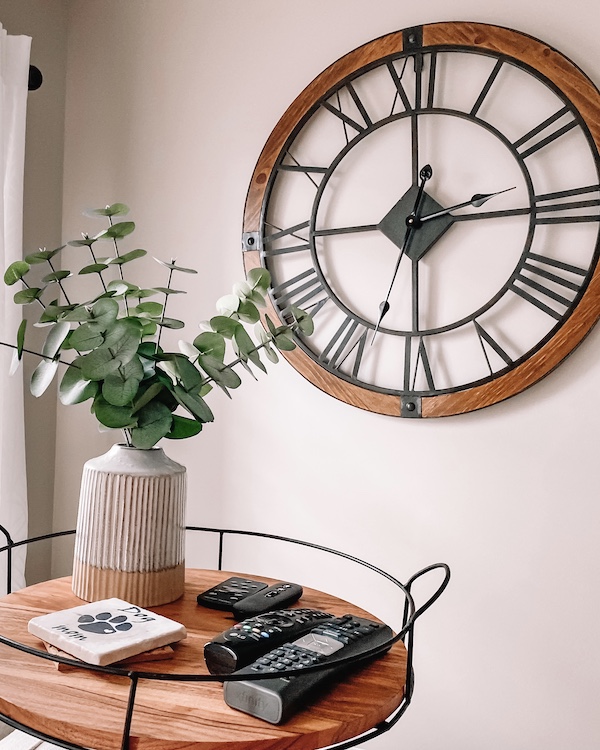
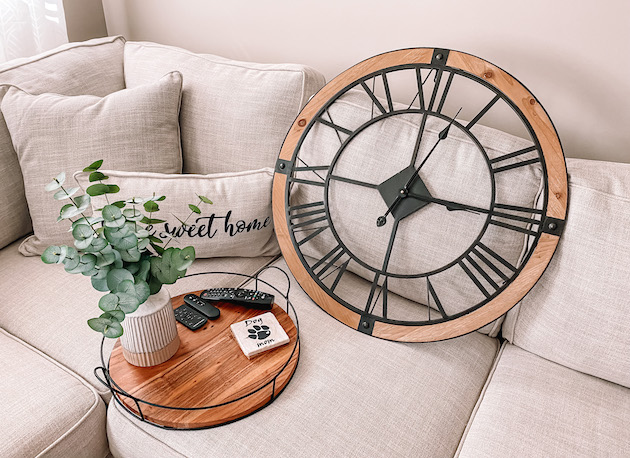
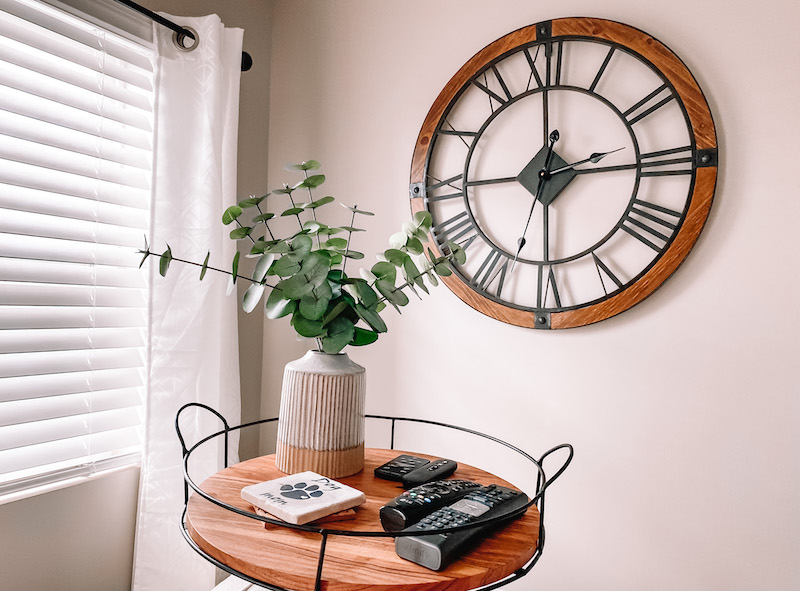
Before and After Wood Stained Clock
Ta-da!
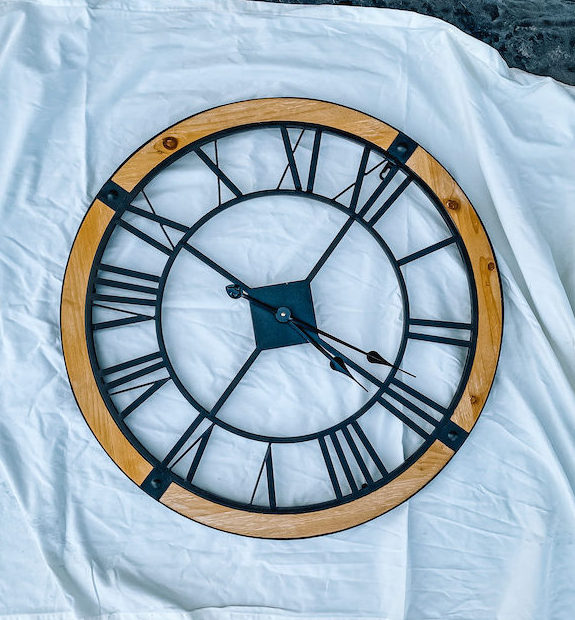
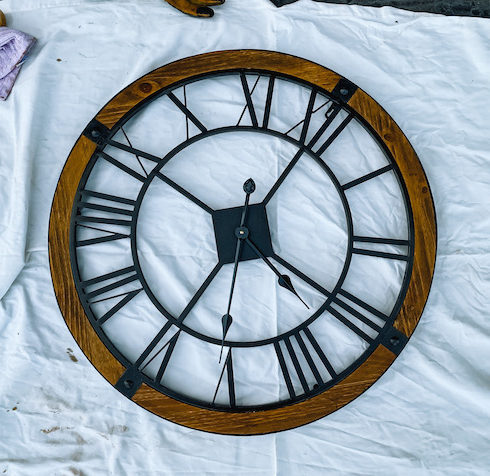
The new shade matches my loft space MUCH better! I don’t like having too many shades of wood in one space, so it was important to me that the clock was a bit darker.
The whole project took a total of 4 hours to complete between a trip to the store for stain, 30 minutes or so for staining, wiping and sealing and the rest of that approximately 3 hours was simply drying time.
Which shade of clock do you prefer, the before or after? And which do you prefer for my space? You now have everything you need to stain a wood clock or other piece of wood home decor. So, what’s your next project? Share in the comments and let me know with any questions!
More DIY and Home Improvement
- Loft Before Decor and Inspiration
- One Step Wine Cork Coasters
- Cleaning and Reusing Three Wick Candle Jars
- DIY Duvet Cover Tutorial
This post contains referral/affiliate links. A small commission may be earned if products are purchased through my links. Thank you for supporting the brands that support this blog.


This post contains referral/affiliate links. A small commission may be earned if products are purchased through my links. Thank you for supporting the brands that support this blog.


