
This board and batten accent wall is one of my all-time favorite DIY projects, so I’m pumped to bring it to the blog!
Neither Kevin nor I have worked on a board and batten accent wall before, so this was a brand new challenge for us. Between Kevin watching videos on fastening the boards and me working through the math, we made a great team. Let me take you through the project, step by step, so you can feel equipped to create your own!
Measuring for a Board and Batten Accent Wall
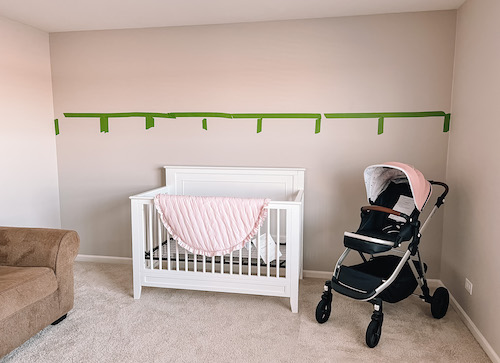
Before you buy a single supply, know what you want your wall to look like. I previously shared what I’d hoped for our finished wall in my pink and white nursery post. With a basic pattern in mind, we begun measuring how far apart we’d like our battens.
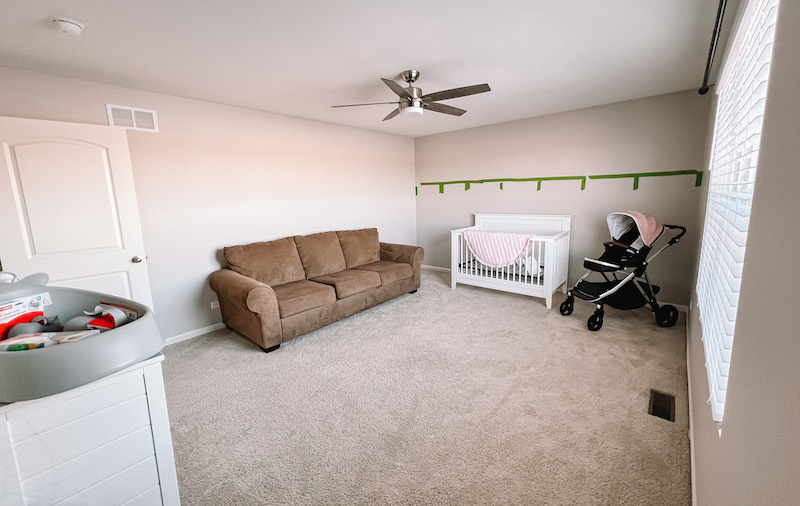
Less and larger spaces between the vertical boards was the look we wanted. Ultimately we ended up with eight boards, including the two end pieces, for seven total slots. This centered the crib on one opening perfectly for a look we loved.
To measure, know the EXACT width of your boards. We used 1×4 pre-finished boards to make up the boards and the battens (fun fact: the vertical boards are known as the battens, the boards are the horizontal boards, which is how this style gets its name “board and batten”).
However, 1×4 panels aren’t exactly 1″ x 4″, they’re technically 0.71″ x 3.5″, which can be confusing and lead to a final product you weren’t quite picturing. The 1″ measurement being slightly less will not impact your project in this case, but the 3.5″ width will give off a slimmer board and batten appearance, so take that into account. Originally I was planning to use 1×3 boards but knowing those were smaller too, I sized up to 1×4 boards for a thicker vertical batten look.
Board and Batten Wall Formula
This formula I created was incredibly helpful to have figured out ahead of time and made the day-of project go much smoother.
- Total width of wall (150″ for our wall)
- Total width of battens (board width x number of boards i.e. for me it was 8 boards by 3.5″ each)
- Number of spaces between battens
Take the total width of wall and subtract the total width of battens (i.e. 150″ – 28″ = 122″) and divide by the number of spaces between battens (we have 7 spaces, so 122″ / 7 = 17.4285″ wide per space).
Given that’s a very specific, non-even number, we rounded to 17.5″ and accepted that one spot will take on a few fractions of excess space (you don’t even notice it at fraction of an inch).
Board and Batten Wall Supplies
After all the math, it’s time to get shopping! We got all of our supplies we didn’t already own in one quick trip to the hardware store. I’m tagging my supplies below or offering similar options if you’re looking to streamline your own shopping.
- 16 pre-finished boards, 1×4 size (12 needed, 4 bought as spares in case of bad cuts)
- 3 pre-finished boards, 1×3 size (2 needed, 1 bought as a spare)
- 2-11′ long quarter round pieces for under the top shelf (12.5′ needed)
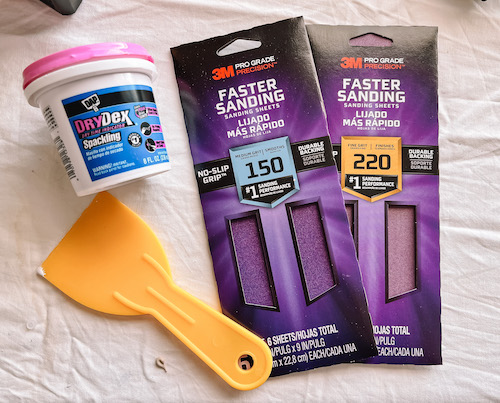
- Spackling
- Putty knife
- Caulk gun (this caulk set is a better value for both the gun and the tubes!)
- Paintable caulk
- Sand paper (we bought two but only used one)
- Painter’s tape (I only use Frog Tape, at least 1.41″ wide, it’s the best for preventing runs)
- 2″ paint brush (you’ll want two if you have more than one paint color)
- Standard 9″ paint roller and roller naps
- Paint tray and two paint tray liners (or one for each color paint)
- Eight-foot ladder (or step ladder if it reaches what you need, but ladders have a hook for holding paint trays which is very convenient when painting up high)
- Paint, one gallon per color is likely more than enough for one wall but consult your in-store paint experts if you’re unsure
And always save your receipt! We took back about $50 worth of unused materials which brought our total project cost down.
Power Tools Needed for this Project
Thankfully, we already owned both, but below are the two biggest tools you’ll need for this project if you don’t already own them.
Cutting the Pre-Finished Wood
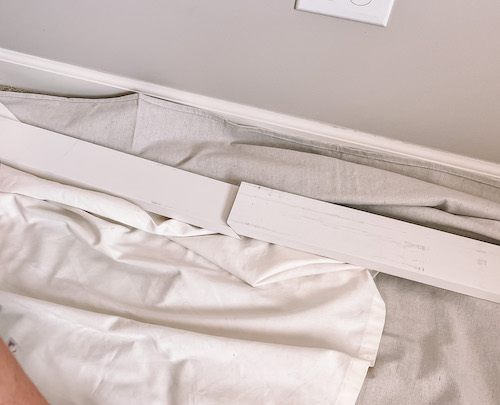
Kevin read up on how we wanted the horizontal boards to lay together and found a few methods. We could simply lay them next to one another on the wall and caulk the gap, which is the easiest way. The only downside there is you’re much more likely to see that gap, even after caulking. Or, you could cut the two boards in a bevel cut. This method cuts the boards at a 45 degree angle so they locked in together more snuggly, leaving much less gap/caulk work for a cleaner finish.
What is a Bevel Cut?
We ultimately went with the bevel cut knowing it’d provide us a cleaner finish in the end. If it’s a space you’re going to be looking at for years to come, take the time up front and do the project how you think you will be happiest. You won’t regret it!
Sadly, I did not get any pictures of Kevin on the saw, but really all he did was YouTube videos on how to create a bevel cut. I highly recommend doing the same since we are not necessarily experts on that detail yet.
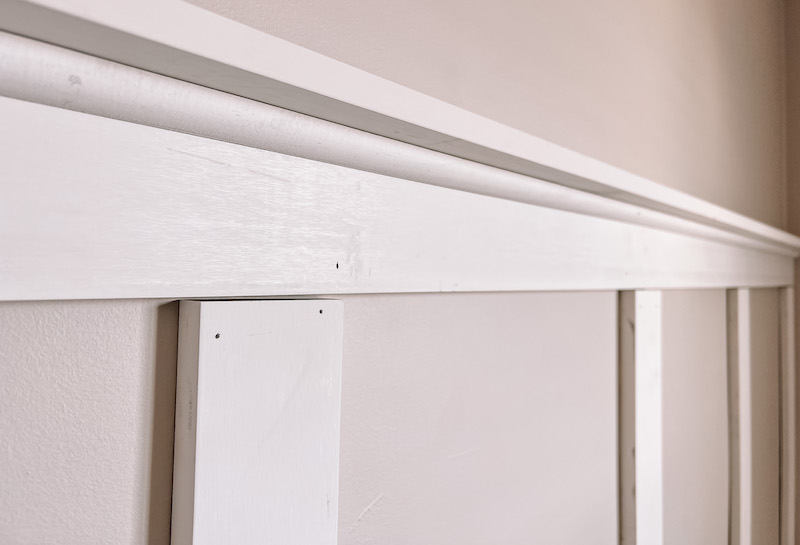
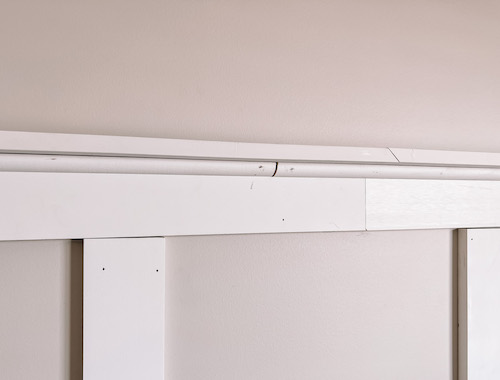
Now you can see those same boards attached on the wall even before any spackling or caulking. They lay really flat and interlock well, right? It takes a little more work up front but the end result is VERY MUCH worth it. Bevel cuts are great if you need to piece together more than one board, either vertically or horizontally.
Cutting the Vertical Battens
Once your horizontal boards are in place, measure where each batten is going specifically. You’ll want to cut each vertical batten with the unique measurement you get from the specific spot it is going because there’s always a chance it is fractions of an inch different in each spot. NEVER cut all of your boards on one measurement.
Regardless of your pristine measurements, there’s always a chance there will be a small gap in a few or even all spots. Do not worry! This is normal. That is exactly where your spackle will come in handy later.
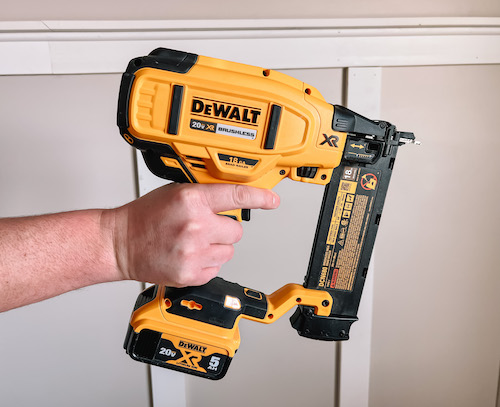
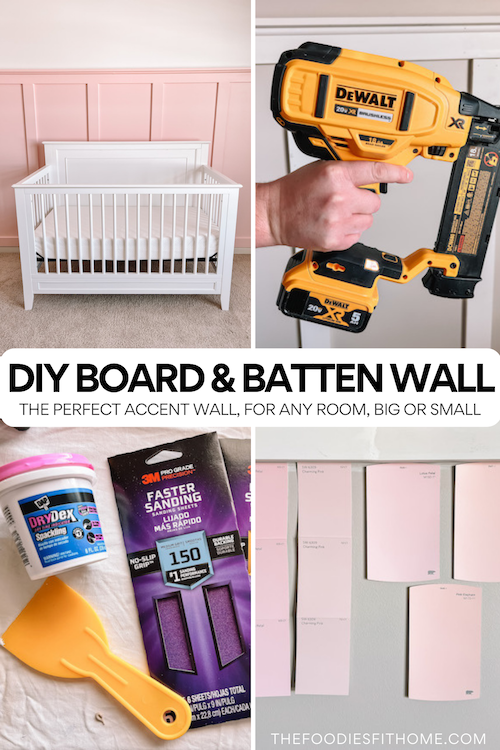
Attaching the Board and Batten to the Wall
We used the DeWalt 20V MAX Cordless Brad Nailer Kit for attaching the boards and battens. This is the same nail gun we used to attach our trim when we finished the basement. It’s a gentler tool that uses a smaller nail for use on thinner, more fragile pieces of wood, just like these.
In total, Kevin used about 8 nails per board, two on the top, two on the bottom and two sets of two more nails evenly in the middle of the board. We recommend using two nails in each spot to cover both ends of the board for the most secure fastening.
The above picture is a good example of nail spacing. While it already has the spackle on it, you still get the basic idea for placement.
Spackling and Caulking the Board and Batten Accent Wall
Once all your boards are on you can begin caulking and spackling right away. We were tired from cutting and fastening the boards though, so we elected to do this on day two of our 3-day weekend.

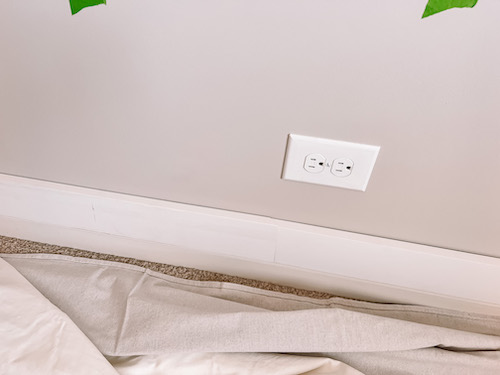
Where to Caulk vs. Where to Spackle
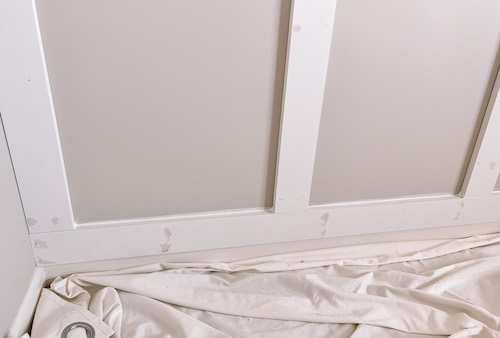
This is actually really simple. Caulking is for anywhere the boards are touching the walls and spackling is to cover nail holes and large gaps. Examples below:
The gap between the quarter round, the boards and the nail holes all get spackled. Wherever you see a board touching a wall you run a line of caulk, which creates a seamless, paintable bridge between the two materials.

While I took care of all the spackling, Kevin took the lead on caulking the gaps with this paintable, quick dry caulk.

He became a total pro by the end, running his finger along where he ran the caulk to ensure a smooth, thin finish. Kevin’s biggest suggestion to anyone caulking a board and batten accent wall is to have a bunch of paper towels around for wiping your finger after each caulk line. Don’t actually wipe the line with the paper towels though, it won’t be as precise and can leave debris behind on your wall.
Sanding the Spackled Areas
Once your spackle is dry you’ll need to sand them down to blend into the two pieces they’re gapping together. Note: you won’t be sanding the caulk, it’s a different material and can flake if sanded. Be sure you’re running that smoothly as you apply as that will be your final product!
We used this sand paper for the whole wall and it worked perfectly. I recommend cutting the pieces in half or thirds as you won’t need it all at once, and use pieces until all of the grit is gone. You’ll know a spot is spackled down properly if you can close your eyes, run your fingers over the area, and not know where you actually spackled. It’s the best test considering the area will still look spackled until painted over, and you don’t want that to cloud your judgement.
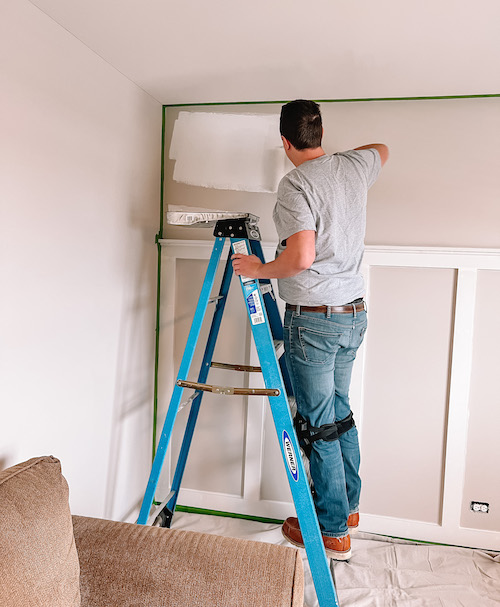
Painting the Board and Batten Accent Wall
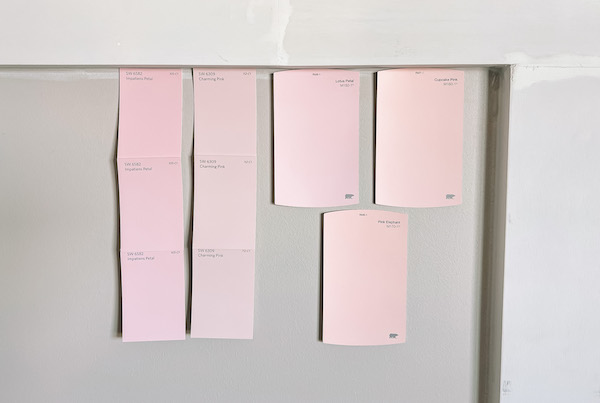
Once your wall is fully spackled, caulked and dried, it’s time to talk paint! Step one is picking your colors. We used Sherwin Williams Extra White on the top and Behr Cupcake Pink on the board and batten part.
The night after we caulked and spackled we took a few minutes to get all of our painter’s tape up. In my opinion, taping is the worst part of the whole paint project. It takes so long and is quite tedious. If you can split this up separate from actually painting, I highly recommend it.
The next day, we were able to get two coats of each paint color on the project thanks to pre-taping. That just left us with another two coats the next day to complete the project. Normally, a paint project usually requires two, maybe three coats of paint, however we were using colors much lighter than the one underneath and even after three coats we wanted to go over it one more time for an optimal look.
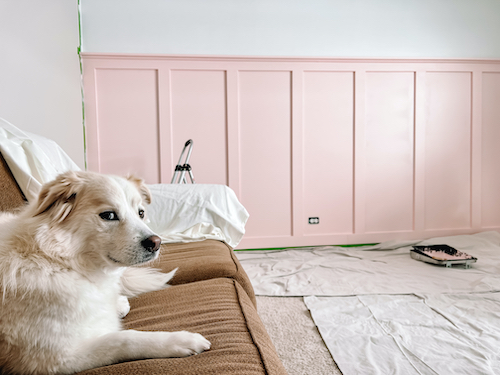
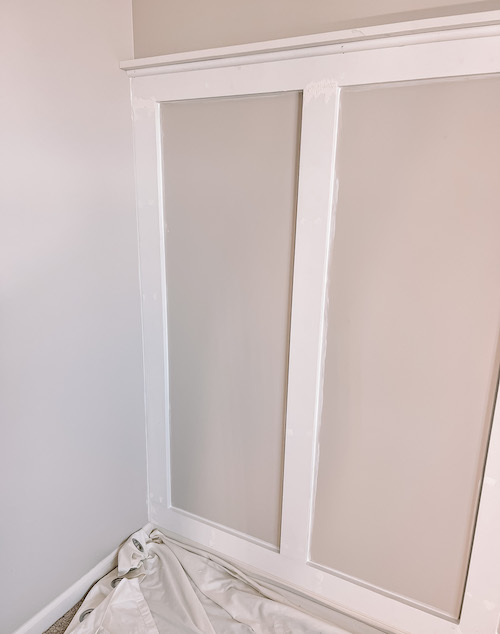
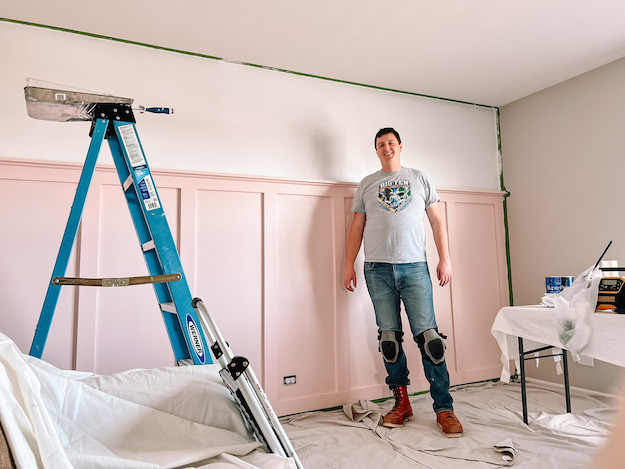
The Finished Board and Batten Accent Wall
The accent wall came out so much more beautiful than I could even have imagined! Here’s Kevin enjoying the fact that we’ve added our last coat of paint and are finally DONE.
Exclusive sneak peek: we choose white on top because we purchased a watercolor floral wall decal from Etsy for the space. Once we’ve allowed the paint to sit for a few weeks we’ll be getting this on the wall. Be sure to follow me on Instagram for that big reveal!
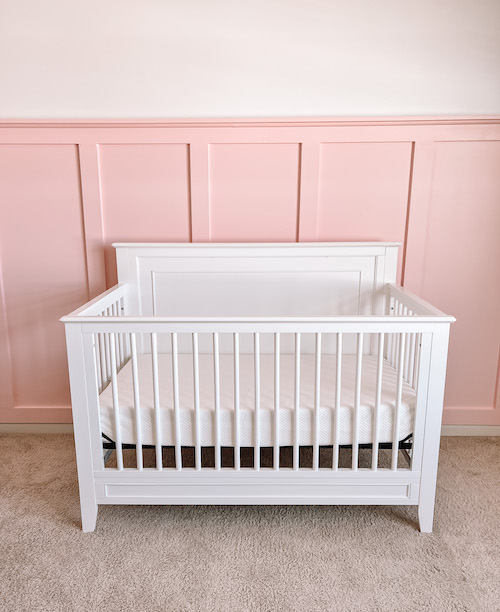
The pink for the board and batten accent wall part was a no brainer. I wanted her white crib to stand out nice and brightly. Plus, her mattress will actually be a very similar shade of pink to match the wall. We’re both pretty obsessed with how the whole nursery is coming together!
Total Project Cost
All in, our project cost us around $300 between lumber, paint and supplies. Thankfully, we already owned the brad nailer gun and miter saw which are the most expensive supplies you’ll need for this project. If you don’t own either, see if you have any family or friends who can lend you theirs (or even help you with the project) but if not, Home Depot and many hardware stores have a tool rental service you can leverage if you’re not looking to purchase them.
Did you enjoy this DIY? Board and batten accent walls are a hot trend right now and I think they’ll stand the test of time. If you’re looking for a fun way to spruce up a space, give this project a try!
More Home Improvement and DIY
- How to Stain a Wood Clock
- DIY Barn Door and Wreath Decor Tutorial
- Our Loft Living Room Remodel
- Taking Our Kitchen from Builder Grade to Cozy Farmhouse
This post contains referral/affiliate links. A small commission may be earned if products are purchased through my links. Thank you for supporting the brands that support this blog.

This post contains referral/affiliate links. A small commission may be earned if products are purchased through my links. Thank you for supporting the brands that support this blog.

