
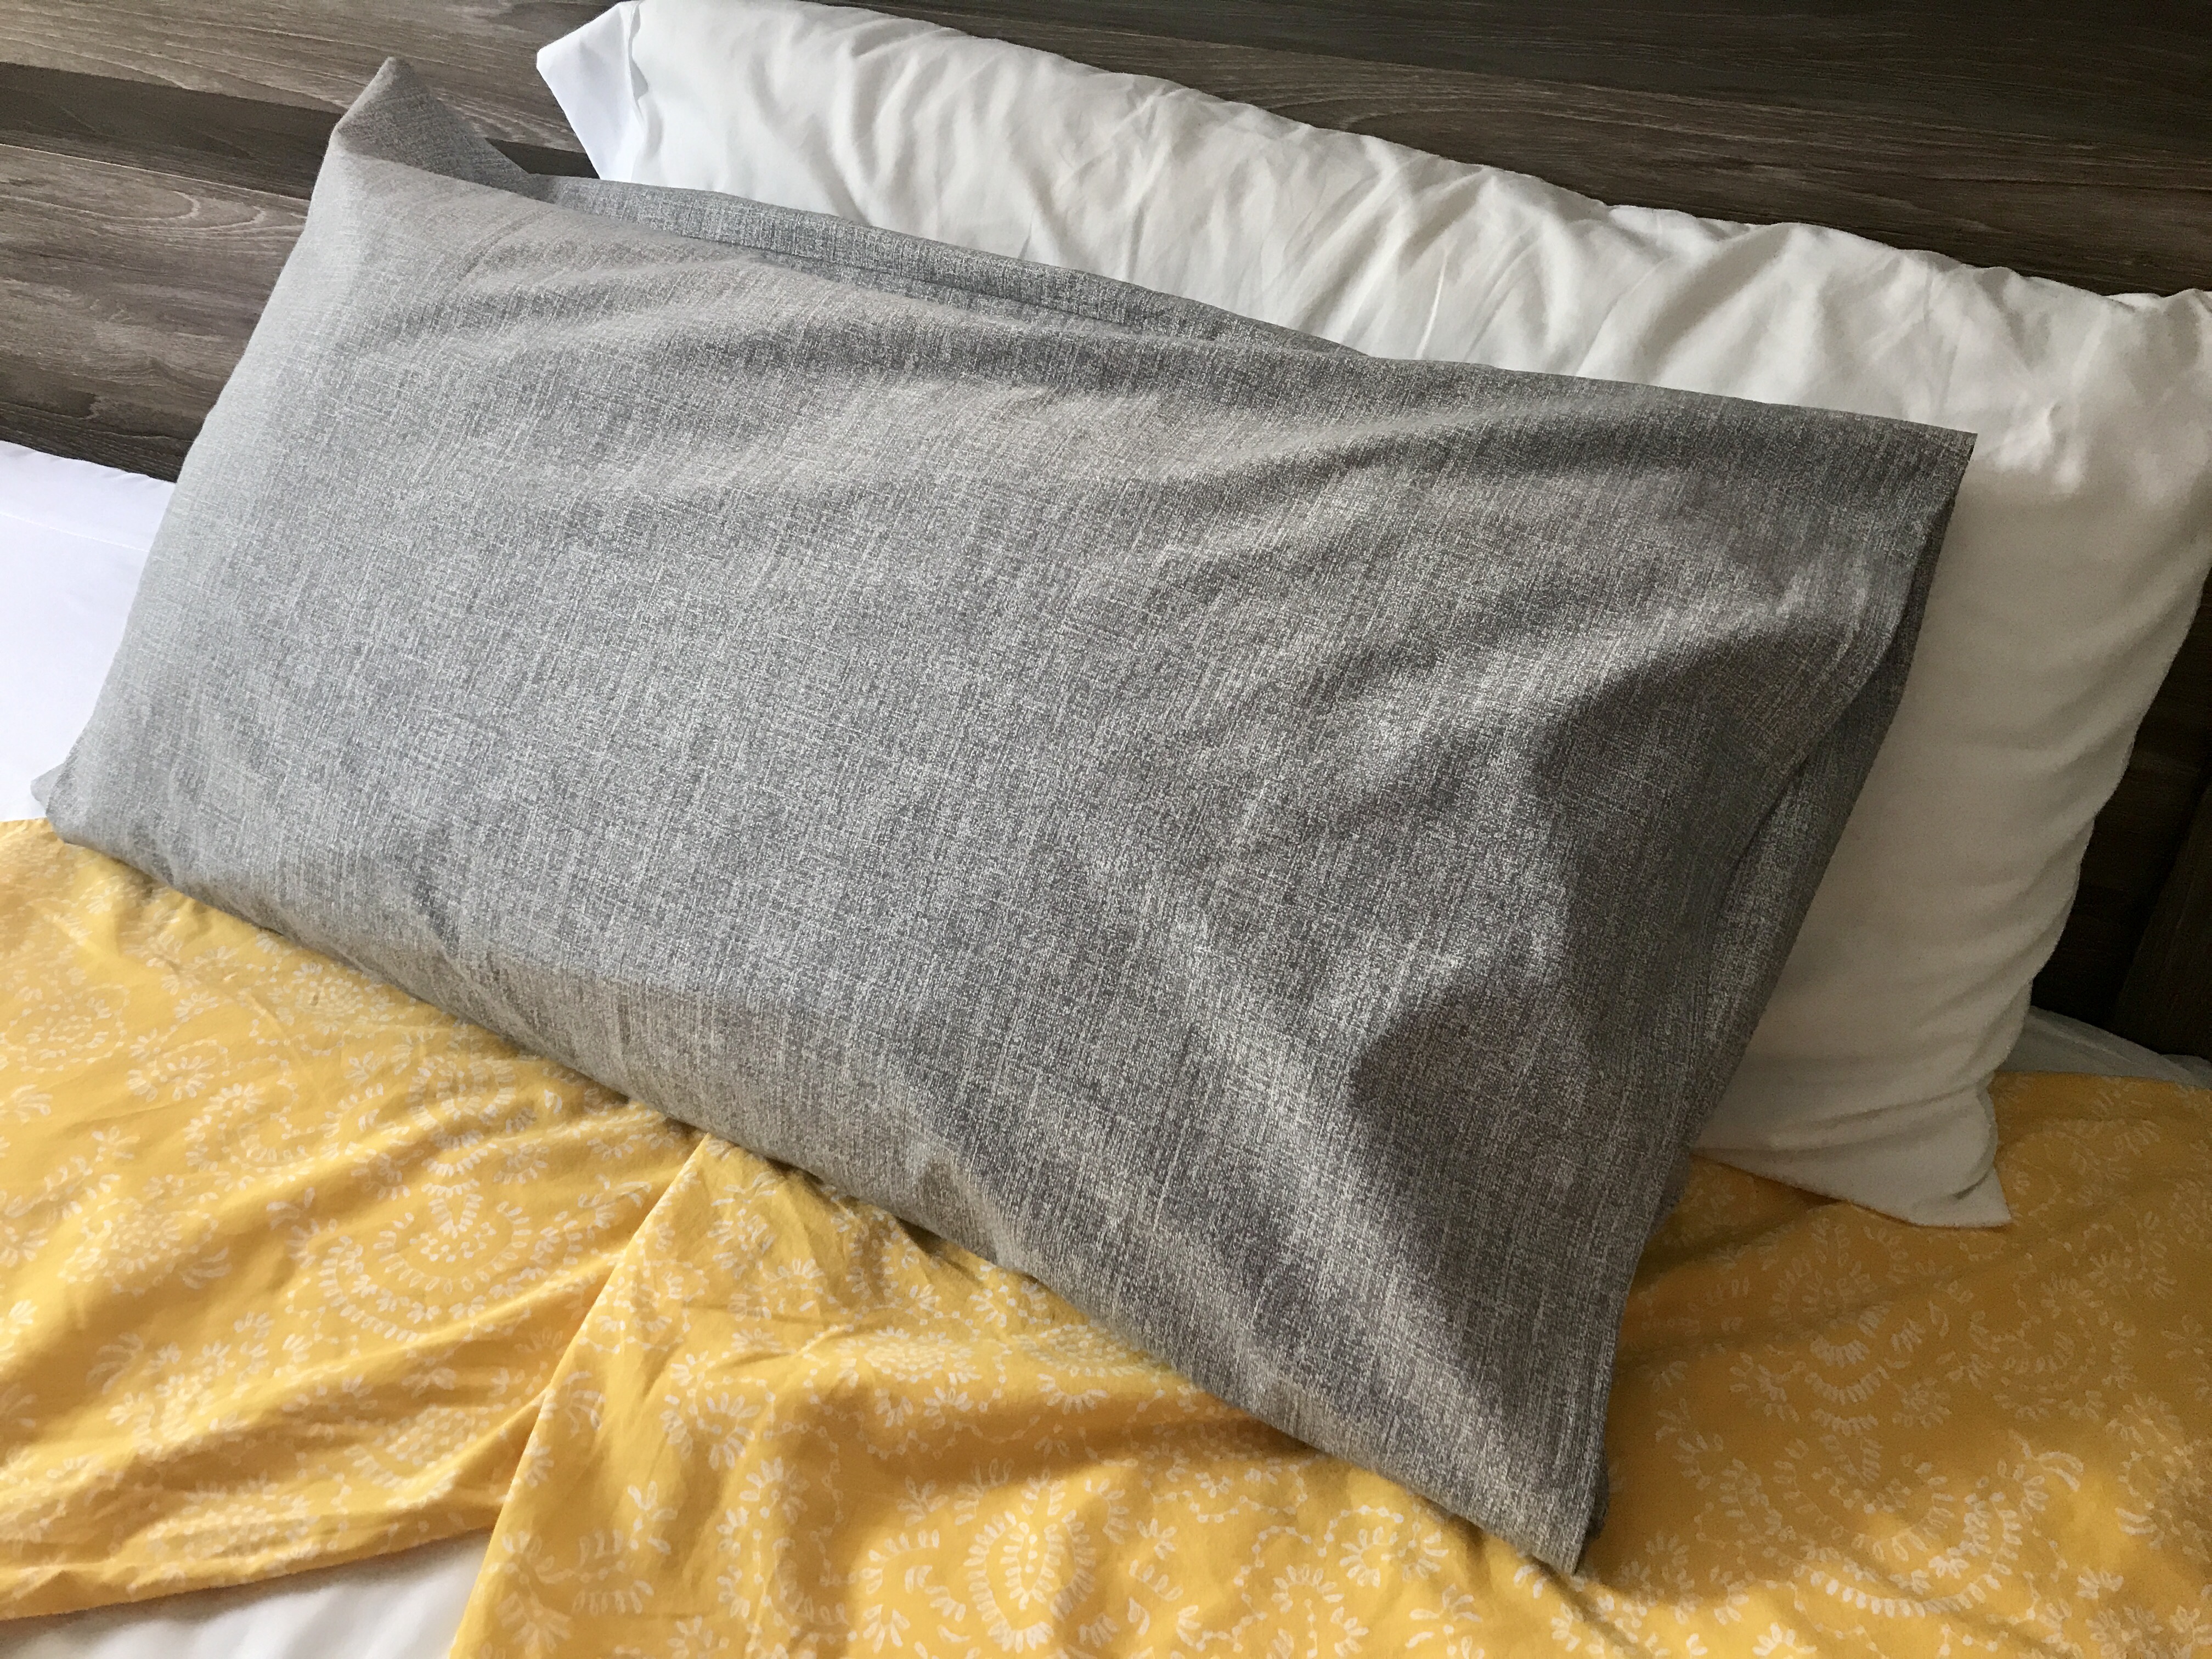
Whether you need new shams because you’re getting a new set or you’re just wanting to switch up your bed top decor, look no further. My simple sew pillow sham tutorial will allow you to create a sham out of any fabric you’d like to achieve a perfectly custom look.
This Ikea replica is a very simple sewing project and can completely change your room. It’s simply two pieces of fabric sewn together in straight lines, with a little bit tucked in to hold your pillow inside. Not so scary, right?

I eyeballed this pattern and its measurements based off of an Ikea sham that came with my last bed set. We liked the style of the set, but Ikea only made a few patterns, so I made my own duvet and now the matching shams. We’ve actually been using the previous flowery yellow ones above until now, yikes!
Simple Sew Pillow Sham Supplies
- Fabric
- The type of fabric is totally up to you. However, I always preach the power of a JoAnn Fabrics coupon, so check here or on the app first. The amount you need will vary based on the dimensions of the sham you’re making.
- Amount needed for each sham:
- Twin/Full/Queen: One 22″ x 33″ panel + one 22″ x 41″ panel
- King: One 22″ x 39″ panel + one 22″ x 47″ panel
- Dimensions
- Twin/Full/Queen: 20″ x 30″ long
- King: 20″ x 36″ long
- Thread
- Find the best match to your fabric color, or what might be least conspicuous if it’s a multi-color pattern. A sewing rule of thumb is to go with the darkest color if you have multiple shades. Quantity-wise, one spool is plenty for two shams and then some.
- Sewing Supplies
- Sewing machine
- Iron
- Fabric sheers
- Measuring tape
- Pencil
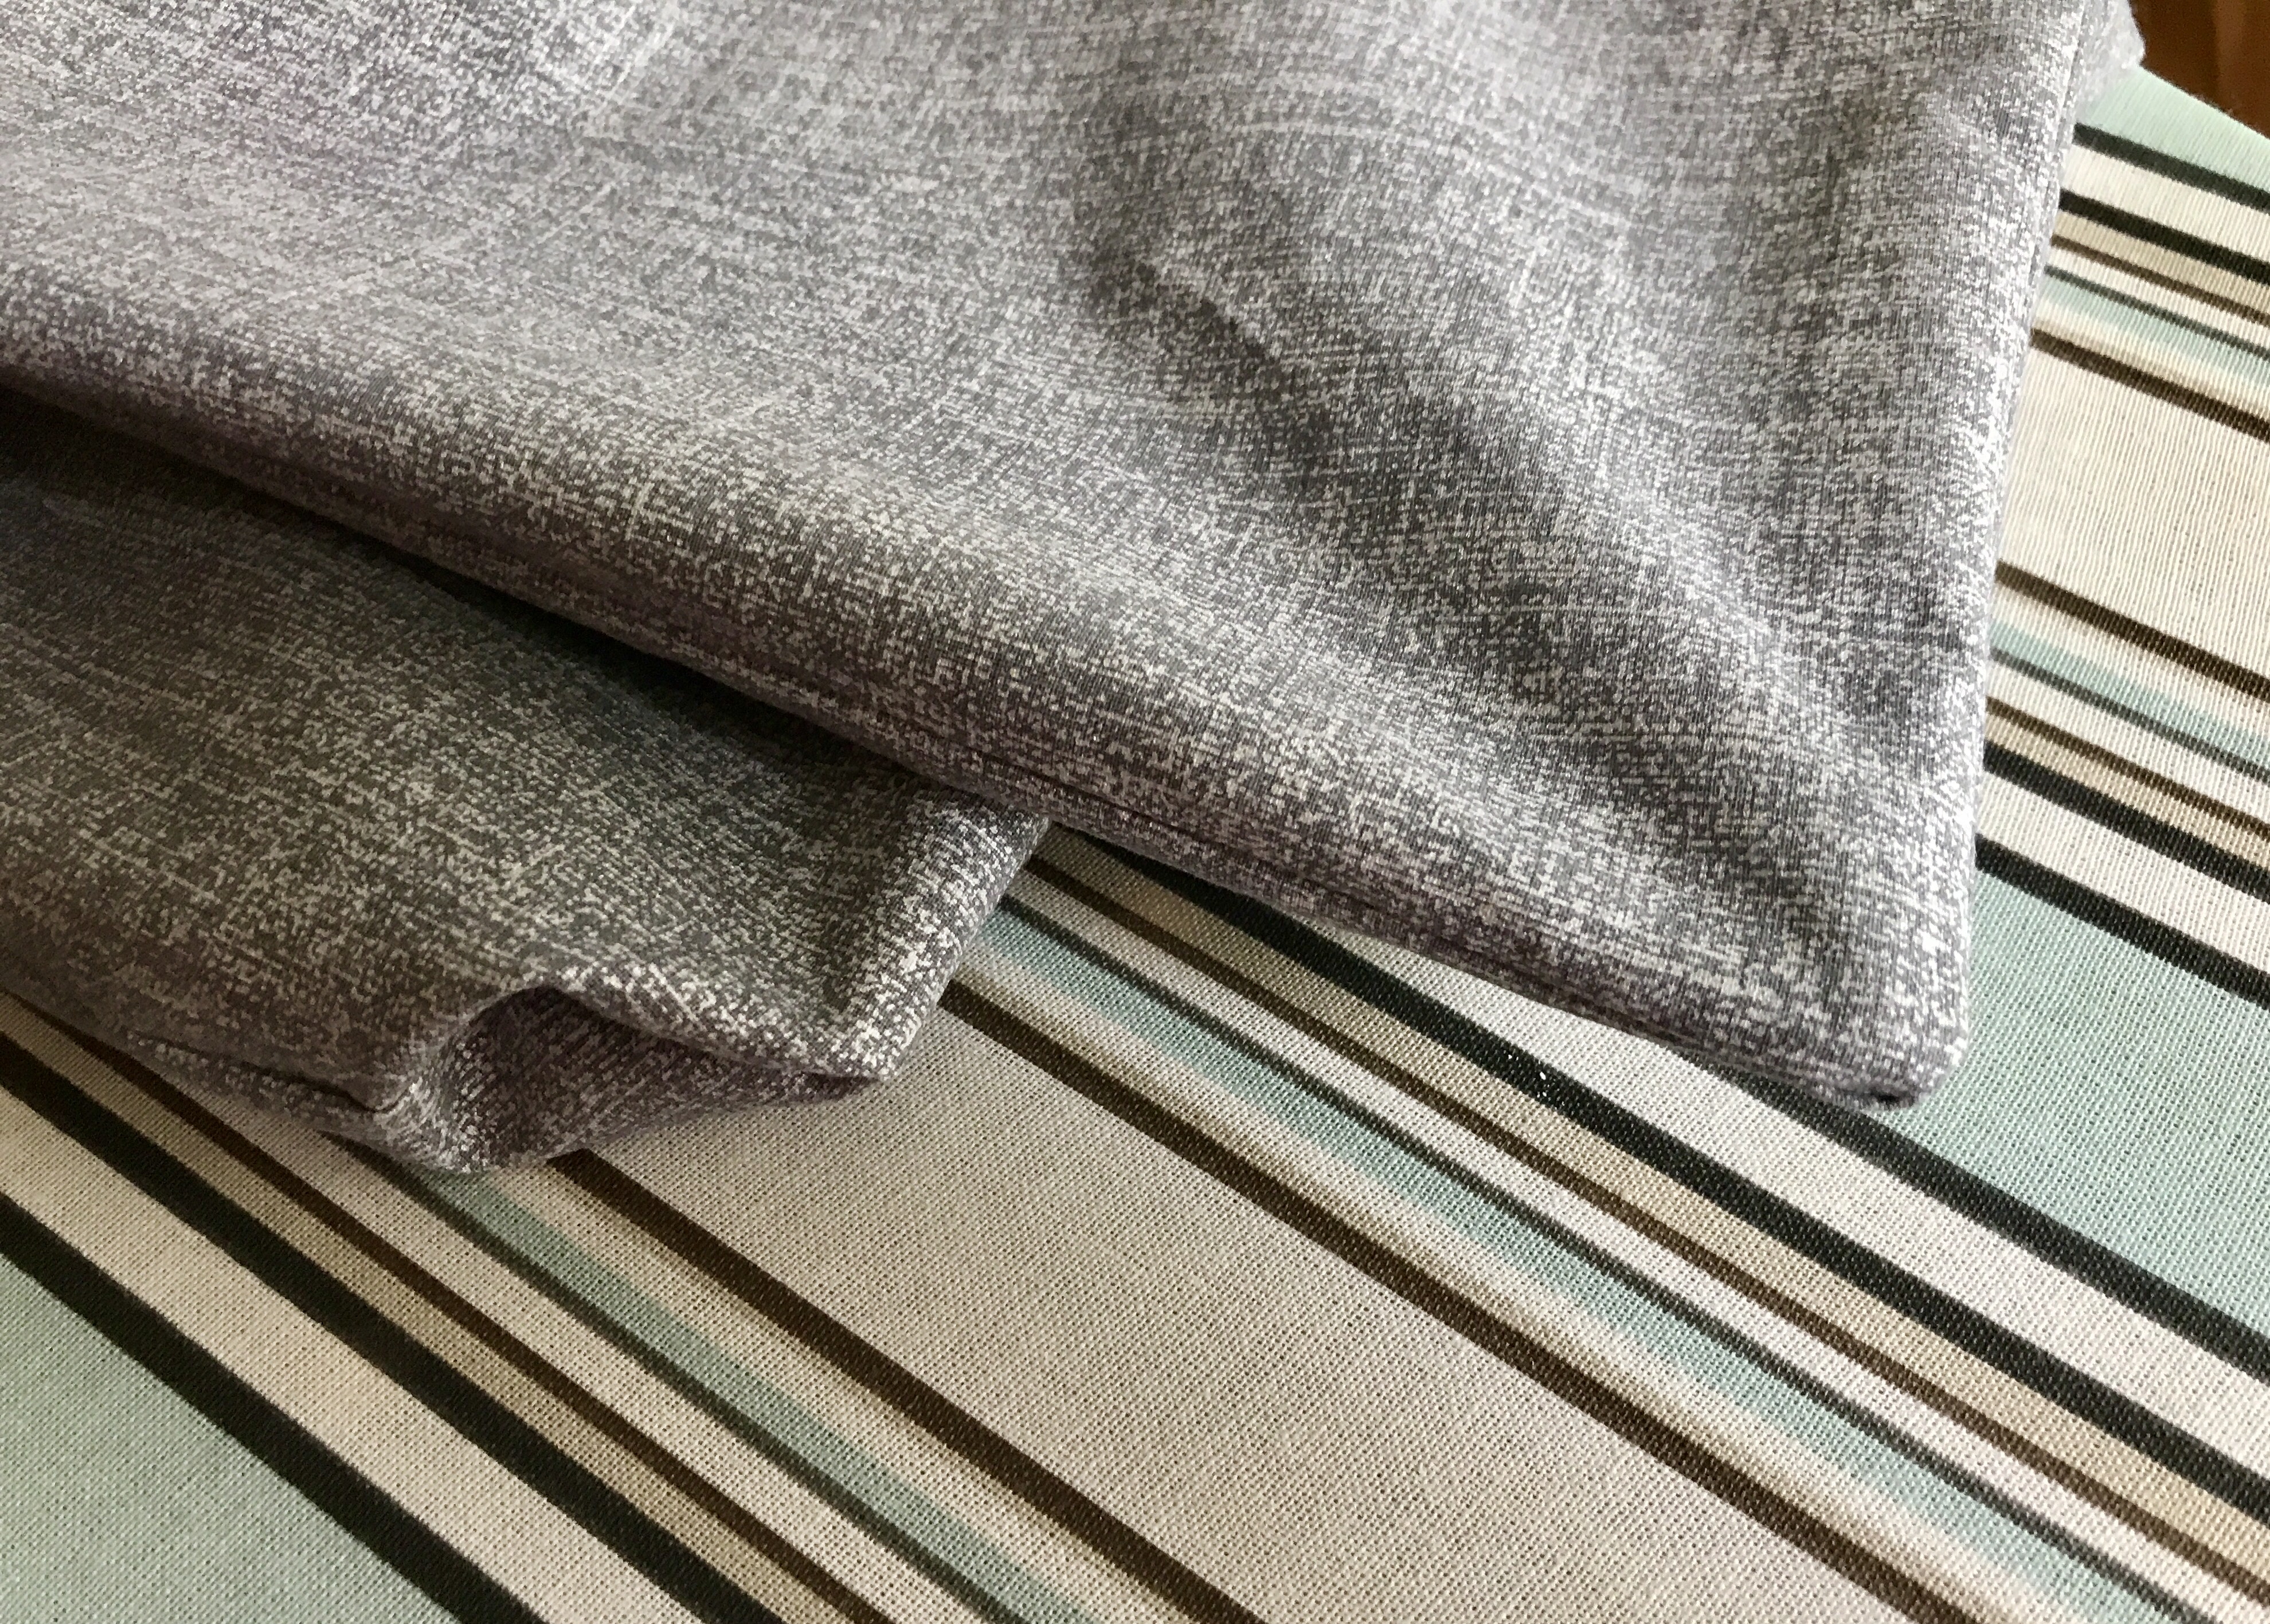
How to Buy Fabric for Your Pillow Sham
First, check the width of your bolt of fabric. Mine below was 44″, which is a very standard size, as seen towards the left hand side under the fabric’s name.
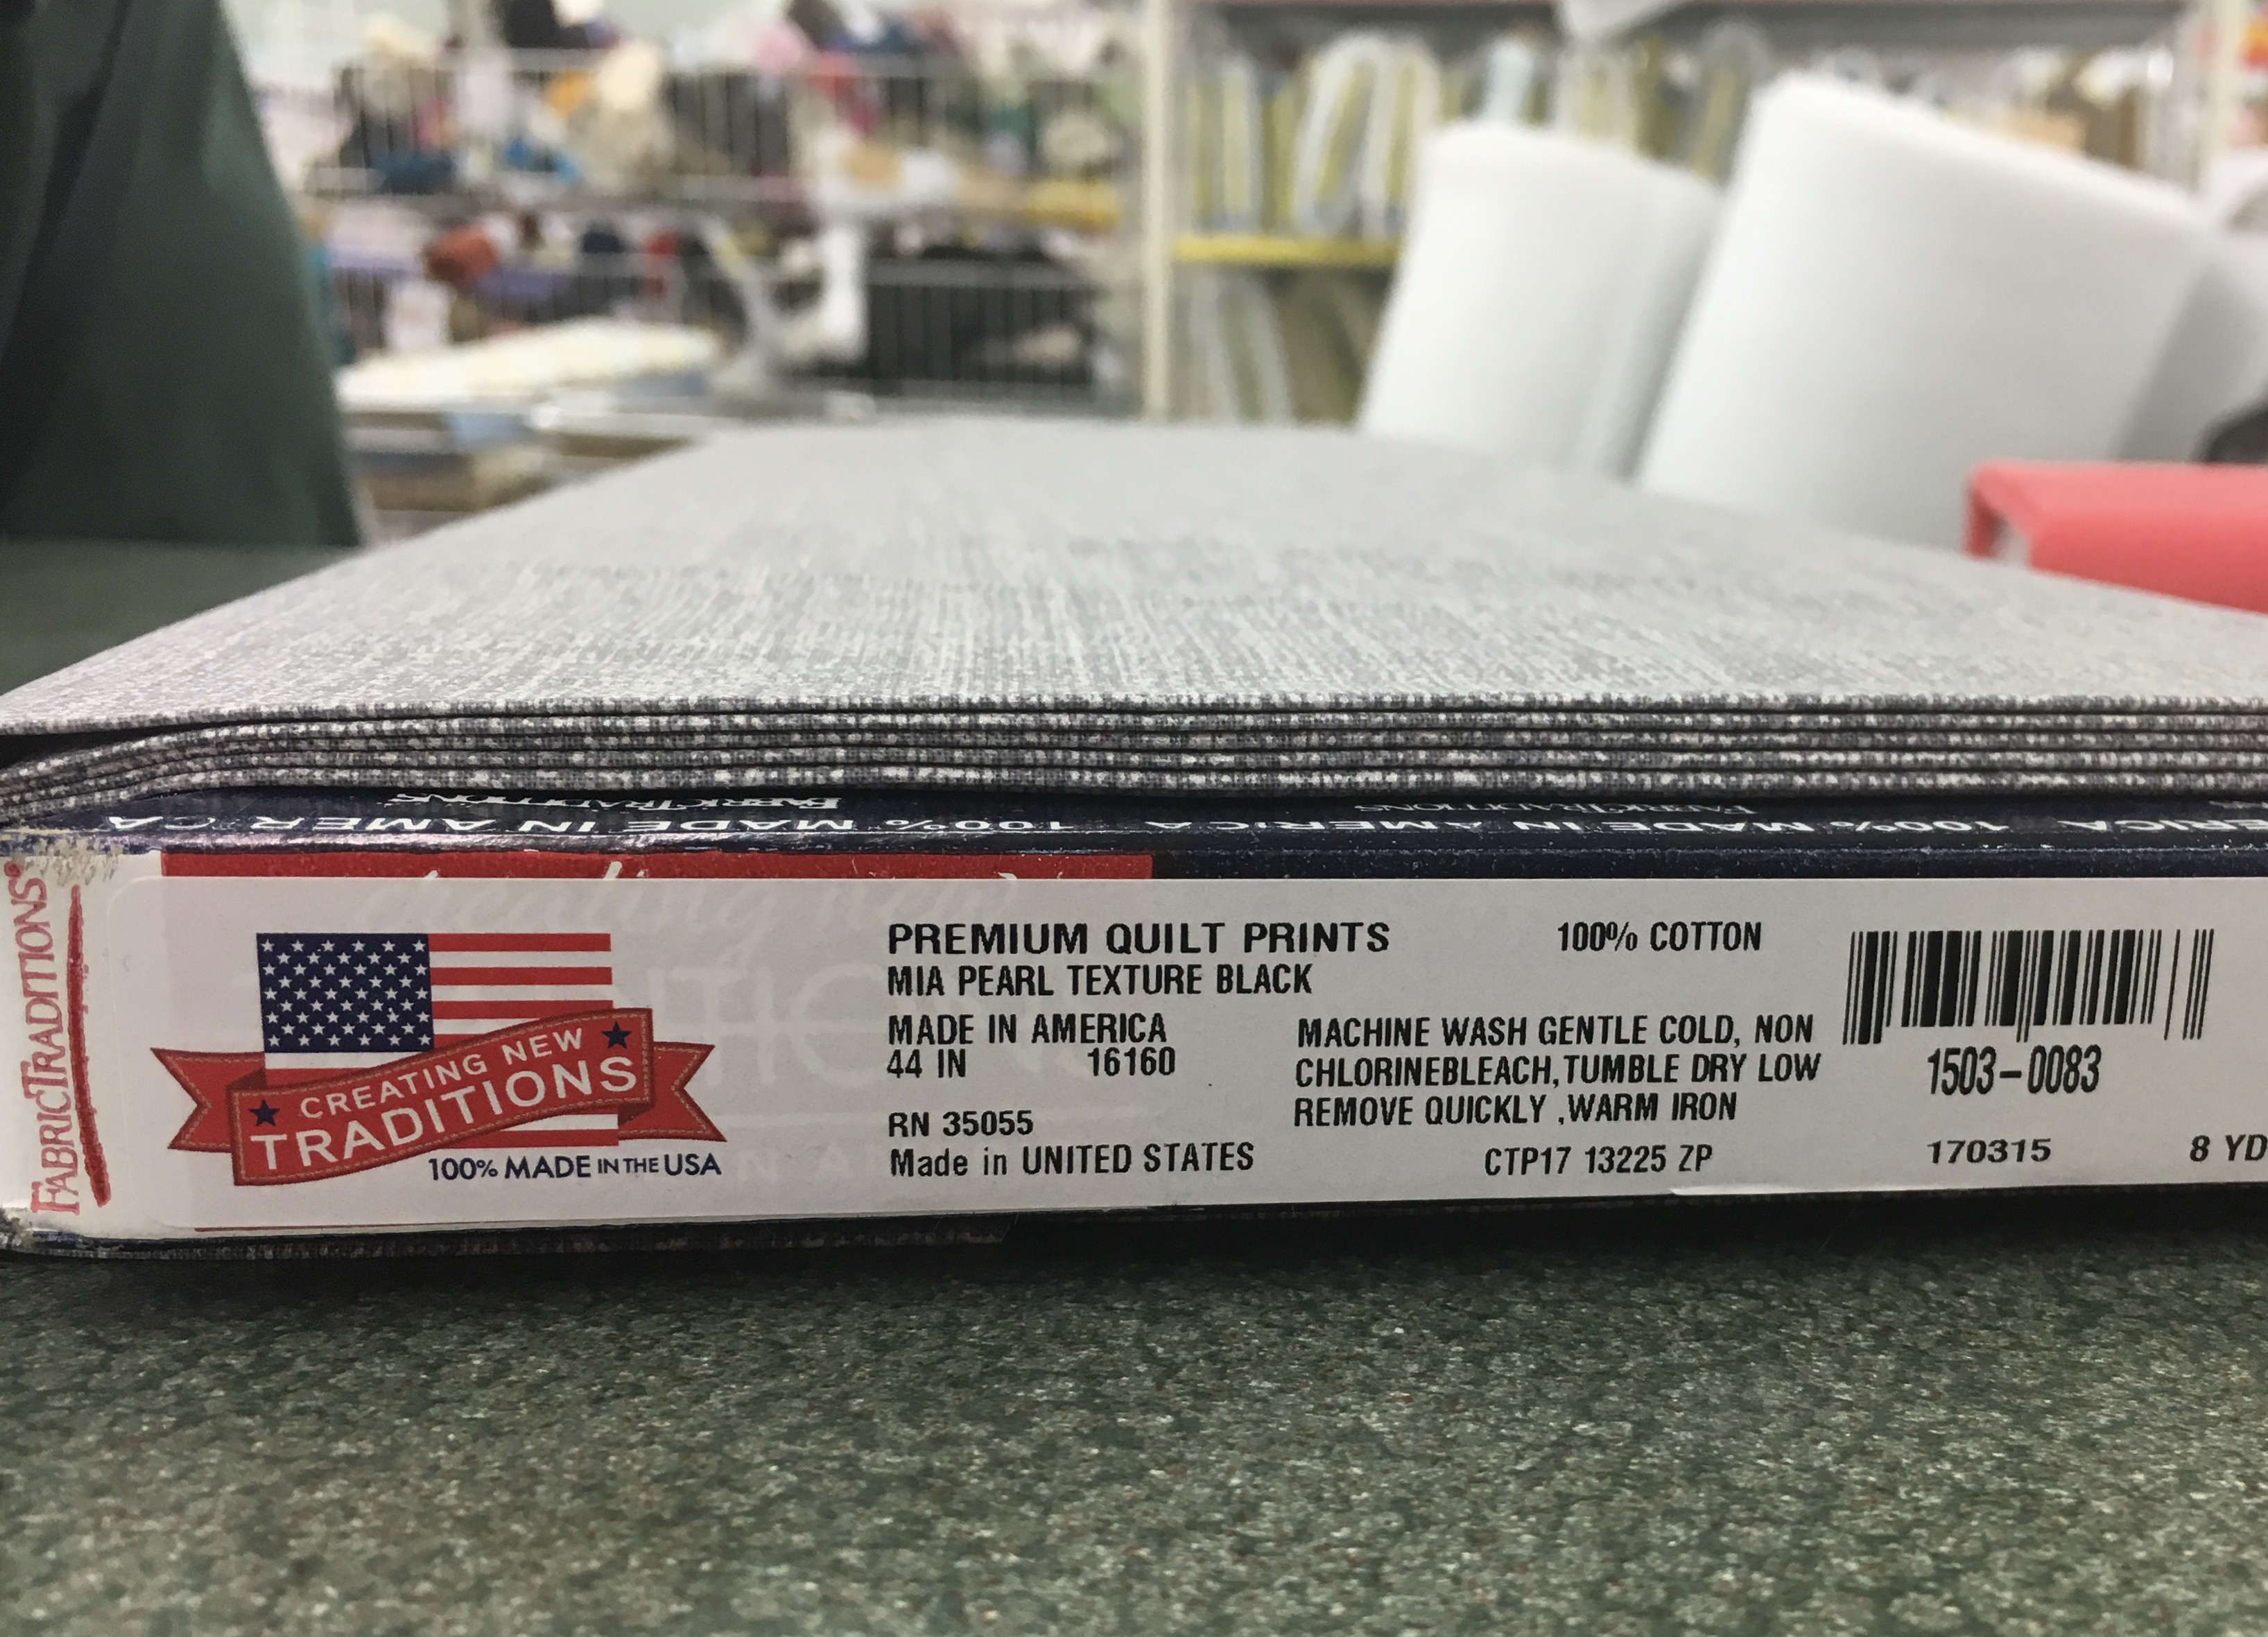
What that means is you can fit both shams on the same width* of fabric. The shams are 22″ wide each and your fabric is 44″ wide, so now pay attention to the fabric length (imagine both pieces of one sham in tandem on this length of fabric). This will save you some good dinero on the final cost.
*always be sure there is no part of the edge of fabric that you would need to cut off first, if it cannot be hid within the seam of the finished product
Example: For two full-sized shams you need 74″ (~6 feet, also known as 3 yards, fabric is priced per yard at the fabric store) of fabric. That said, I’d suggest getting 6.5 feet (78 inches) so you have wiggle room. Always get at least a few extra inches of fabric. This is insurance that will likely only cost you pennies.
How did you determine 74″ of fabric is needed?
The full-sized pattern calls for one 22″ x 33″ panel and one 22″ x 41″ panel, since the widths will fit side by side, you essentially only need to order one length’s worth of fabric, since that will yield you two sham’s worth of fabric.
When Sewing: Measure Twice, Cut Once
Regardless of size of your pillow sham size, the width is going to be 22″ on either pattern. Measure to 22″ on the width of your fabric, repeat, then mark it. Take your fabric sheers and cut a 1/2″ slit straight in to the fabric.
Now, if you haven’t worked with fabric much before this may feel like a leap of faith, but will become your new favorite sewing hack. Take the slit you just made with the sheers and rip the fabric apart from either side down that slit with your bare hands.
There’s no better way to ensure you are splitting the fabric evenly than ripping it versus cutting down the entire 6+ feet of fabric.
Not to mention it’ll take WAY less time, you’ll thank me later! Once you’ve separated the original, purchased fabric at the 22″ width into your two final product shams, mark where you’ll need to cut the two panels into two more pieces (the front and back of your shams). To do that, take one panel and measure 41″ down the length, twice, and mark there. Once you’ve cut another slit at the 41″ mark you’ll also rip this piece of fabric so it’s perfectly straight. I promise, it’s the way to go!
Pro Tip: set this piece aside, clearly marked, as soon as you cut it so you don’t confuse it for the other panels (do this each time you cut a piece, in any project).
From there you will measure another 33″, which should be all but approximately 4″ of the remainder, of the remaining panel you were working on. Mark, cut, rip, label as with the first, larger panel. Repeat with the second, third, etc. sham as necessary to cut all pieces before moving forward.
How to Finish a Pillow Sham Edge
You may recall that these pillow cases have edges that are exposed. We don’t leave fabric edges exposed to fray or look junky, we finish them for a clean look.
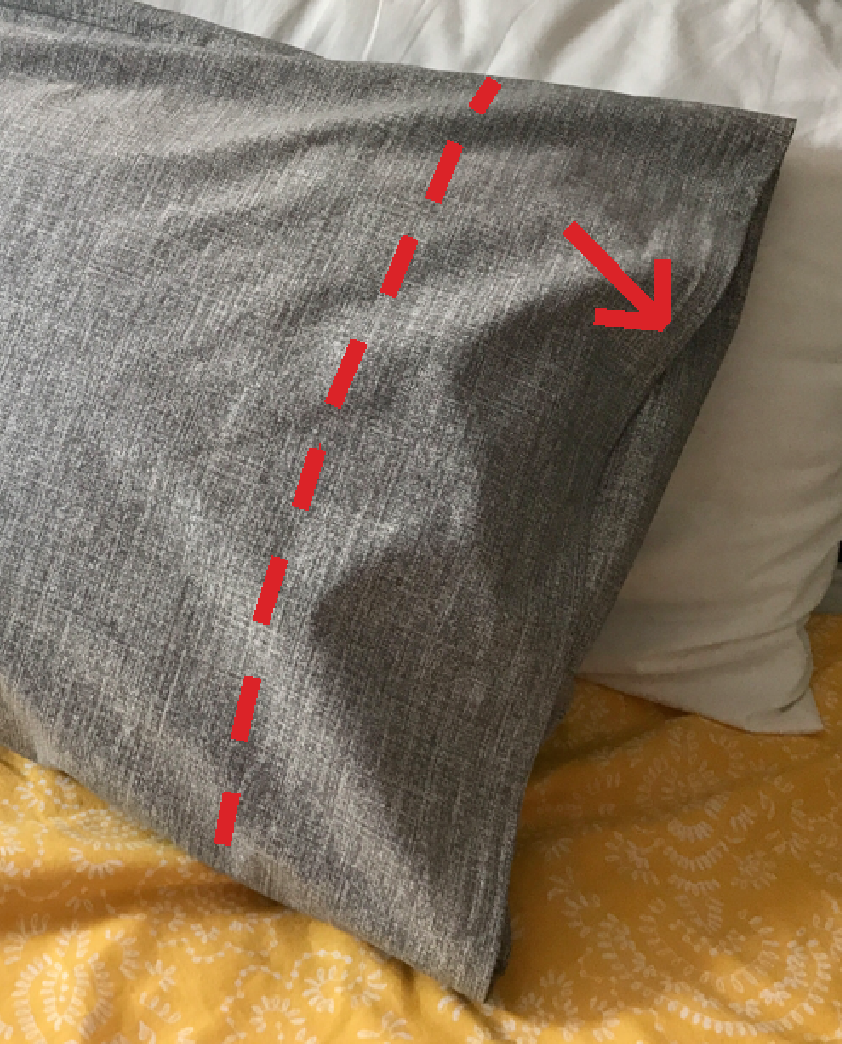
I have one inch built into the pattern for this on each panel, two finished edges total per sham. Where at, you ask? One on the edge of the length and one on the end of the lip that sits tucked in. See below:
Step 1: Set fabric on surface with the ‘good’ side face down. Identify 1/2″ at the length’s end and fold it over, ironing as you go so it stays folded.
Step 2: Let it cool, then repeat step 1 once more, folding over another 1/2″. As you’ll notice, this will leave a clean edge, with no edging/frays visible.
Step 3: Sew a straight line through the folded 1/2″ area, closer to the inside of the panel where it was last folded and will secure the best (closer to the middle is fine too).
Step 4: Repeat Steps 1 through 3 on the other panel on one of the length’s ends so you end up with both your longer and your shorter panels each having one finished edge.
Pinning and Preparing to Sew
First, lay your longer panel finished side face down and fold 8″ of the finished edge side over. This way you’re looking at 8″ of the good side and the rest the inside of your pillow case. Pin that flap down to the other side of that same longer panel so that it sews together to create the built-in flap (as seen in the post’s initial photo).
Next, you’re going to sew this pillow sham inside-out, so lay the two panels down with the good sides touching one another (which will leave the folded over flap facing outward, which is right, you will see the flap folded over as you sew since that will ultimately go inside the sham).
The finished edge sides should be on the same end when you match up the panels. Because you folded the flap over what you will actually have is the shorter panel’s finished edge matching up directly with the crease of the longer panel.
What if the longer panel’s crease doesn’t match up exactly? Dont’ worry! Simply adjust how far you fold over the flap on the longer panel. No one will ever know it is shorter than the other since it sits inside – adjust away!
Once you have the panels lined up looking just how you want, pin them together on the three appropriate sides. You will not sew the edge with the crease and the finished edge, that will be the opening.
Sewing the Panels Together
This part is honestly the least confusing and stressful, in my opinion. Bring your pinned pillow sham over to sew. You will sew three edges: both long sides and one short side.
Start at one of the corners next to the side that won’t be sewn and sew with a 1/2″ to 1″ seam (however much room you have decided you have to spare so that you will have 20″ from stitch to stitch when done). Be sure to reinforce that first stitch however you normally do for the ends of projects, then sew straight down the long side and stop about 1″ from the end.
Sewing the Corner
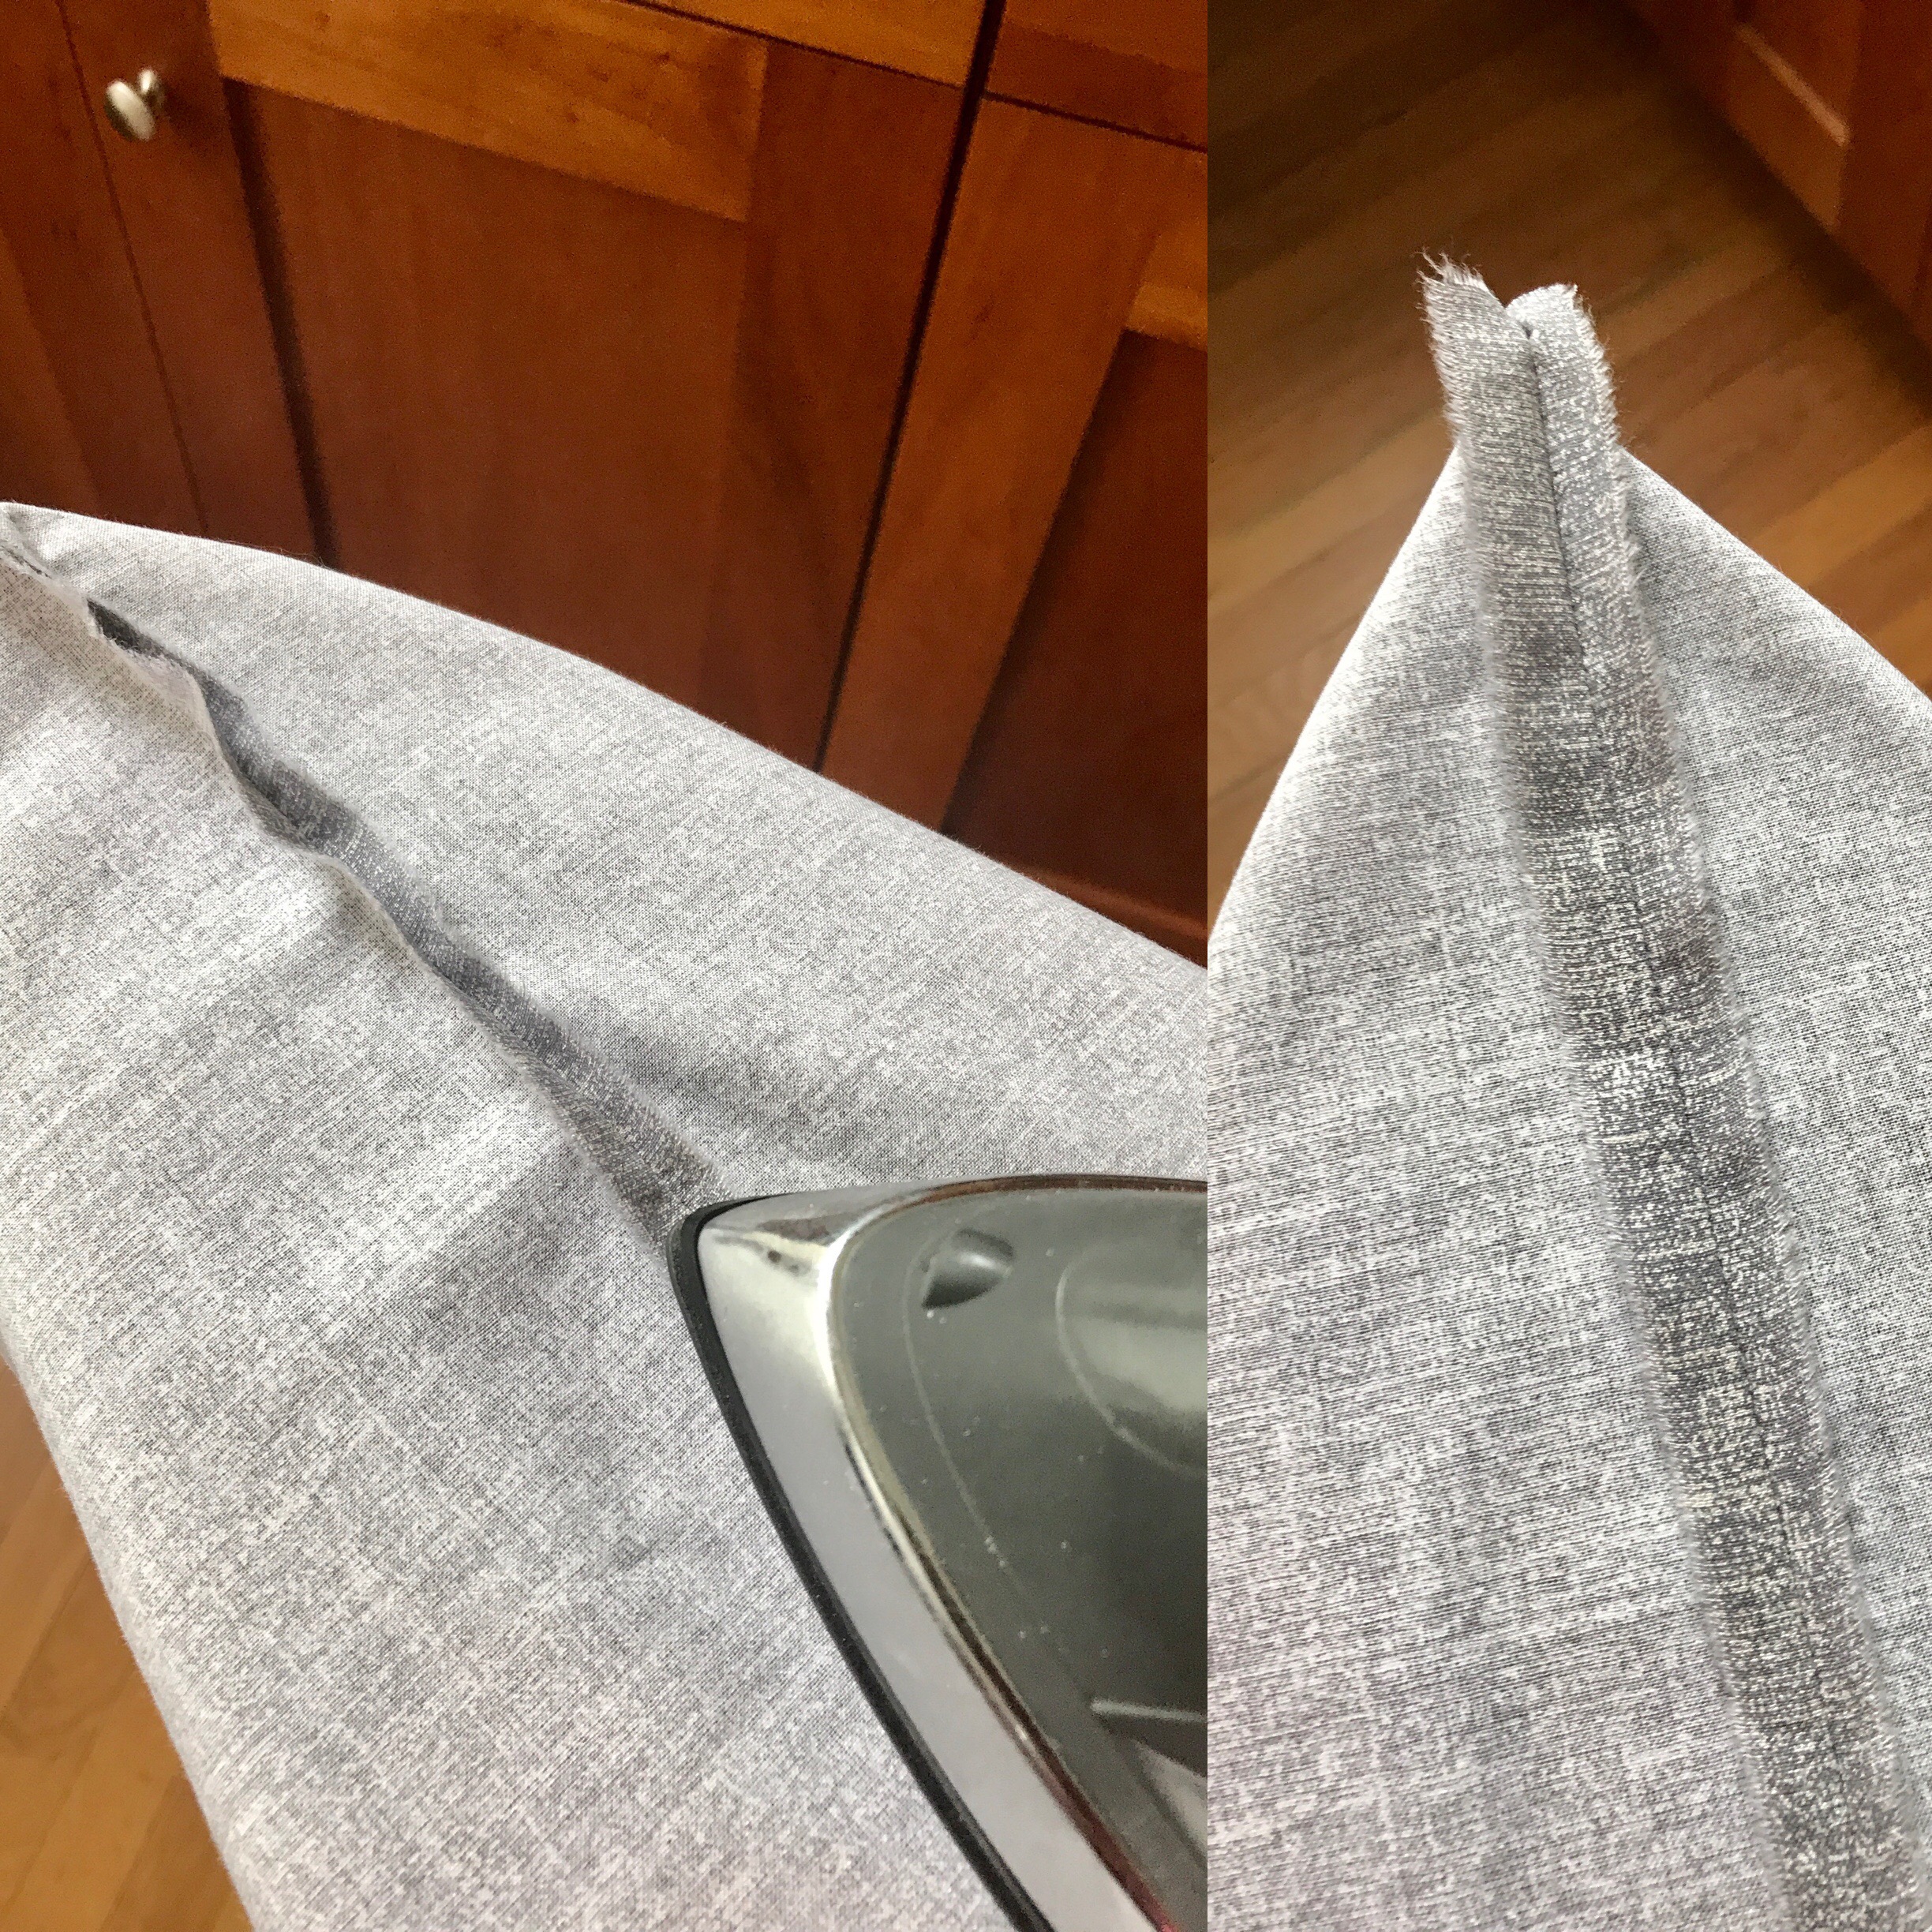
When you stop, be sure you stop in a spot where your needle is down in the fabric. You will then lift up your presser foot and turn your sham on an angle towards the next side to sew in a nice corner .
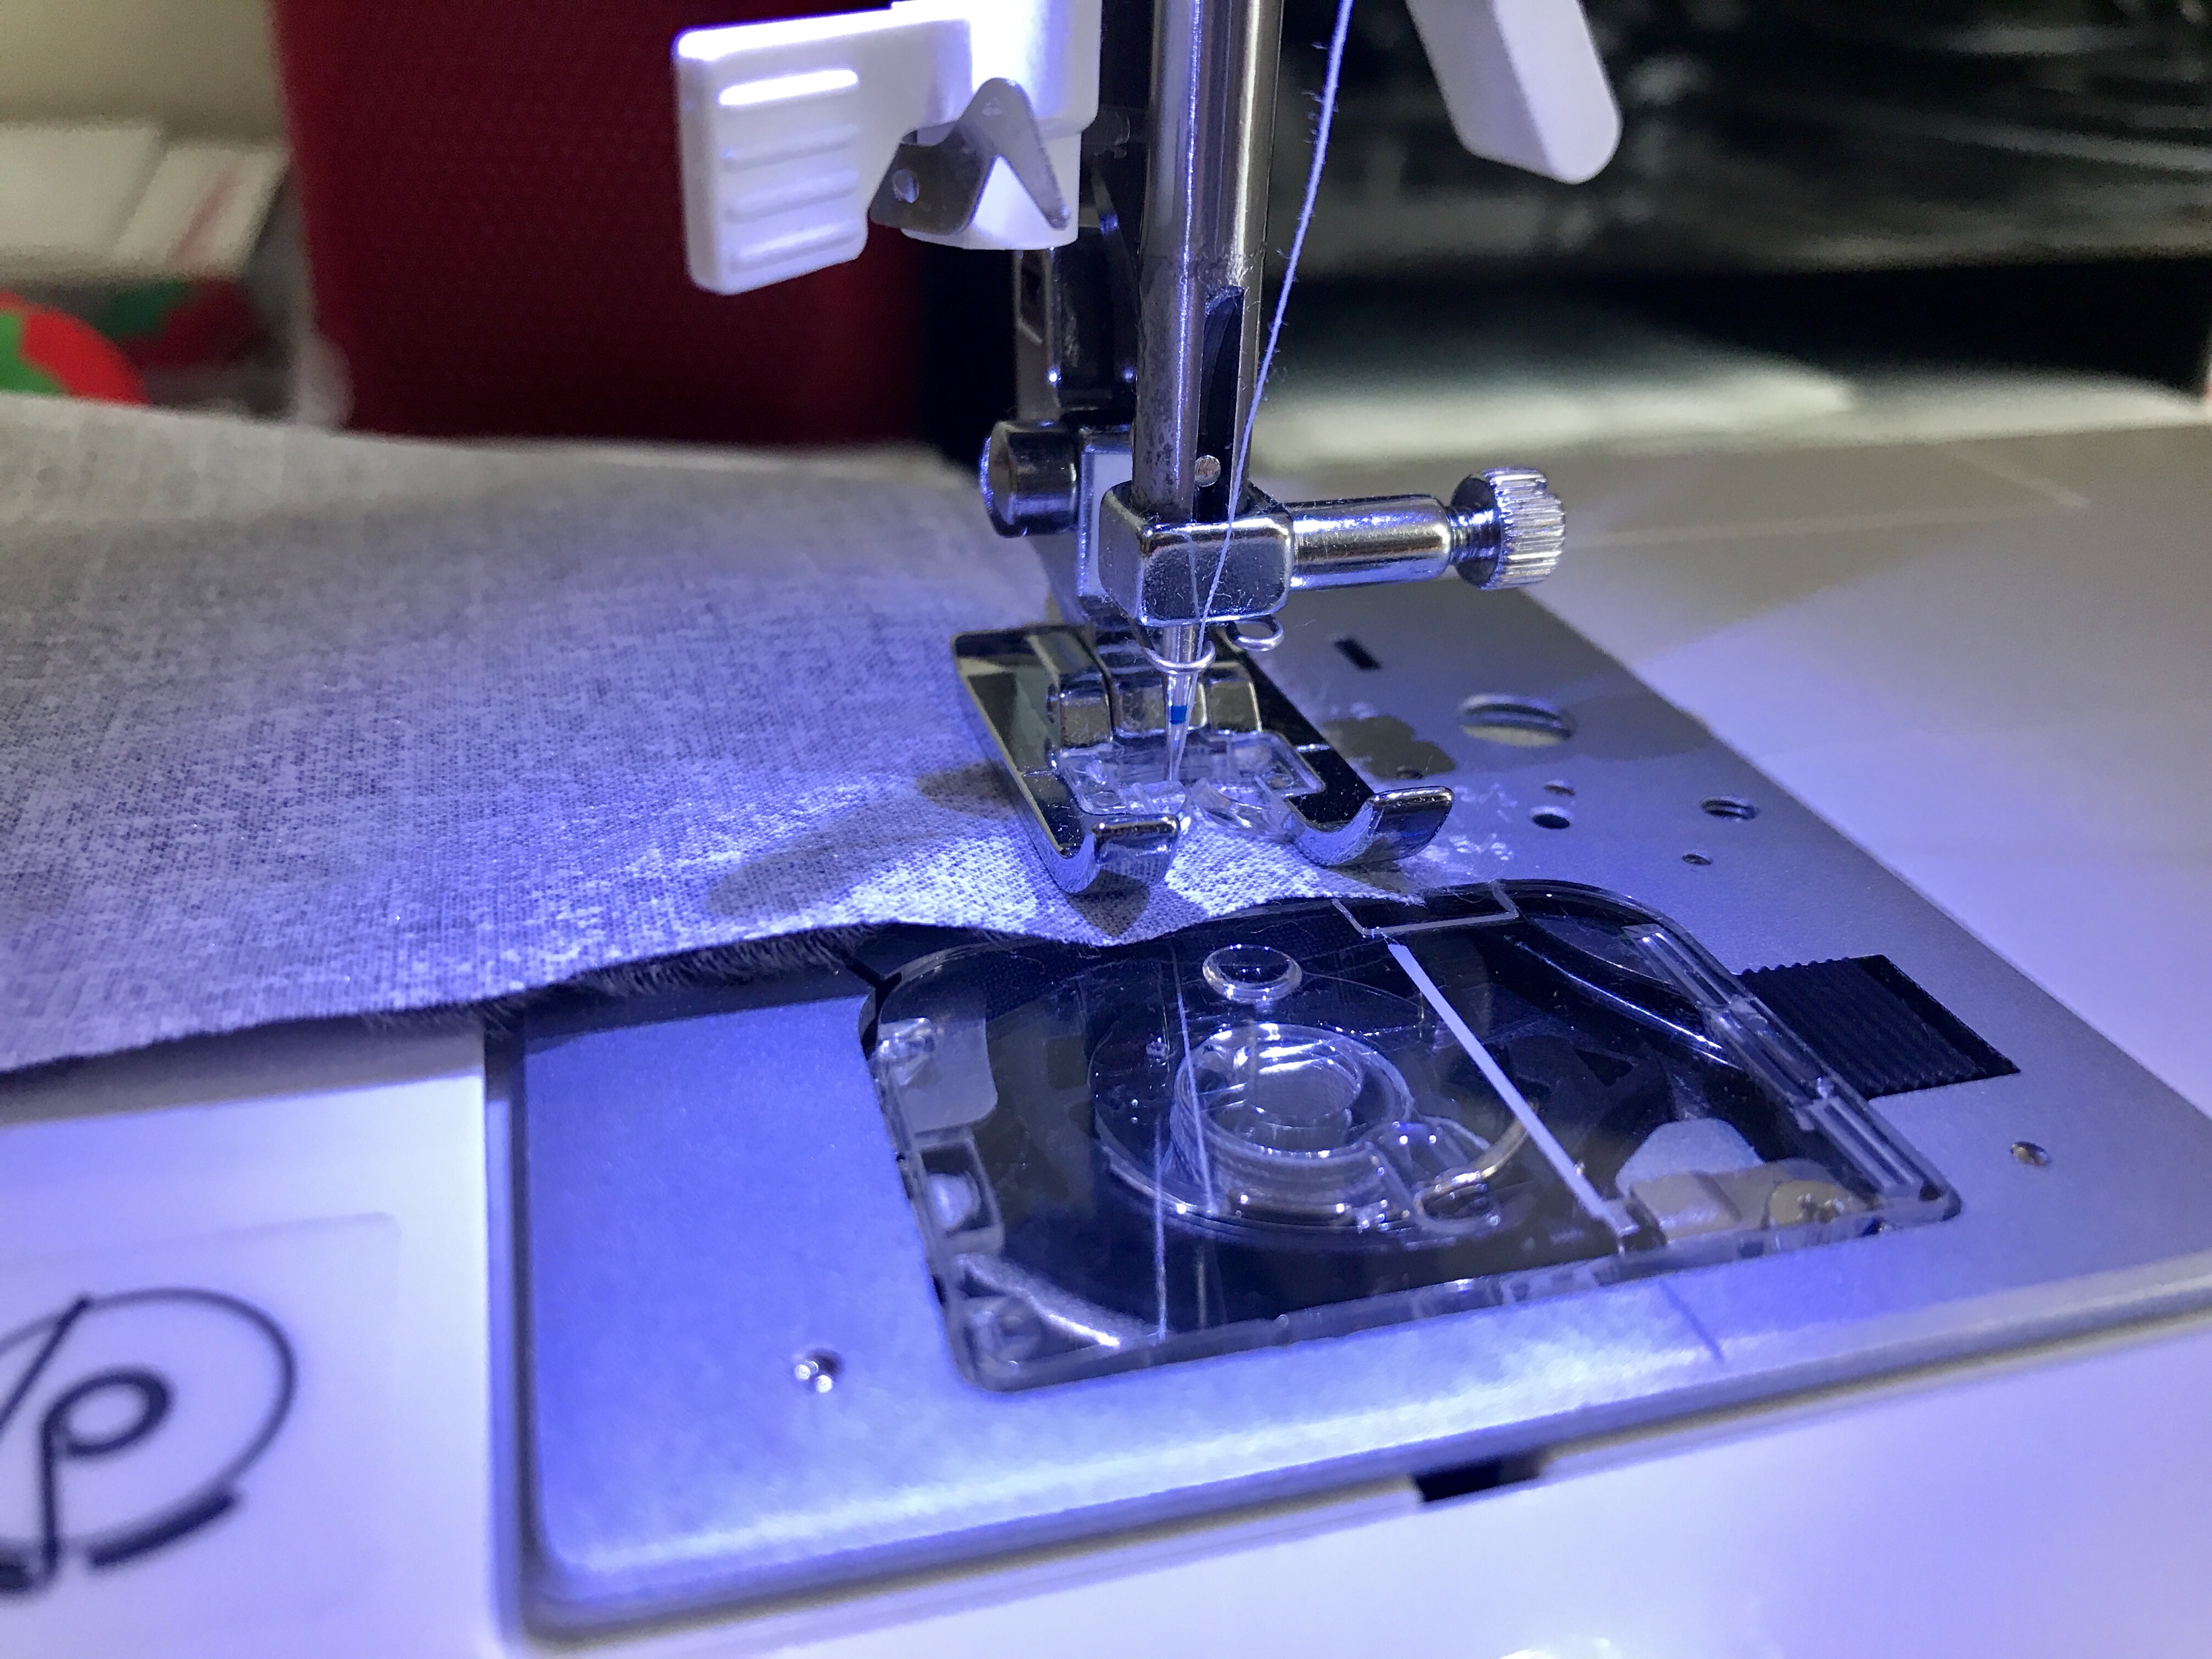
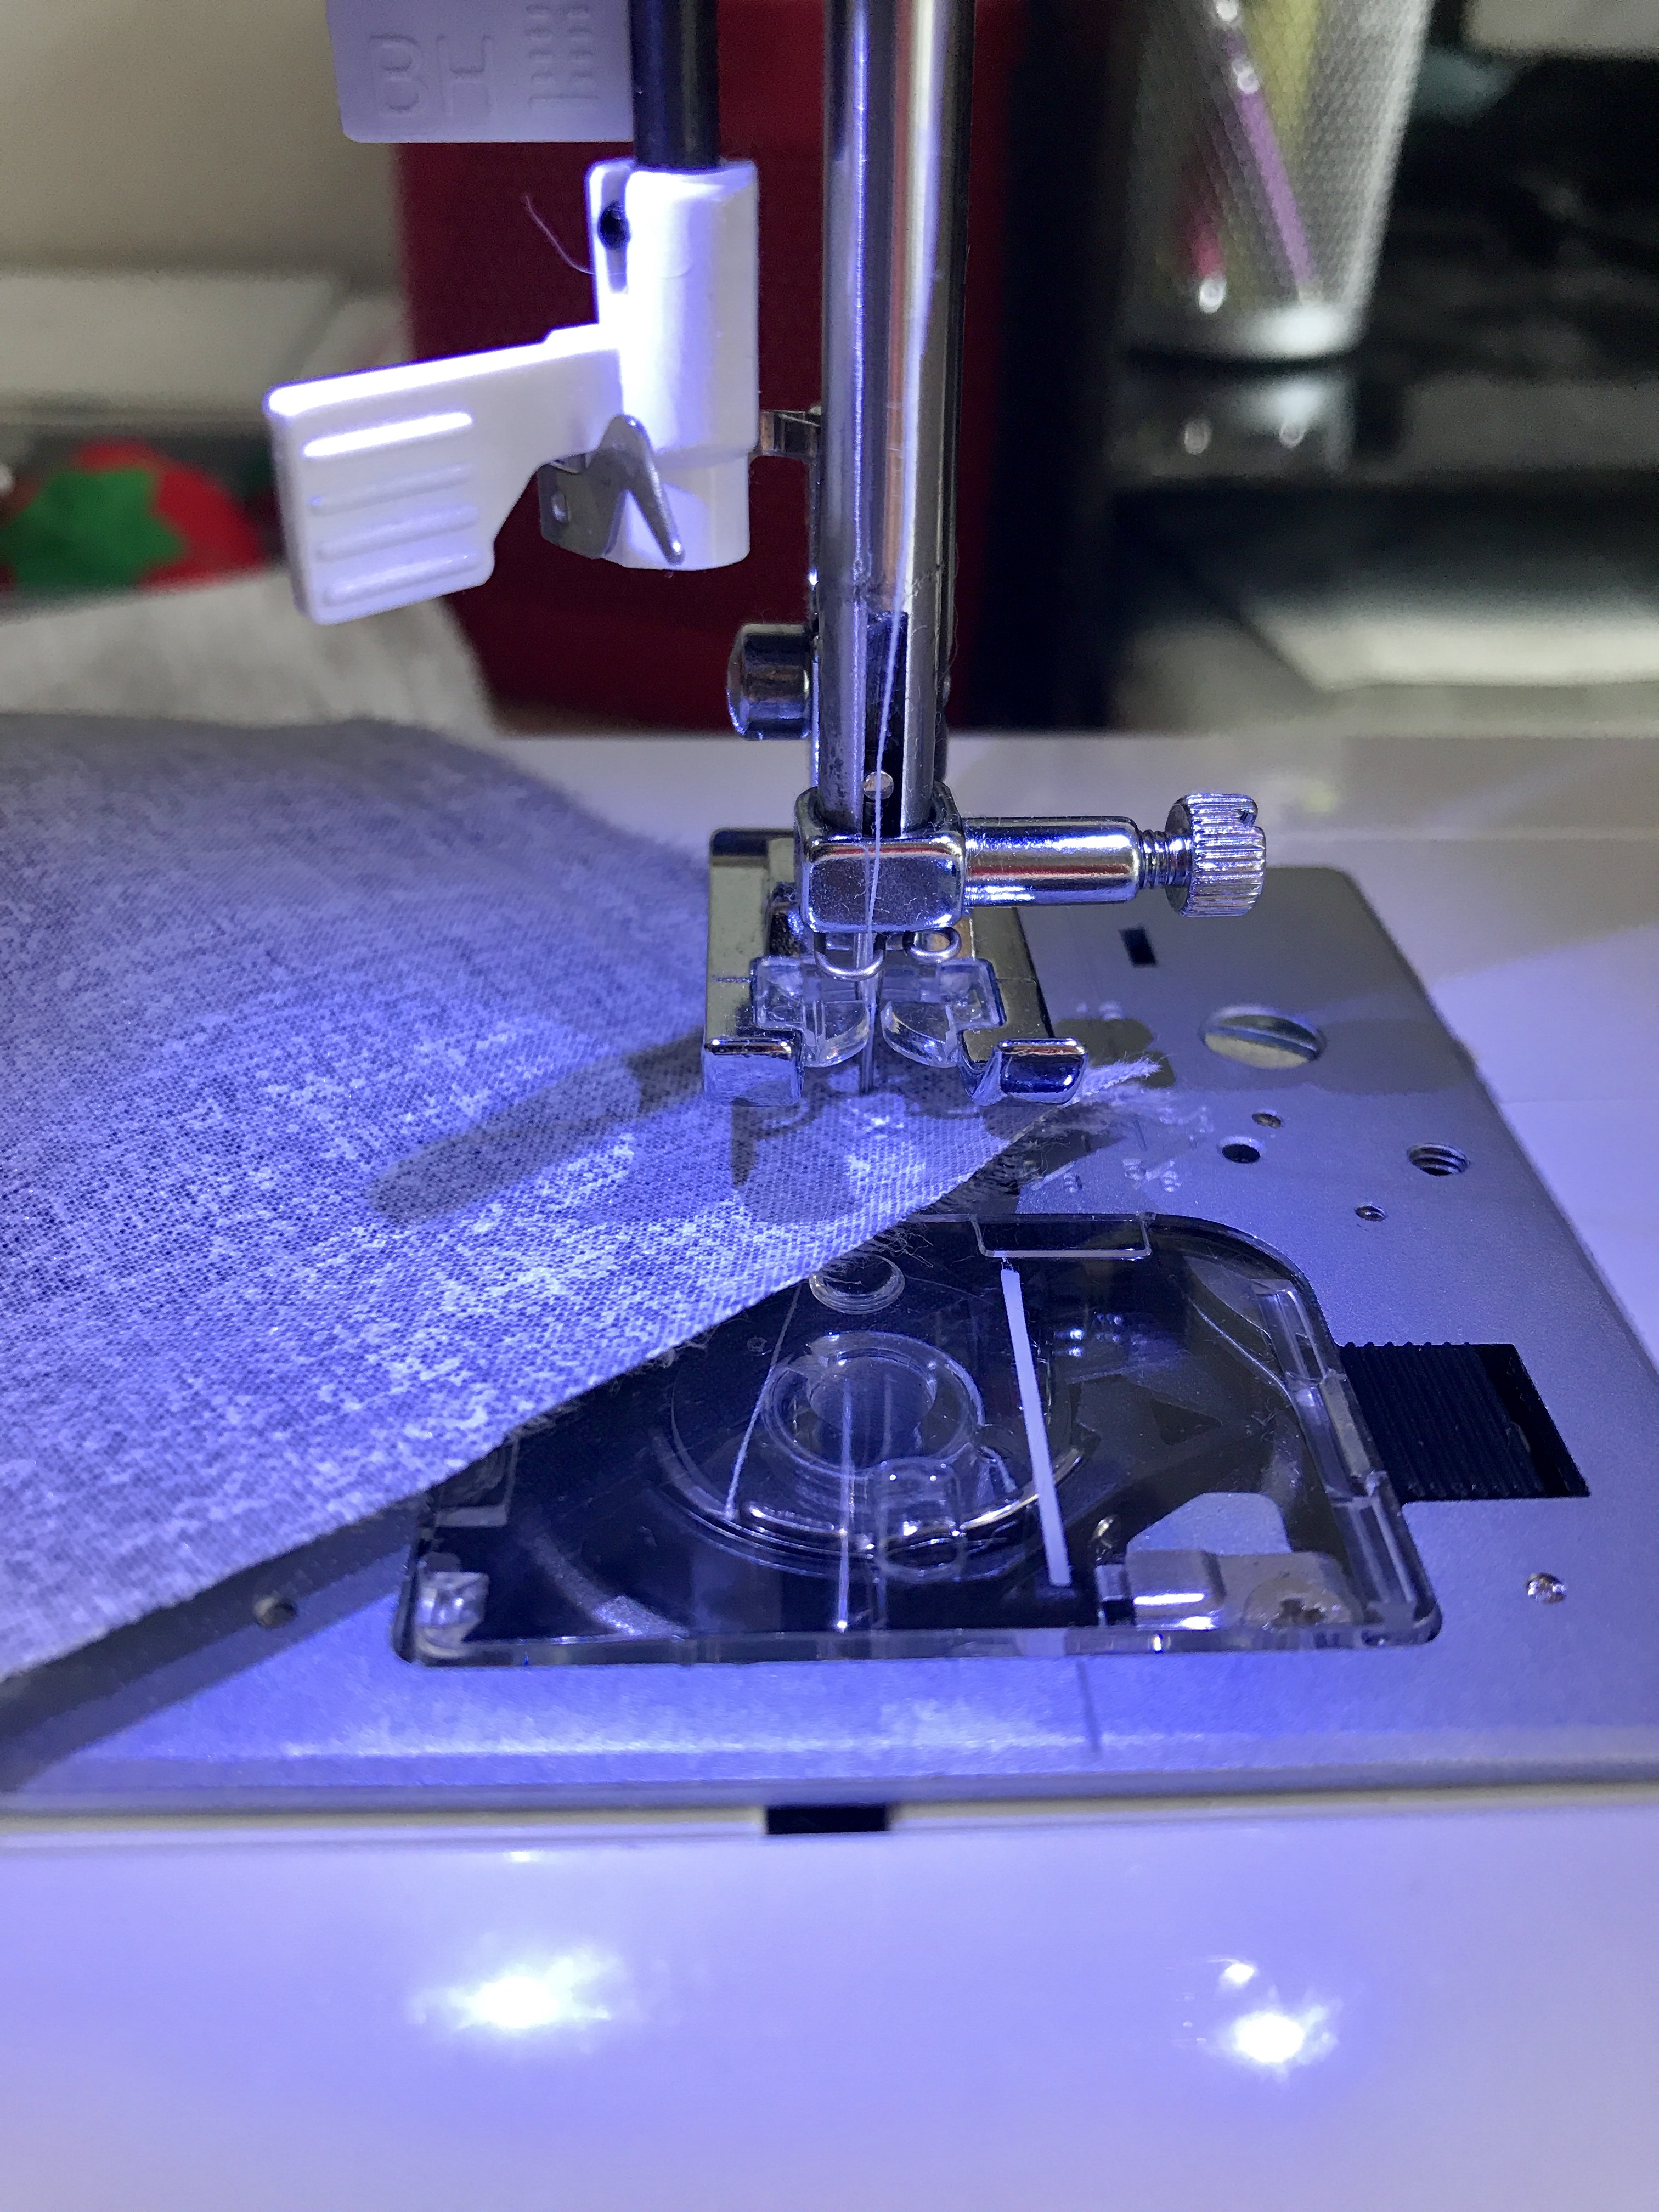
Lower the presser foot to sew again, sewing in about 3 stitches while angled and stop the needle in the fabric again. Rotate the fabric back to a straight line, this time lined up with the one short side you’ll be sewing.
Repeat this above section for the next corner and the last long side you need to sew, reinforcing at the end just like you did at the beginning.
Post-sew Finishing Touches
Iron the inside of the seams flat, see below for a before and after.
The results when you flip the sham right-side out:
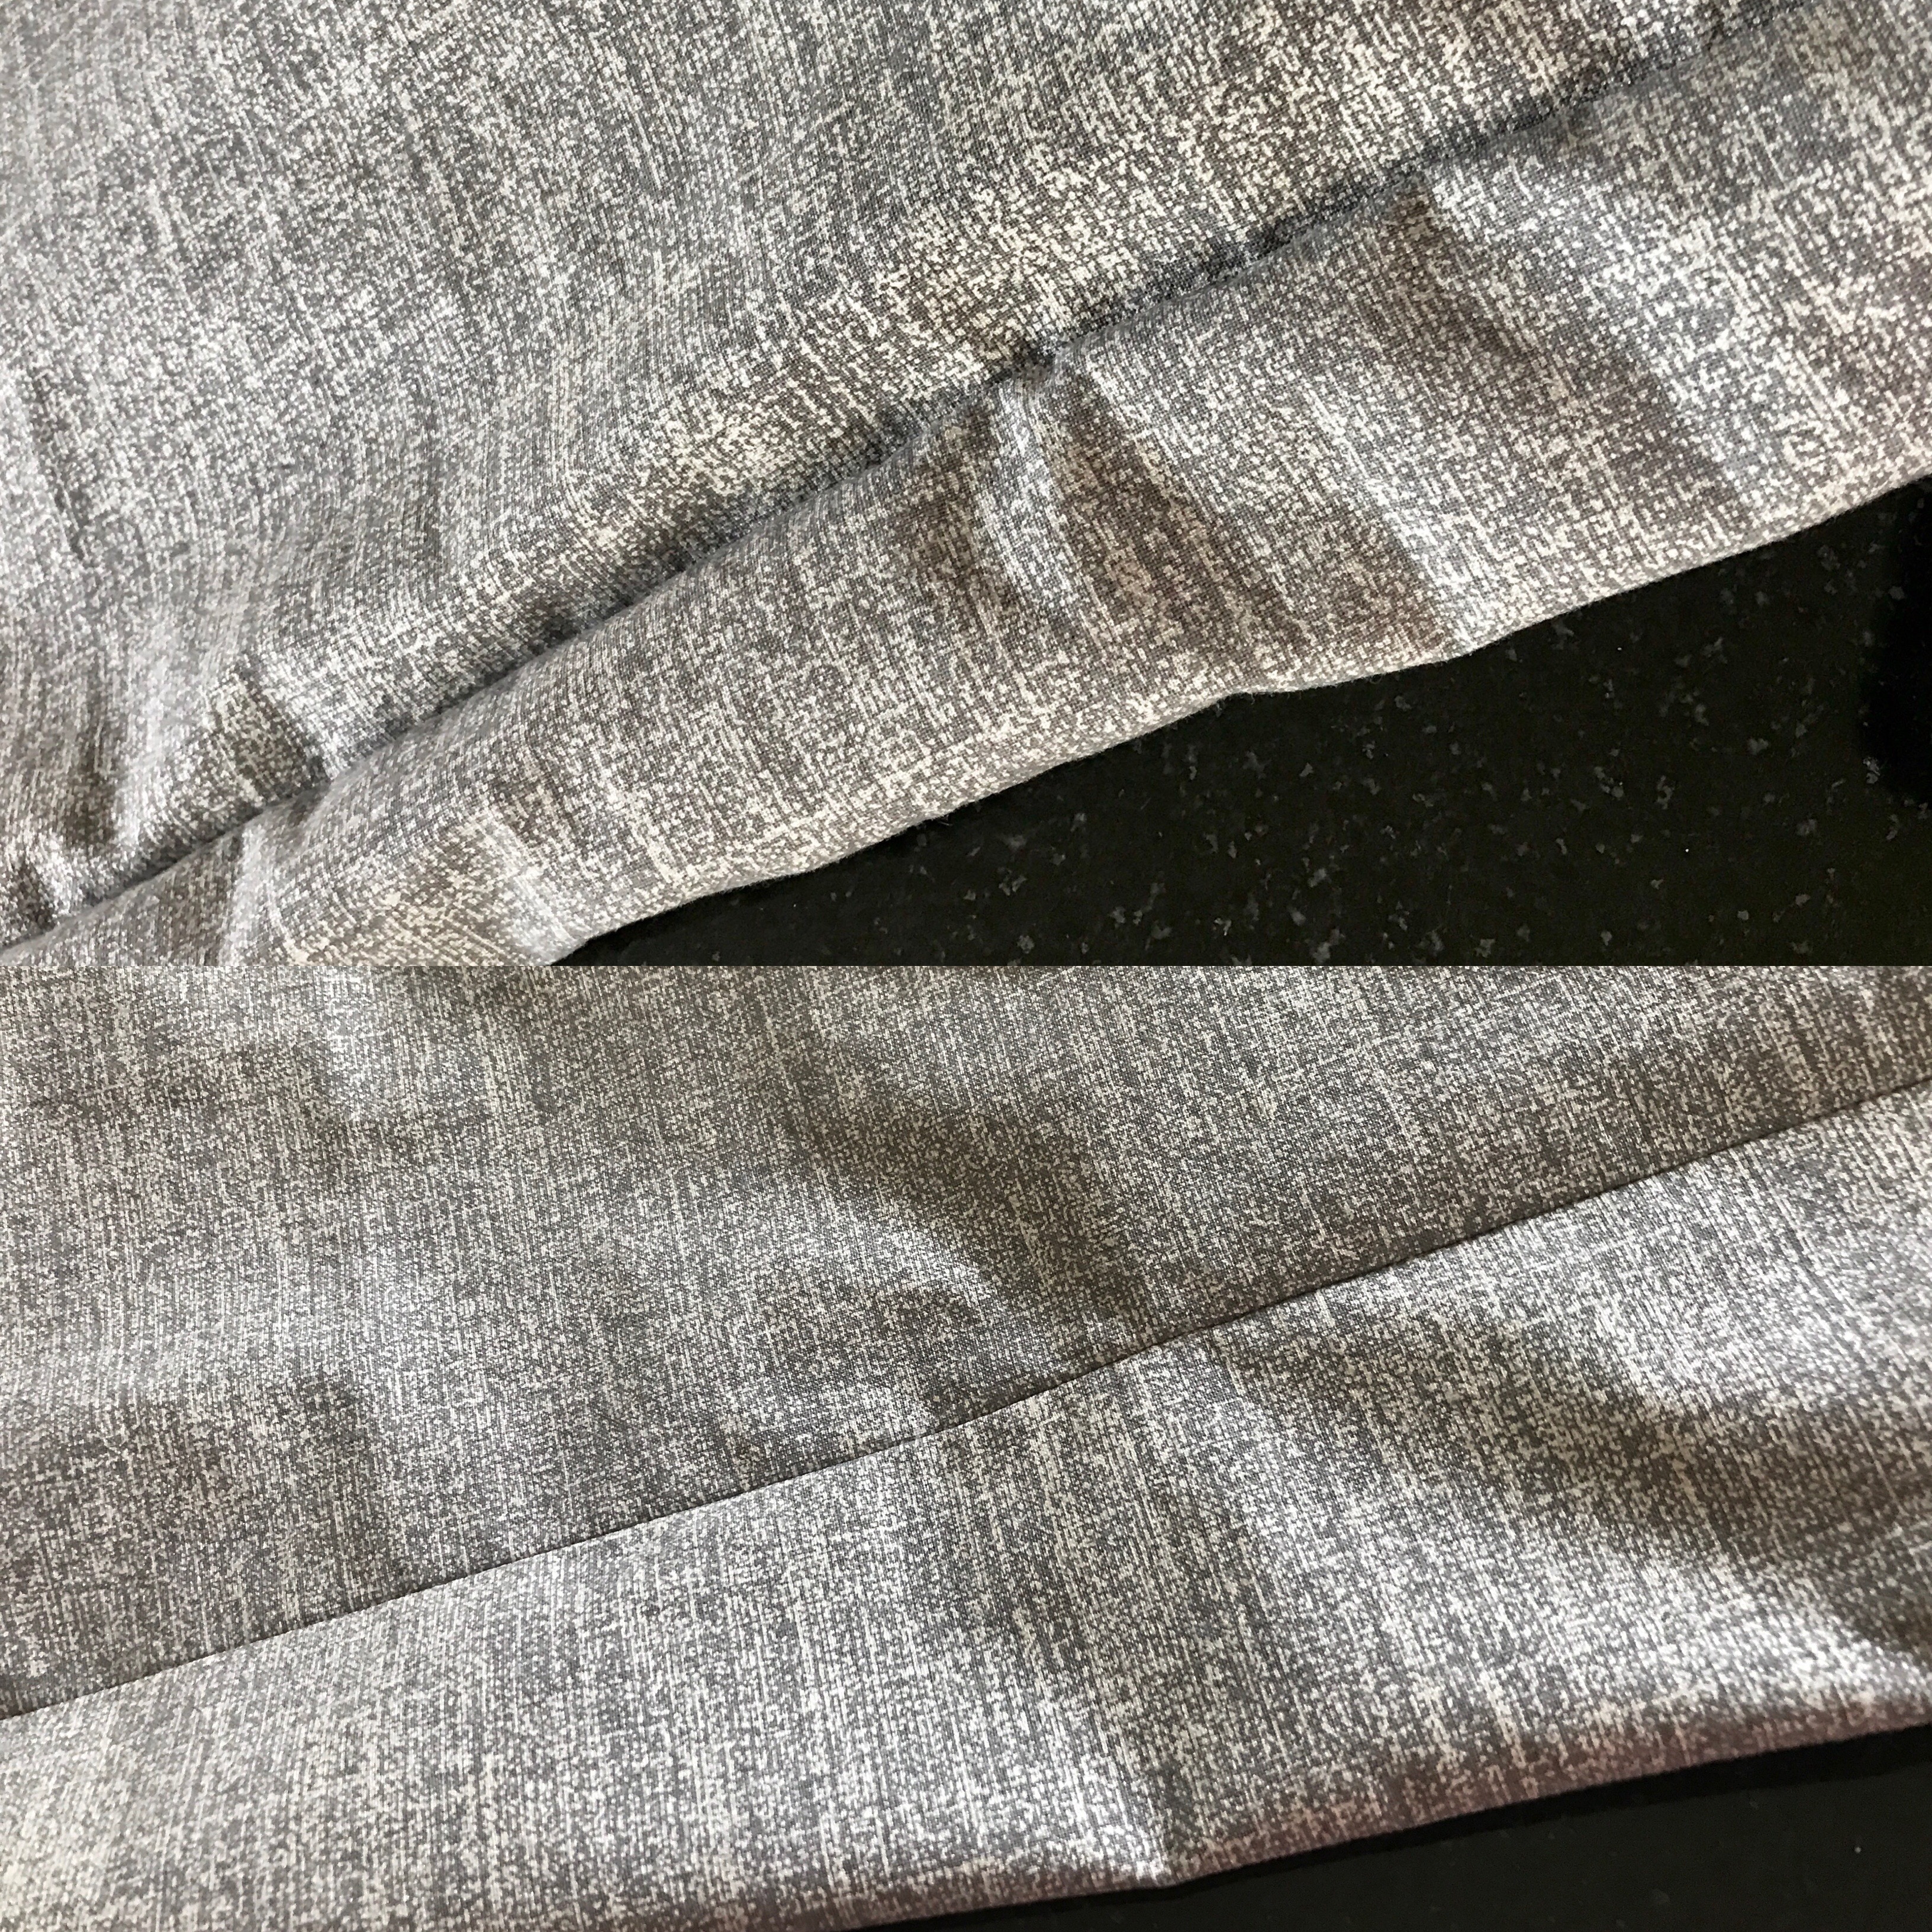
What a difference it makes, right? The top wasn’t ironed from the inside-out and the bottom was. Always iron the inside seams to give your final products a nice crisp, flat seam line.
Then, when it’s time to turn your shams right side out, be sure to poke out your corners (see above). This is what it looks like before (underneath sham) and after (top sham), it makes a big difference!
New vs. Old Pillow Shams
That yellow floral on my new DIY coral, grey and white duvet was unbearable! So glad I finally made matching shams. If you’re going to do something, do it right, I say. Don’t make yourself a beautiful new duvet and live forever with mismatched shams.

If you’re familiar with sewing machine basics, I fully believe you can muscle either of these projects, especially the shams.
Did you try your hand at homemade pillow decor of your own? Share in the comments and let me know how it went or ask questions. Or feel free to tag me on social, I love seeing and sharing your projects!
More DIY Home Projects
- Chic Boho Kitchen Curtains
- Spray Painting Your Outdated Decor
- Hanging Our Farmhouse Shelves
- DIY Foam Cone Christmas Trees

This post contains referral/affiliate links. A small commission may be earned if products are purchased through my links. Thank you for supporting the brands that support this blog.
