
Have a little sour patch kid in your life? Or maybe you just need a quick and easy, but adorable costume for your little one. This Sour Patch Kids onesie Halloween costume is easy and done in under an hour! You can also use this print for older kids’ shirts. I’ll explain how and more in today’s post.
Sour Patch Kids Onesie Supplies
Here’s the onesie and heat transfer vinyl (HTV) I used to make this easy Halloween costume.
- Red zip up onesie
- Fluorescent Green HTV
- Fluorescent Orange HTV
- White HTV
- Black HTV
- Multi Pack HTV, includes black and white
NOTE: you can buy this pack instead of black and white separately for some savings.
Cricut Sour Patch Kids Onesie Graphics

I haven’t searched it myself, so more than my graphics may come up if you search “Sour Patch Kids” on the Cricut image library. The exact graphic numbers for mine are below so you can simply search with those to get to these exact graphics.
- Black Background #M1D363D56
- “Sour” #M1D36519A
- “Patch” #M1D367810
- “Kids” #M1D36AE66
In case those numbers aren’t pulling the graphics for you, you can download these directly from my site and upload as your own graphics to use.
Sour Patch Kids Background Cricut Graphic

Sour Patch Kids ‘Sour’ Cricut Graphic

Sour Patch Kids ‘Patch’ Cricut Graphic

Sour Patch Kids ‘Kids’ Cricut Graphic

If you pull the graphics by number in Cricut Design Space, they’re all sized and ready to cut, however, if you’re making an older kid or adult sized shirt you may want to adjust them all a little bigger still. Graphics saved from here will need to be sized to your project but that’s just a small step in the grand scheme of the project.

Group them all together and size up to keep the proper ratios. You can do that by selecting all layers (Crtl+A) and hitting the “Group” button at the top right, as pictured below.
Preparing Your Cricut Graphic for Cutting
Given your graphics will be all different colors you’ll need to hide some each time you make a cut. To do so, click the eye icon on any given layer to hide it. For example, all but the background layer are hidden here, so I’d load my Cricut up with black HTV and get ready to make this layer.

Hit the green “Make It” button at the top to cut just the background right now.
Once you’ve successfully cut the background, unhide the “SOUR” text graphic and ensure it is still the proper size compared to your background. (Note: it shouldn’t have altered in size at all, but for the sake of being thorough, I always re-check between cuts). Then, hide your background so the only layer showing is the “SOUR” layer. Load your green HTV and cut.
Repeat this process with the “PATCH” and “KIDS” layers until all four graphics are cut and ready to be weeded.
Weeding Your Vinyl Cut Outs
I swear by the weeder tool (the tiny pick looking one) in my Cricut tool starter kit.
Regardless how little the project I always pick at it with that tool to get the vinyl off the easiest. Just a little tip from one maker to another!
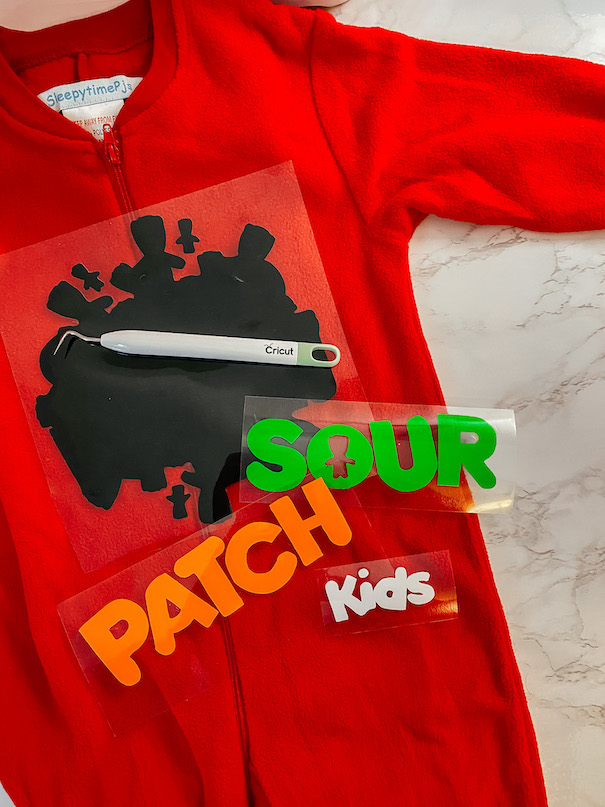
Staging Your Cricut Vinyl Layers
Before ironing on layers one at a time, make sure they all still look proportionate now that they’re physically cut.

As long as you didn’t individually alter the different graphics’ sizes they should all still be perfectly proportionate.
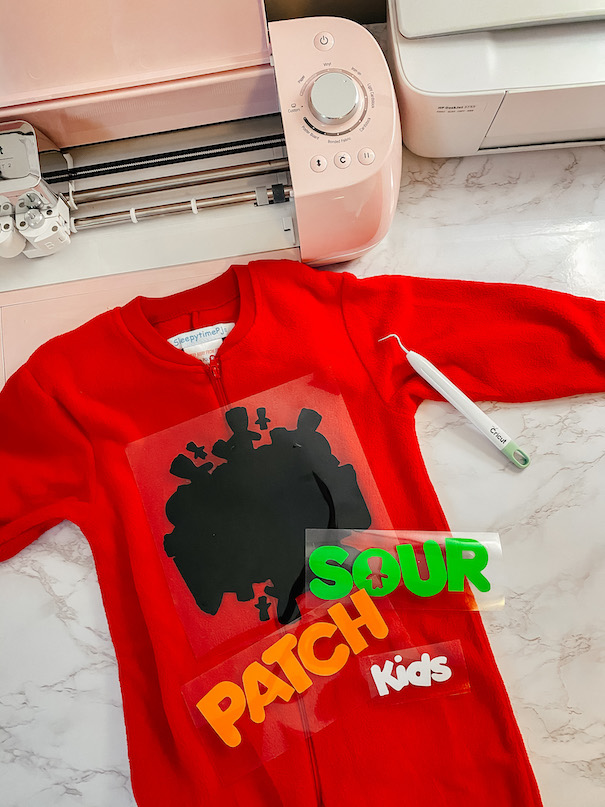
Optional Step: Cutting Your Vinyl Graphic
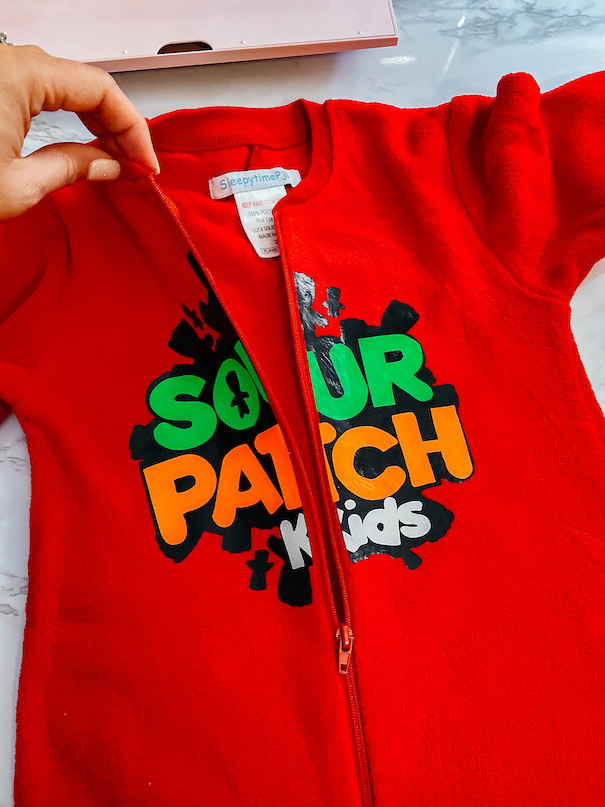
Depending on what type of onesie you order, you may have a zipper down the middle. This adds a small extra step: cutting the graphic in half.
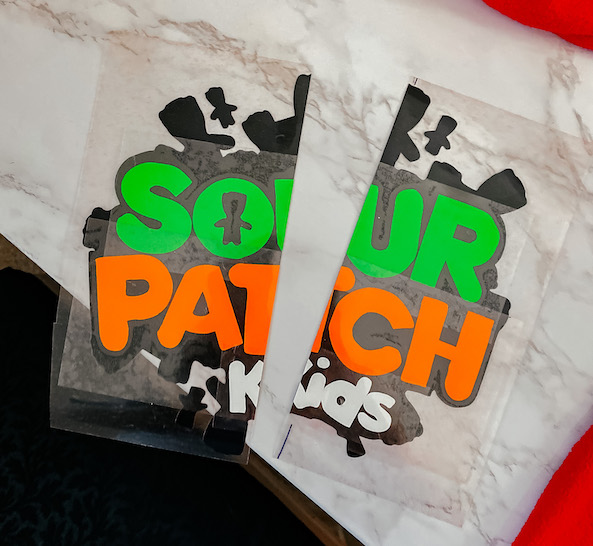
This is SUPER easy, especially if you have a scrapbook trimmer. I got this for cutting paper crafts, cards, thank you notes for my Mercari storefront and miscellaneous projects like this. You can also cut by marking a line down the back side of the graphic with a ruler since that side will be applied to the garment.
Layer the vinyls atop one another so you can see the final image laid out. This ensures the pieces are cut perfectly so you can safely iron on one at a time, knowing they will all fit like a glove.
Ironing Multiple Layers of Heat Transfer Vinyl
This is actually super easy. It was my first time doing it and it was seamless. My biggest piece of advice is to ensure you don’t touch the already ironed-on layers with the hot iron directly. Use an old cami or semi thinner fabric as a barrier between the vinyl and garment, as you should even when ironing on one layer. It’s even more important in this scenario because you don’t want to melt the already transferred vinyl.
Start with the base layers, which are the black background pieces in this project. Then move forward with your words, one word/color at a time, starting at the top. Allow a minute or two between top layer irons so the transferred vinyls can cool.
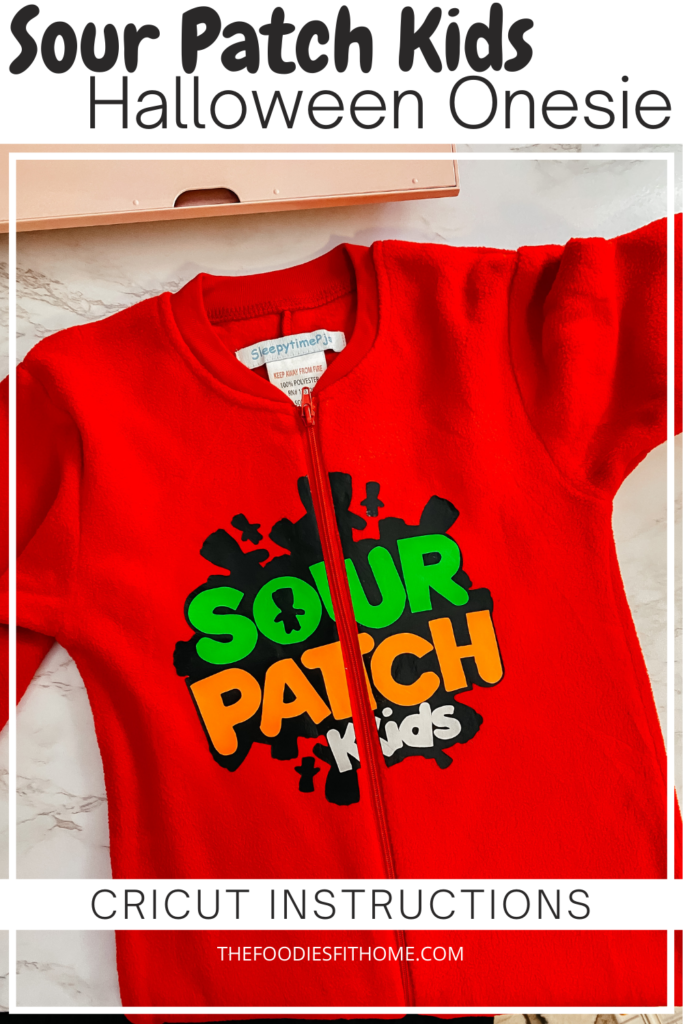
Finished Sour Patch Kids Onesie Costume
It came out GREAT! This is largely thanks to the vibrant, fluorescent vinyl colors. They’re right on brand and really sell the integrity of the costume. Plus, little ones love bold colors. So much fun!
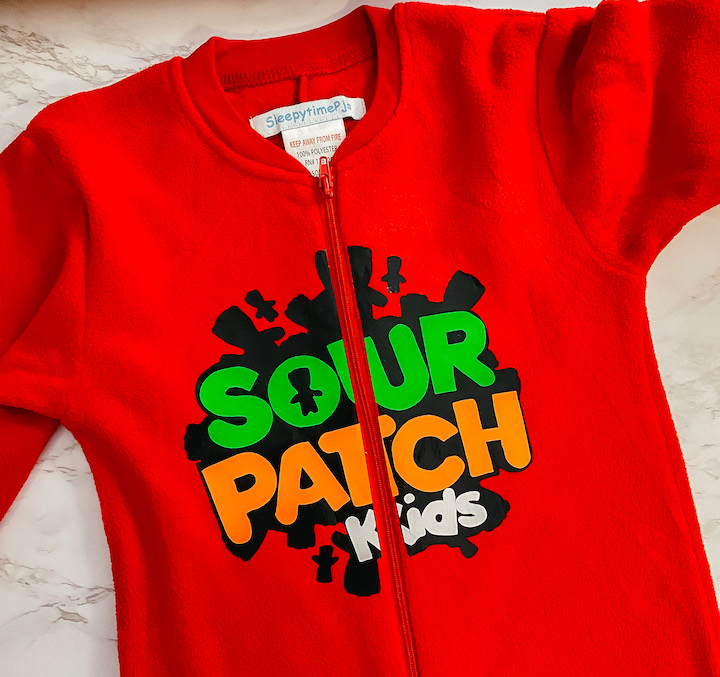
Best of all, this costume is still easily functional for mom to get little one out and changed without hassle. We want to keep this Sour Patch Kid sweet on Halloween!
Did you give this project a try? Let me know what you thought in the comments below!
More Crafting and Creating
- Simple Sew Pillow Sham
- Boho Chic Kitchen Curtains
- DIY Duvet Cover
- Refreshing Home Decor with Spray Paint
This post contains referral/affiliate links. A small commission may be earned if products are purchased through my links. Thank you for supporting the brands that support this blog.

This post contains referral/affiliate links. A small commission may be earned if products are purchased through my links. Thank you for supporting the brands that support this blog.
