
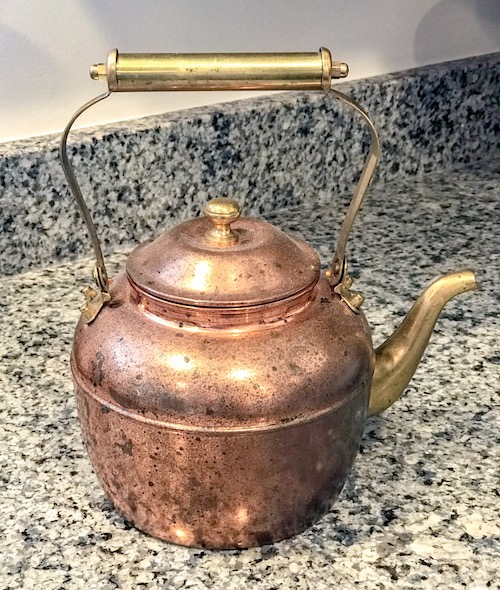
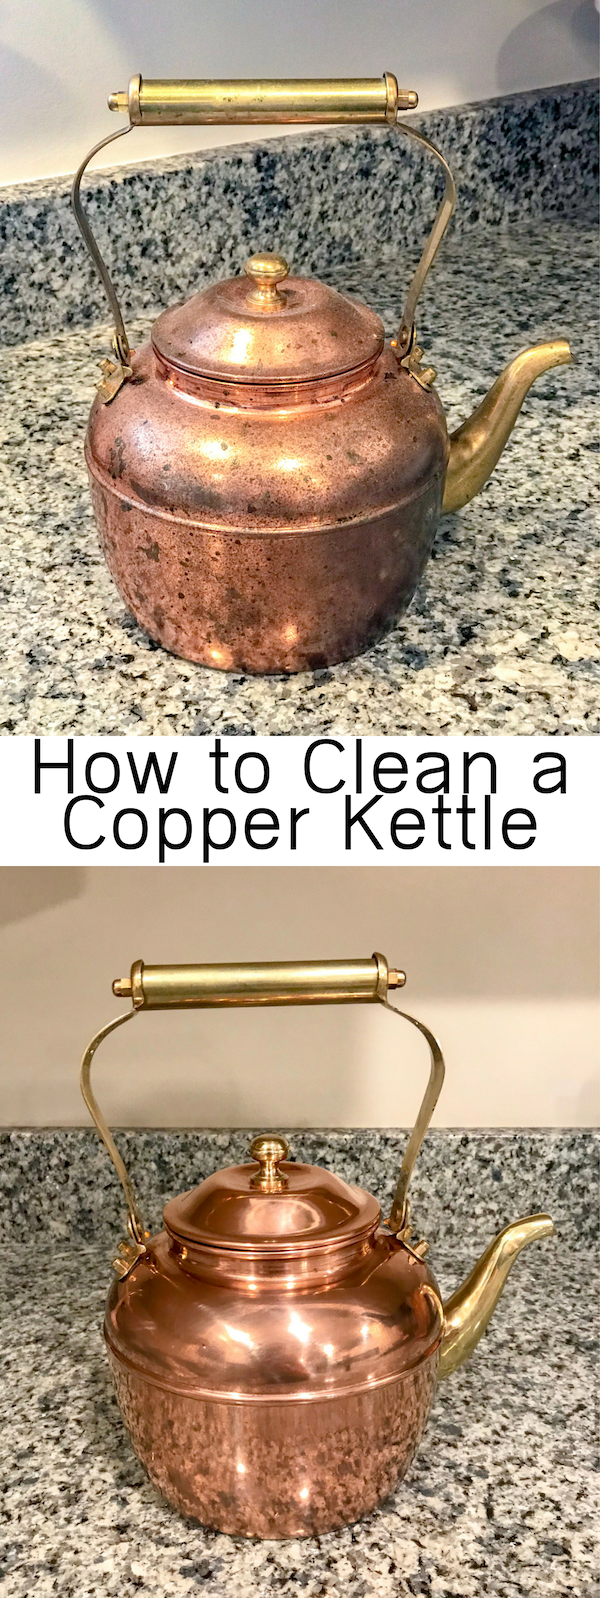
Things looked bleak for my poor, beloved copper tea kettle. Truth be told, my sister ordered a rose gold looking one and got this one instead, so she gave it to me when her replacement arrived. Cleaning a copper kettle isn’t hard, but you have to put a little elbow grease into the job.
Before Cleaning Your Kettle
Literally, so scary looking. I’ve had this piece for years – never used it once, mind you – but also never cleaned it. I love it for my stove, but it has clearly seen the brunt of all the meals we cook. We typically move the kettle if we’re cooking anything that is a spatter-risk but still, 2+ years of not polishing or cleaning copper will surely result in tarnish.
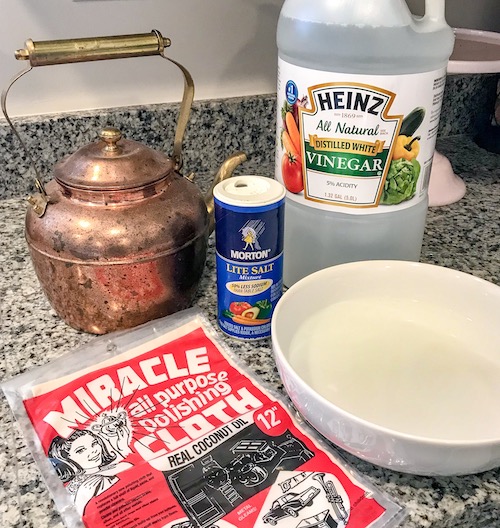
Products to Clean Tarnished Copper
Like most, I took to the internet to do some research.
The first thing Google suggested was a vinegar, salt and flour combination. Seemed easy enough, and it was, especially since the ingredients are on-hand in most homes. It also mentioned to polish it at the end, and fam, THAT is the most important step in this process.
- 1 cup white vinegar
- 1 tbsp salt
- Approx. 1 cup flour
- Miracle All Purpose Cleaning Cloth
- Two soft wash cloths
Cleaning Your Copper Kettle
- Mix 1 cup white vinegar with 1 tbsp salt. This is plenty to coat a large tea kettle. I doubled it when I did it because it seemed scarce, but I totally could’ve gotten by with one cup and tbsp respectively.
- Slowly add flour and whisk until the mixture forms a paste-like consistency. It will still be a little liquidy, so be sure you have something to put the kettle/object on before coating.
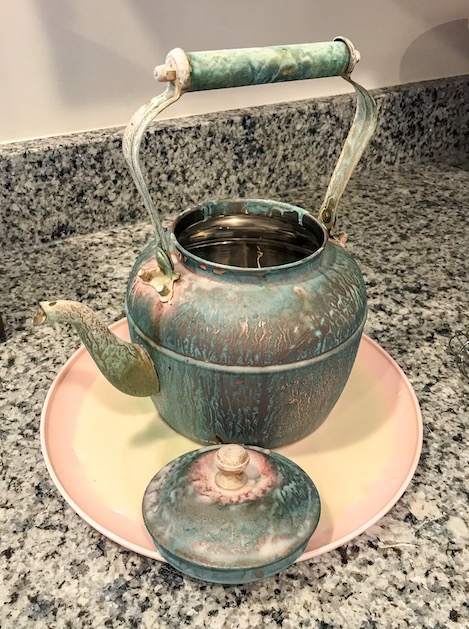
- Let the coated copper sit for 30-60 minutes. Mine sat for 60 minutes and here’s what it looked like, don’t be alarmed:
4. Rinse the mixture off and dry with a gentle cloth (an old kitchen wash cloth works). The next step is where the real magic happens…
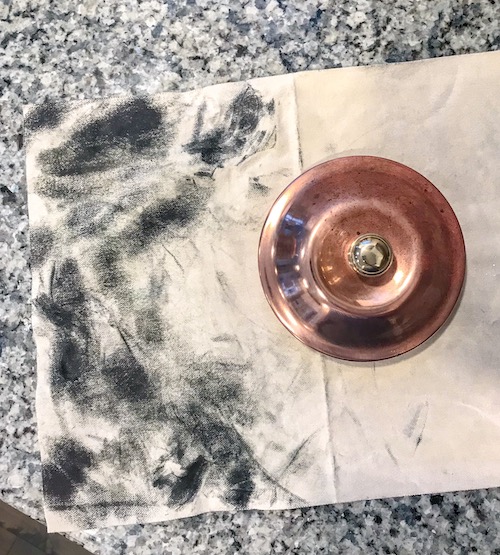
5. Open your Miracle All Purpose Cleaning Cloth (a.k.a. the most magical cleaning cloth I’ve ever seen) and follow the directions on the packaging. Summary of the instructions? Clean smaller patches at a time and follow with a dry cloth (this removes the excessive coconut oil from the kettle that the cloth uses to pick up the dirt). The cloth can be used over and over even after discoloration (which WILL happen), it does not affect the effectiveness of the miracle cloth – I can personally attest to that.
6. Keep polishing with the Miracle Cloth and following with the dry cloth until you are happy with the shine. Some items will take more energy than others, I know my kettle was in bad shape so it took a lot of elbow grease to really see that brand new looking shine. But trust me, the effort is worth it. Your piece will be restored – it’s such a great feeling!
The Finished Product
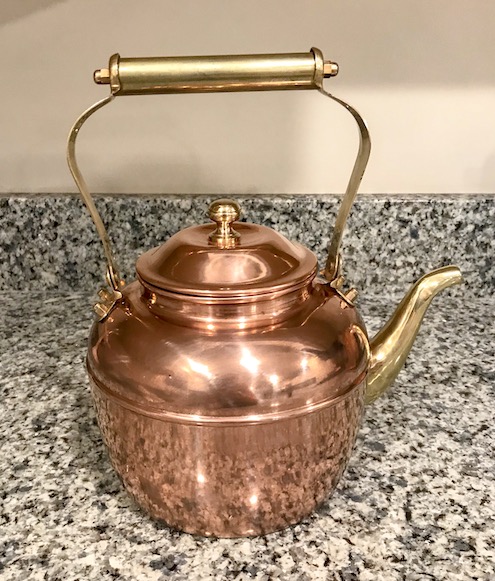
Look at that SHINE! It seriously looks like the day my sister gave it to me. I’ve never been more impressed by the outcome of a restore I’ve done.

After I told my sister about the complete 180 with my kettle she ordered the same Miracle All Purpose Cleaning Cloth from Amazon! #thatprimelife She’ll be getting hers in the next few days and I can’t wait to see her before and afters.
Before and After
Cleaning a Copper Kettle Pro Tips
- Use gloves if you just did your nails. Your naked mani will NOT survive the process. (RIP my beautiful spring pink nails.)
- Allow yourself 30-45 minutes for polishing. Depending on the damage, it can take a lot of time.
Comment below or tag us on social with your beautiful copper decor. And don’t forget to subscribe for more hacks straight to your inbox!

This post contains referral/affiliate links. A small commission may be earned if products are purchased through my links. Thank you for supporting the brands that support this blog.


