
A task all its own, adding DIY landscaping and mulch around your patio is a lot of hard work, but can easily be done yourself. Tackling this project yourself, slowly over time if needed, will ultimately save you a pretty penny. Plus, we’ve already done it! So by following here, we’ve hopefully made the job a little less daunting for you.
Backyard Progress Recap
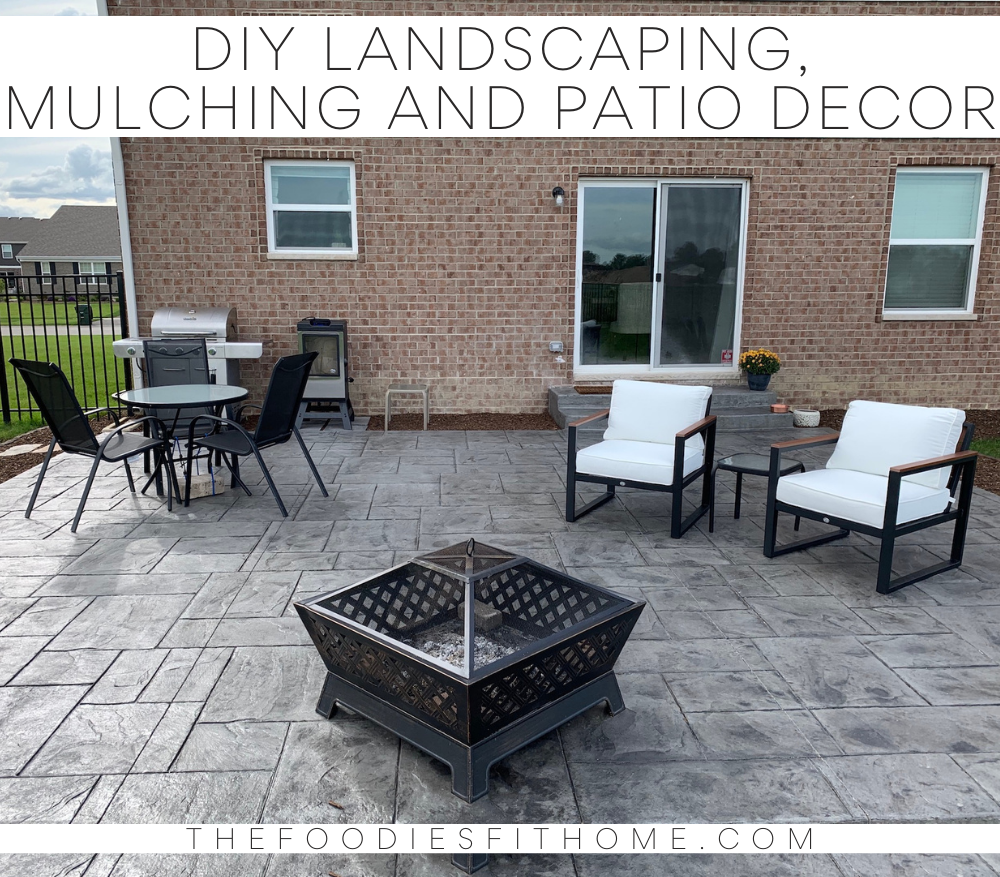
On August 31, 2019 our patio was installed in all its glory.
While a big slab of concrete may not seem like much I had alllll the plans to make it the best space on our 1/3 acre lot. Step one is polishing the rough edges with some landscaping.
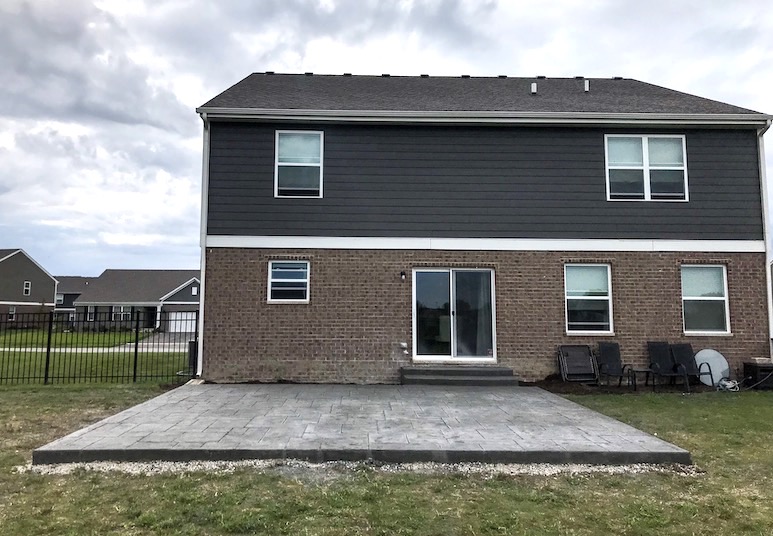
One Week After Our Patio Was Poured
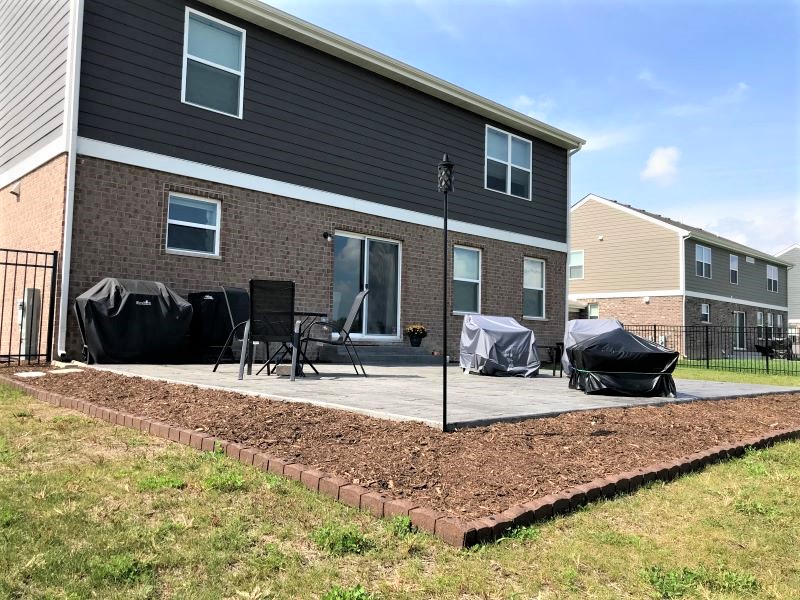
We’ve come a LONG way. In one week’s time we were able to not only install this wonderful mulch barrier but get some patio furniture up there to start enjoying our beautiful work.
Ready to get moving on your own backyard transformation? Let’s take it one step at a time.
Make a DIY Landscaping and Mulch Game Plan
Mulch is the move for us right now. Down the line we may swap it out for gravel, rocks or something a little lower maintenance over the years but for now, budget says mulch!
Before diving deep into Pinterest looking for DIY landscaping and mulch inspiration, I asked our concrete guy for his thoughts. He explained in 30 seconds exactly what I’m about to show you. No Pinterest needed! It’s that simple.
How Much Mulch Do I Need?
Neither Kevin nor myself had any idea how to order mulch in bulk, and I can’t imagine this is very common knowledge so let me explain.
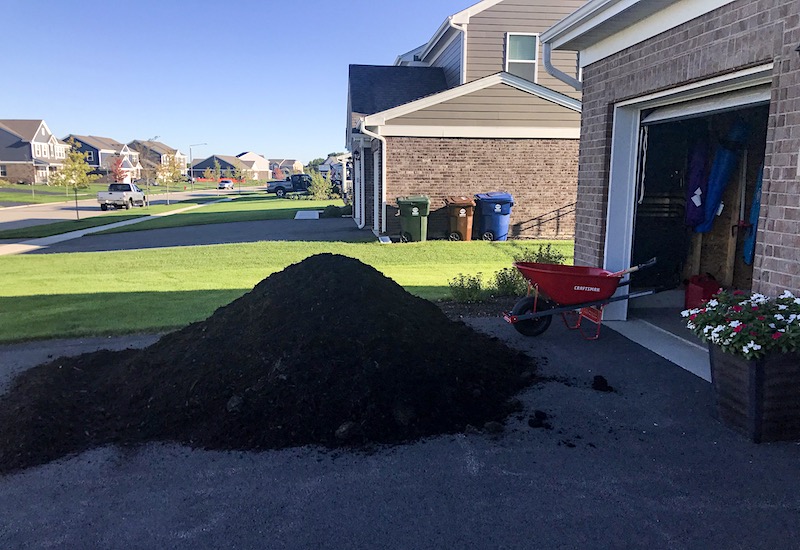
Mulch is sold in cubic yards. Umm how much is a cubic yard?? Exactly. A cubic yard of mulch is approximately enough to fill a standard issue public works garbage bin (peep my neighbor’s garbage can in the next photo for an example).
Per a mulch calculator I found online, I needed ~1.7 cubic yards to cover our new area. However, any real weekend warrior will ALWAYS tell you to order more. I tossed around the idea of ordering 2 cubic yards but knew we were dealing with an elevation change, which meant additional volume.
Ultimately, I ordered three cubic yards. It was only $25/cubic yard, so that was a low cost to guarantee I wouldn’t be left short. Plus, our whole house is edged in mulch so we had a place for leftovers.
Did You Have Enough Mulch?
Three cubic yards turned out to be the absolute right call. Because of the drastic elevation change we used probably close to 2.5 cubic yards on the patio alone, including extending the mulch line outwards for flow, and filling in the mulch between the house and the patio that was severely lower than the patio. It’s a safer level change and looks much better.
Since delivery was a flat $45, we didn’t want to end up ordering an additional cubic yard and paying $70 for it. So, to anyone looking to mulch their yard in a similar situation, do yourself a favor and order plenty extra, you’ll never regret it.
Laying the Weed Barrier and Mulch
We make it a point to do things right the first time, so we laid down weed barrier first. Kevin’s dad says skipping weed barrier is a big regret he had when he hired landscapers 20 years ago. He wanted to save some money so he took out the weed barrier and sees TONS of weeds each year.
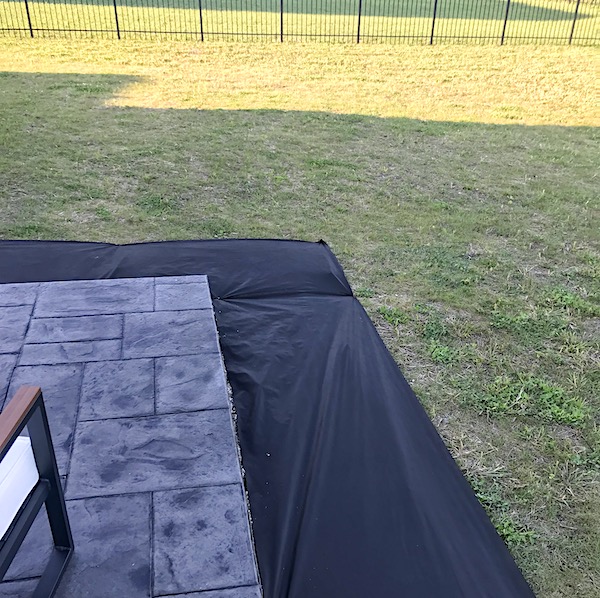
The black fabric you see is a basic weed barrier to keep growth from shooting through my mulch over the years. They carry it at Lowe’s and Home Depot in different brands. I personally use this one and buy at least 100 feet at a time; it goes fast! We recently bought the 300 ft roll when we mulched around our walkway. If you have a big project or know you’ll have more in the future it makes sense to get the bigger roll now.
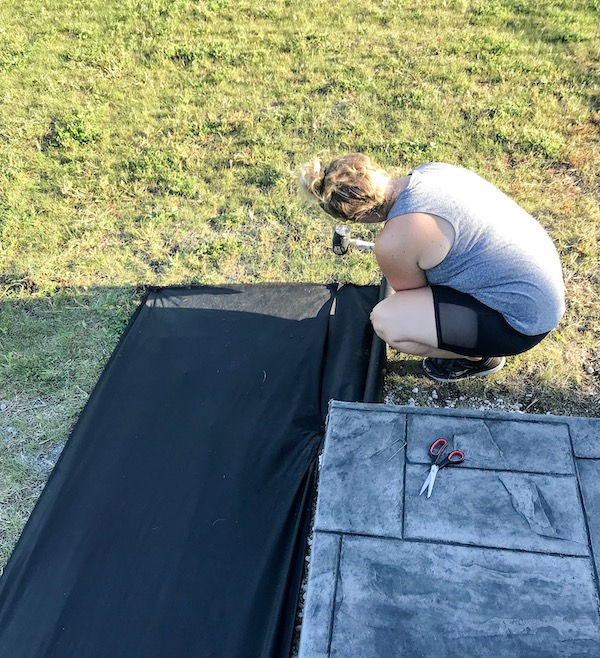
Another item I recommend is landscape staples. These hold the weed barrier down while you install the edging and put the mulch on there. It’s only $9.99 for 75 staples. I only needed about 25-30 for my ~65 feet of barrier perimeter. One staple every 3-4 feet is enough to hold things down. These are an especially good idea if you’re breaking this project up over several days so your fabric doesn’t blow away. You can push the staples in the ground with your hands but a rubber mallet makes it even easier.
Installing the Landscape Edging
Once I had the barrier stapled down it was time to get the edging in place. Kev and I opted for these recycled rubber look-alikes because actual pavers are SO expensive.
The edging was the hardest part for me. It was a LOT of hammering and it was at full strength. Each strip had 4 stake holes and you had to drill a pilot hole in each spot to make it doable with a rubber mallet (a hammer works but a mallet was way easier). But it was DIY and looks amazing so it was totally worth it.
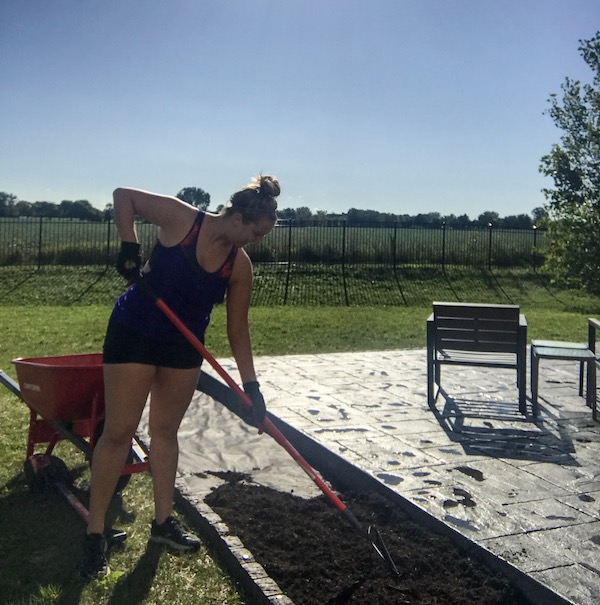
Next, we brought in mulch one wheel barrow at a time and dumped it in the edged area. That took a few days to do but was totally worth it. Kevin and I can’t get over how much we saved on labor.
If you have any mulch at all, I HIGHLY recommend buying a tine rake. Mine was under $20 and will save your back for years to come.
After Your DIY Landscaping and Mulch: Patio Decor
Finally, the fun stuff!
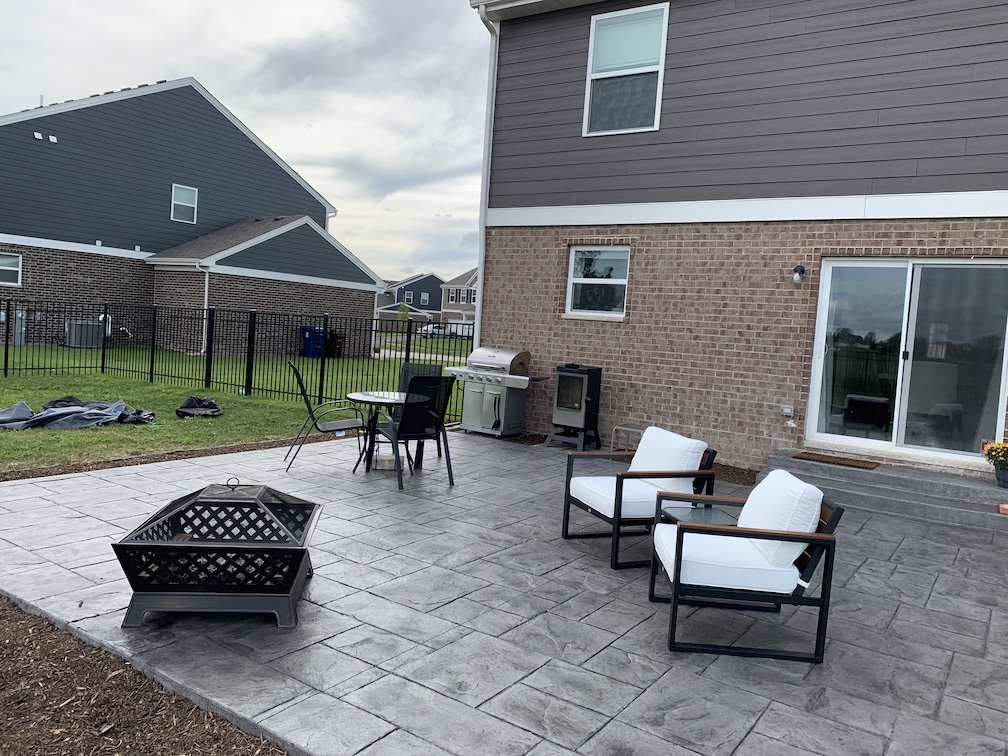
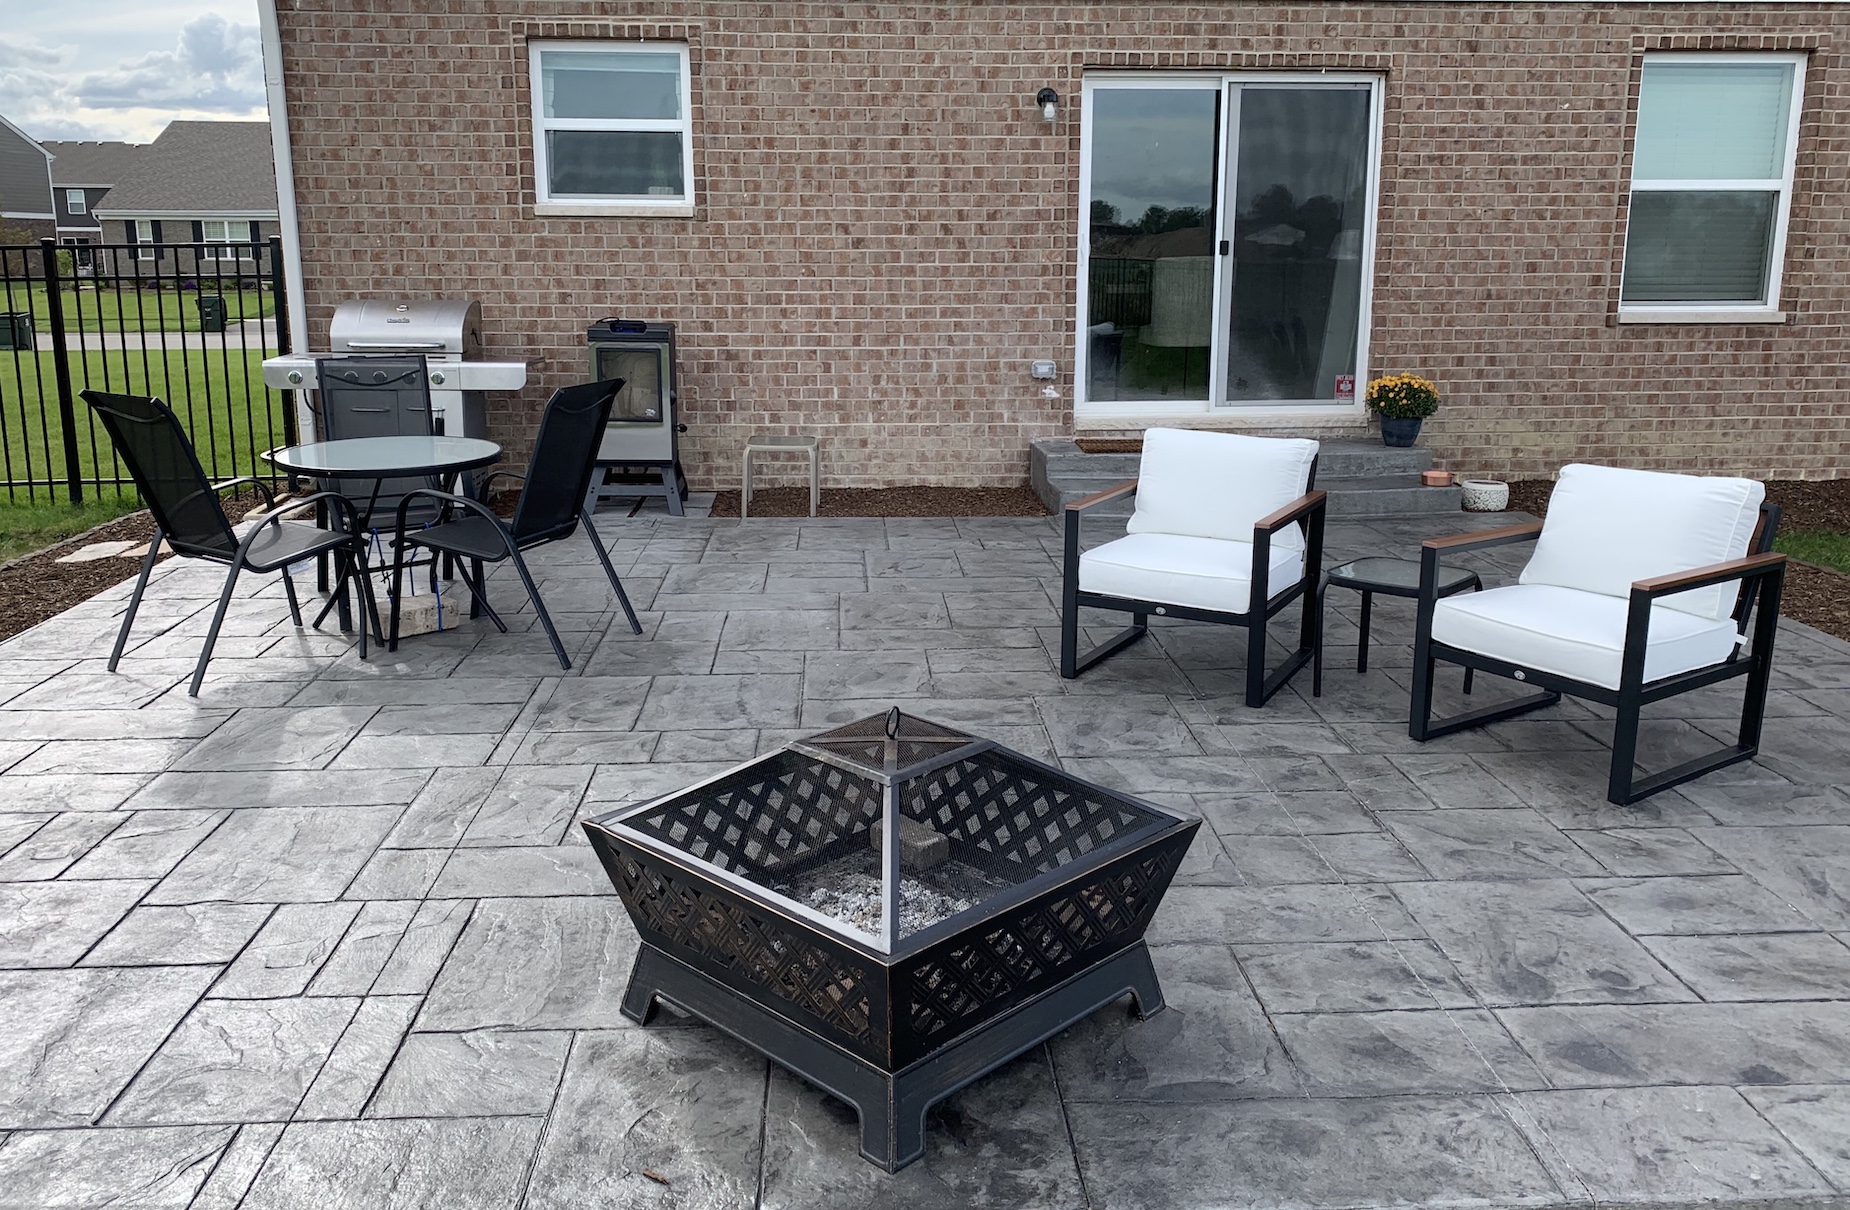
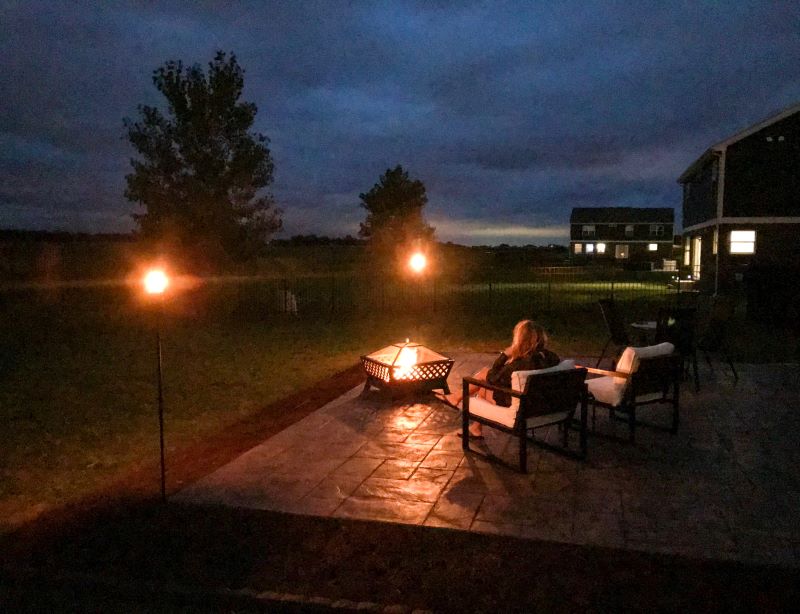
Given the end of summer timing, we found two black/white/wood lounge chairs on clearance for only $219 (originally $449). End of season blowout sales are worth the wait. Our fire pit was a housewarming gift from Kevin’s parents, it’s nice to finally use it in a lounge space instead of on our driveway.
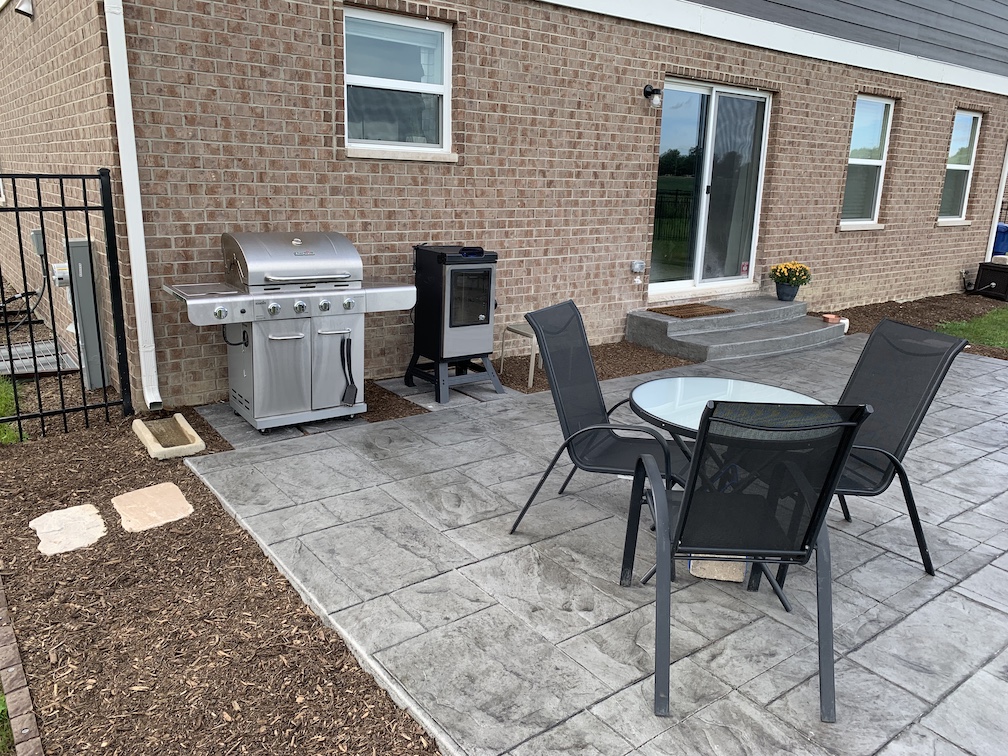
My mom gave us her old patio table and chairs, and they’re perfect for now. We eventually want to get a long dining set with six chairs, an umbrella, the works. Until we find exactly what we want you can catch us at our little cafe setup.
Why the Bungee Cords?
We have crazy amounts of high wind here because of the open fields surrounding our neighborhood, so we have to take additional precautions. Last week we found our grill cover in the back corner of our yard and our fire pit scooted right off the patio into the mulch. Thankfully nothing was damaged, but now I have the whole patio on a bungee cord/tie down plan plus a few bricks in the fire pit to keep it in place.
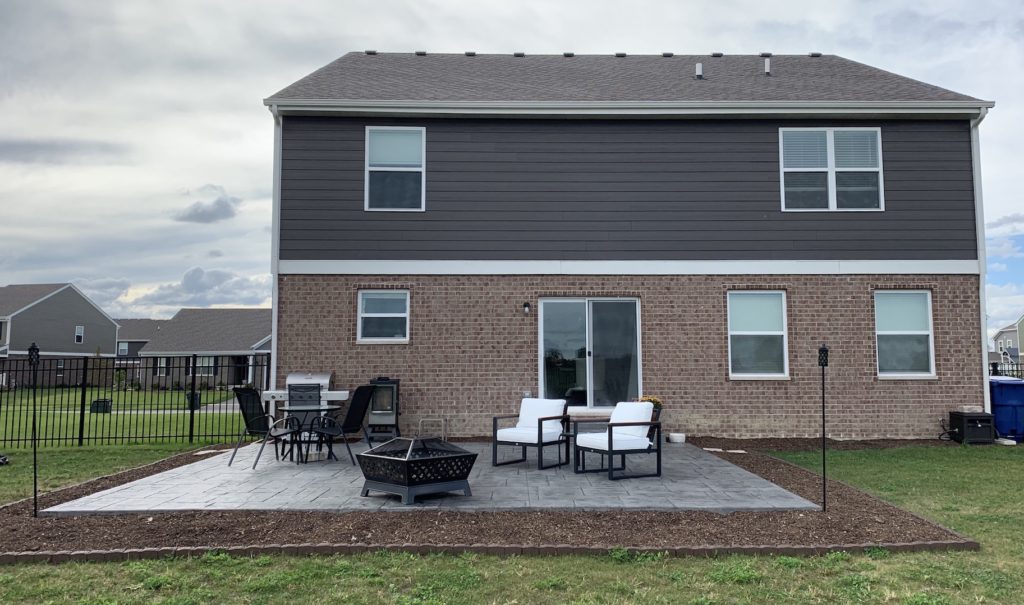
Final Look: DIY Landscaping, Patio and Mulch
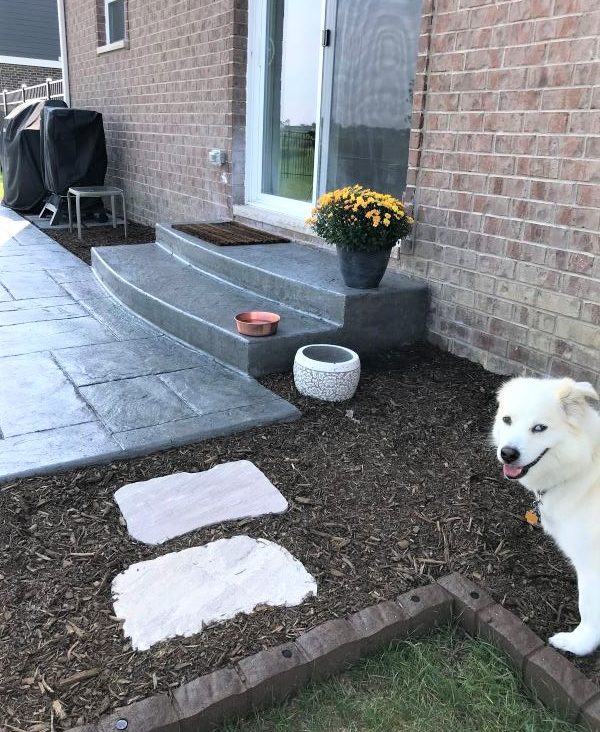
By final I mean “for now” because I’ll be back in the spring with all the planting we’ve done in the 60+ foot long space. Hopefully, once I get some plants in the dog will stop assuming it’s his personal ramp!
DIY Landscaping and Mulch + Patio Decor Progress
Below is what we’ve accomplished since our last check in. While it looks like a small, tidy list believe me, it was work! No shame in completing things over several weekends or even months.
- Put down weed barrier
- Mulched
- Installed edging
- Added steppers on both sides
- Set up the dining area
- Established an ‘outdoor kitchen’ with our grill and smoker area
- Created a lounge space with chairs, fire pit and a few tiki torches (that help keeps bugs at bay – but don’t forget the big jug of torch fuel)

Backyard Projects Up Next
- Installing a permanent, in ground fire pit
- Schedule an installation date for our walking path
- Finding the rest of our patio furniture
- Establishing a space for an in ground garden
For now though, we’re happy to enjoy this beautiful view while we dream about the future. We can hardly wait until the whole yard is connected and functional!
Have you tackled any of these projects? What could we have done better? I’m always curious about the best way to get things done. Share your tips with me in the comments below!
More Home and Garden
- Installing Our Stamped Concrete Patio
- DIY Backyard Fire Pit
- Small Space Gardening Tips
- One Year Suburban Backyard Transformation
This post contains referral/affiliate links. A small commission may be earned if products are purchased through my links. Thank you for supporting the brands that support this blog.

This post contains referral/affiliate links. A small commission may be earned if products are purchased through my links. Thank you for supporting the brands that support this blog.

