
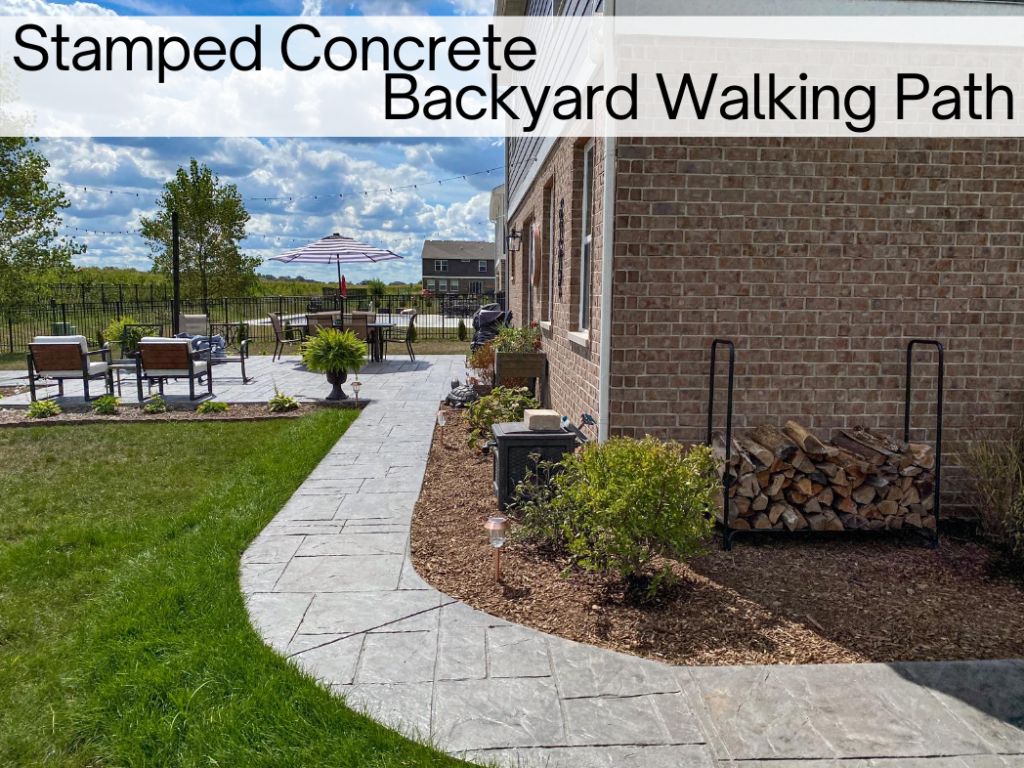
Our stamped concrete walking path is done! This project ending officially completes all of our concrete projects. I talked about this more in our backyard transformation post, but the backyard has been our biggest DIY project yet. Virtually everything except the concrete has been DIY, including all of the landscaping around this new path.
SHOP UMBRELLA | SHOP LOUNGE CHAIRS | SHOP LOG RACK | SHOP SOLAR LIGHTS
This project wasn’t as straight forward as our main patio or fire pit extension. In fact, the projects went from most basic to most detailed, which was convenient as we learned more about laying concrete with each project.
Designing Our Stamped Concrete Walking Path
The day before the install, our patio expert, Tony marked where the excavator needed to dig. Being the particular person I am, I made a few edits, which is apparently pretty common. If I can give ANY piece of advice when doing large home projects it is do NOT be afraid to ask questions or ask to change things. These are large, likely expensive projects that need to be done right. Always be sure you’re getting what you want (and are paying for)!
I always have some form of spray paint home for projects so Tony gave us the OK to spray some edits directly. When I had him on the phone I let him know my edits were in white to avoid confusion tomorrow.
Considerations for the Walking Path
You’ll be glad you gave these points some thought before finalizing your path.
- Pour an attached garbage can storage area with enough surface area to get the cans out to the street comfortably.
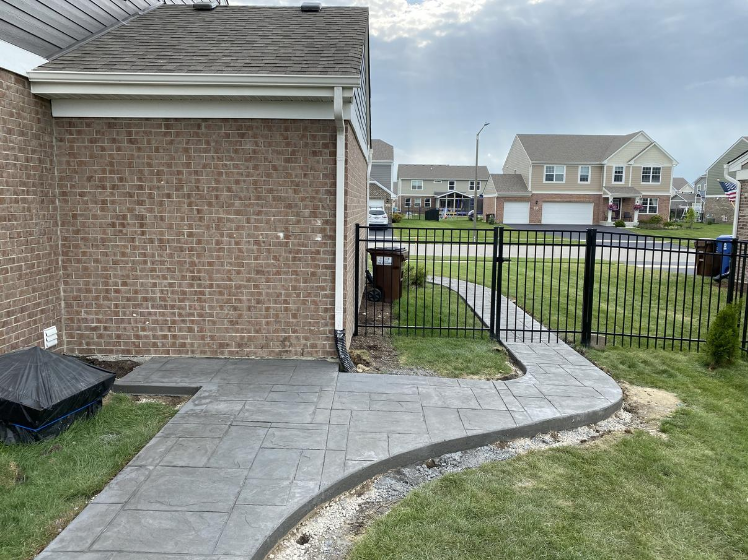
- Don’t cut corners too sharply. Think ahead to your lawn mower, wheel barrow and other large objects that’ll be using this path and how hard it’d be take a 90 degree turn.
- Mind your yard space: your path should be closer to your house, keeping your yard spacious – for both you and your future resale!
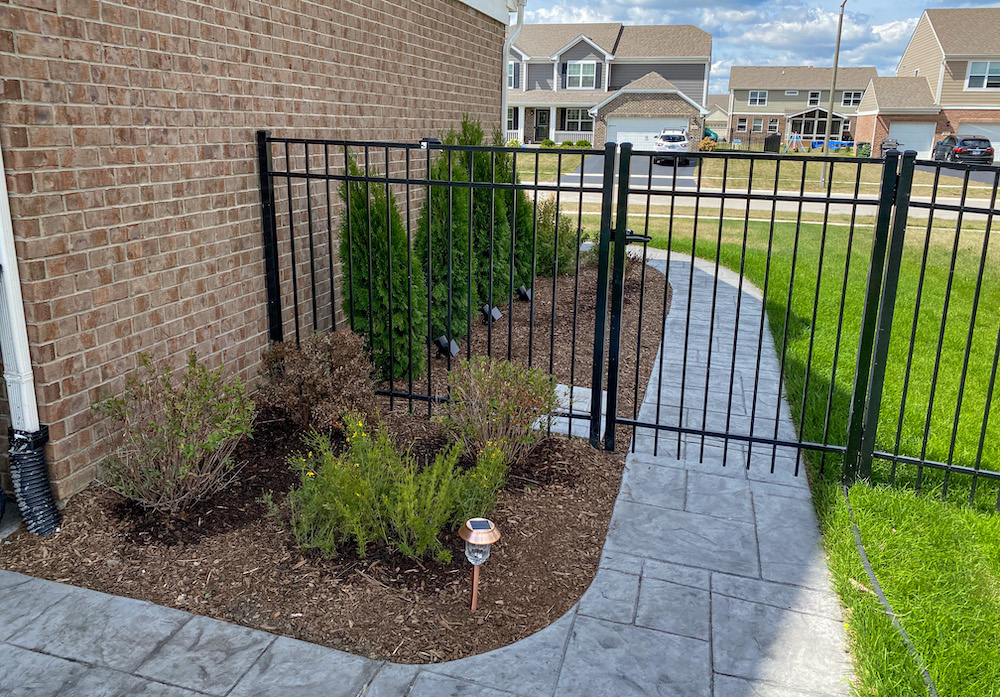
- Standard fence gates are four feet wide. Your path will need to be narrower to account for framing during installation. Our path is three feet wide which is the standard residential width.
- Are you looking to bury your downspouts? Do this BEFORE they pour. It’s an easy DIY project if you’re not digging under concrete.
Pouring the Stamped Concrete Walking Path
The crew always comes bright and early around 6:30 a.m., and coincidentally all of our concrete projects have been on Saturdays. By the time they poured the walking path, Tony told us to just stay in bed and they’ll just get started when they get there, ha! (and that is 100% how it went down).
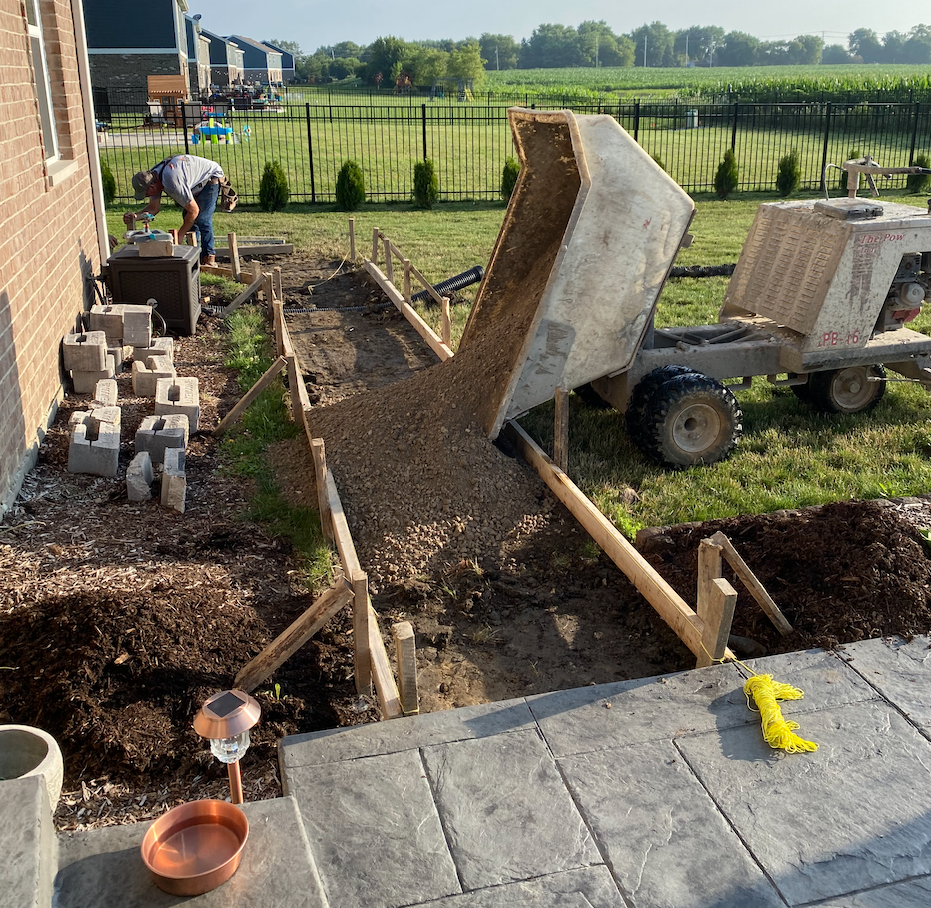
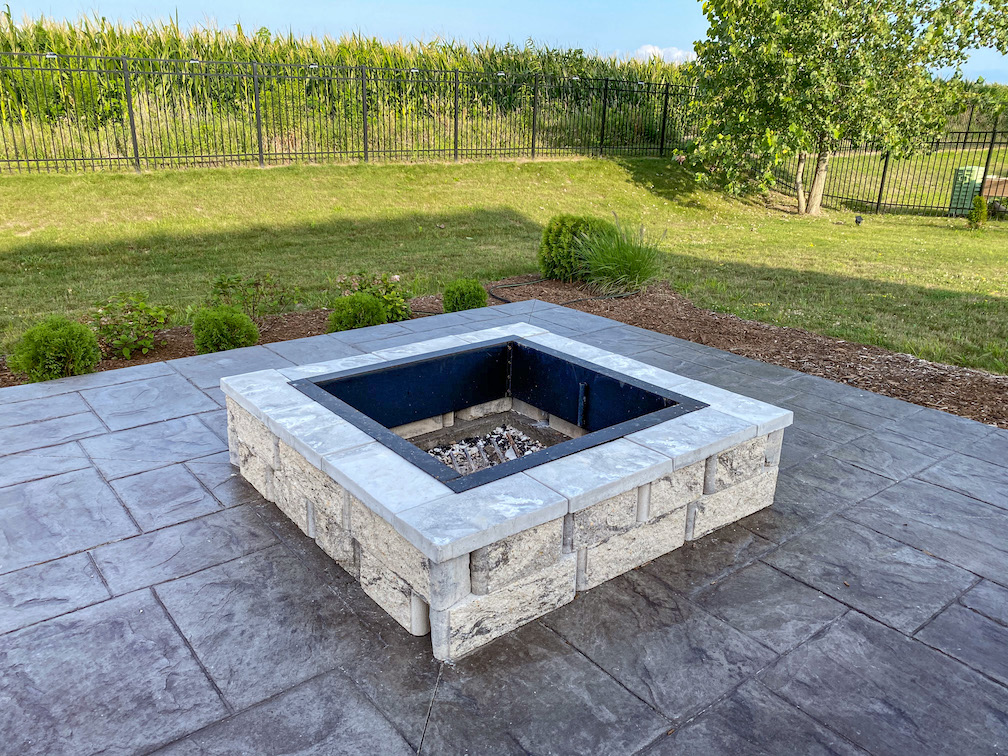
First, they surveyed and framed the path based on the edits I made with my white spray paint. Next, they started pouring the gravel mix with this neat mini dump truck. From there they added the water and let the material set. Towards the very end they placed the stamp and walked on it to create this Majestic Ashlar print we have on the other patios, it’s pretty cool!
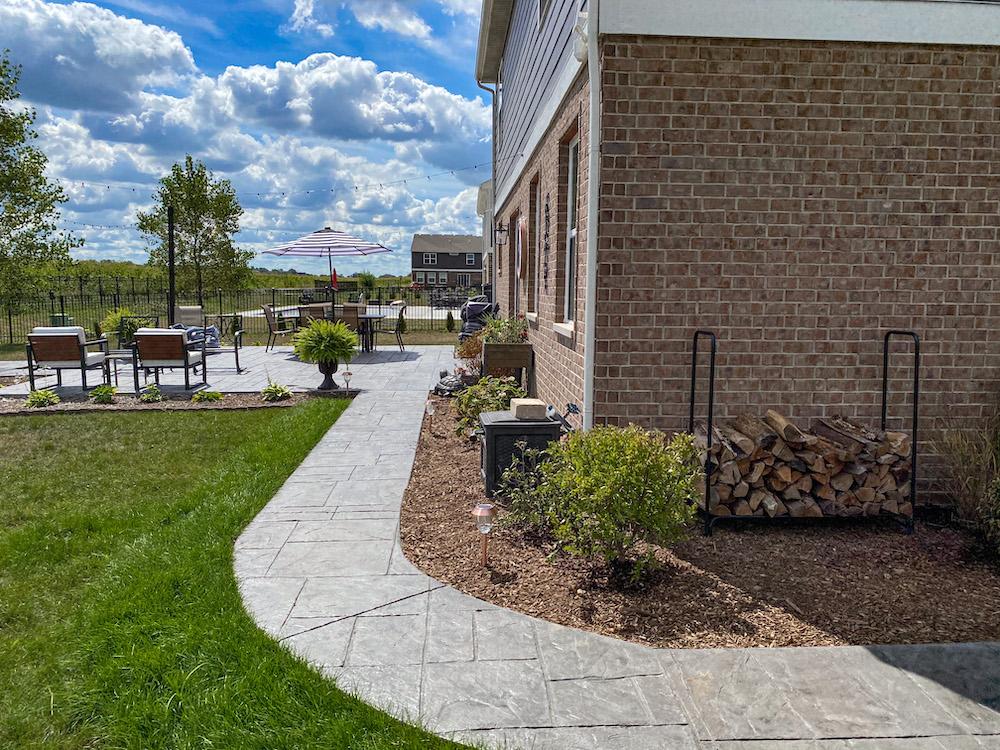
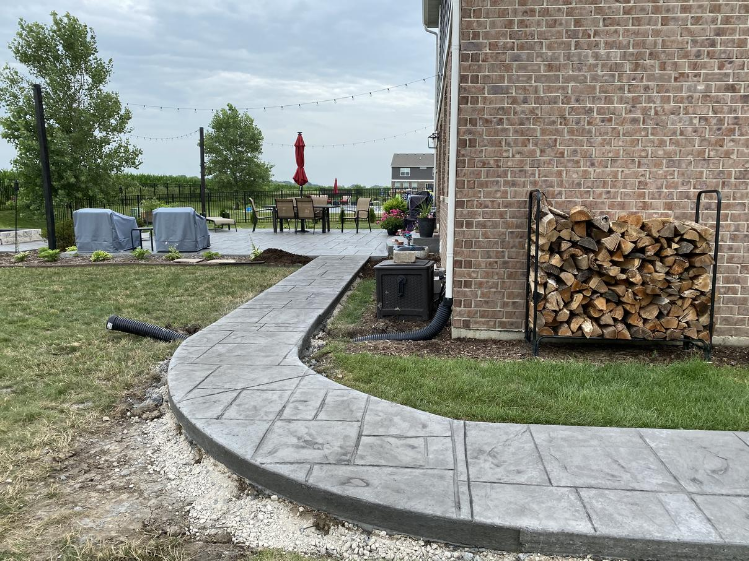
The Finished Walking Path
You’ll notice the landscaping around it is a little rough, we’ll discuss that later. For now, let’s admire the beauty of the finished product!
You can see what I mean by burying the downspouts. We buried all three by the path before Tony and the crew started. We still comment about how thankful we are we did that to this day!
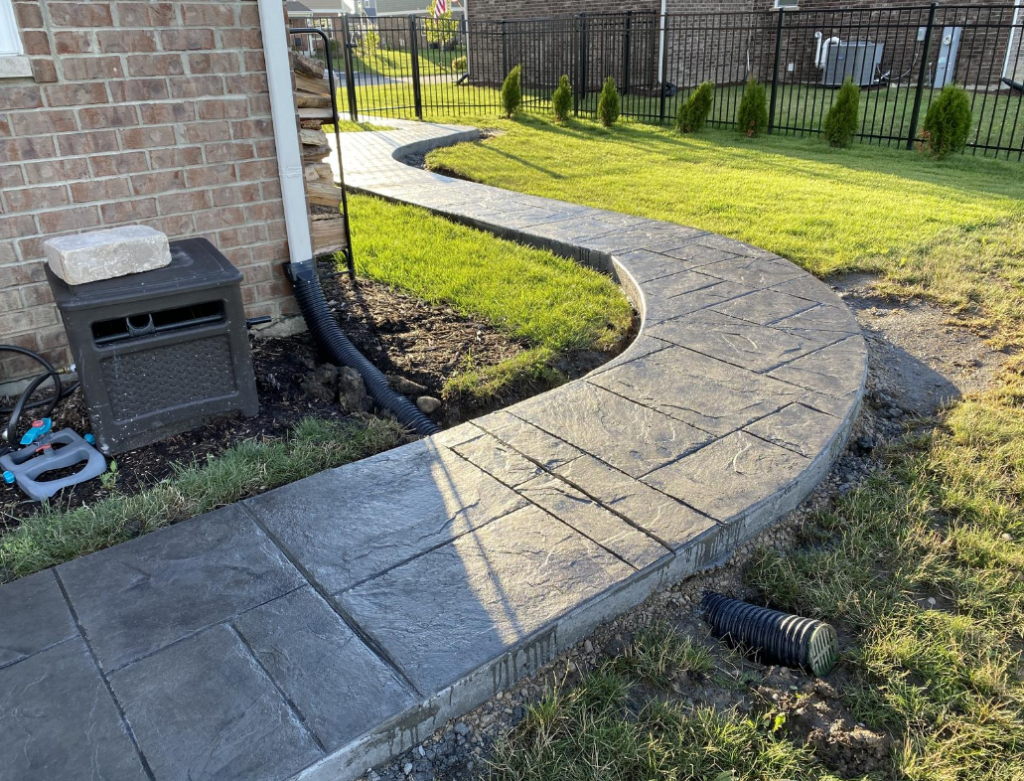
You’ll notice a lot of the considerations I mentioned were ones we faced. For example, you’ll remember this curve was actually much sharper in the initial outline video above before I edited the markings.
I wanted it to be a grander curve, for both aesthetic appeal and function. We have plenty of space over here so bumping it out a couple feet was fine.
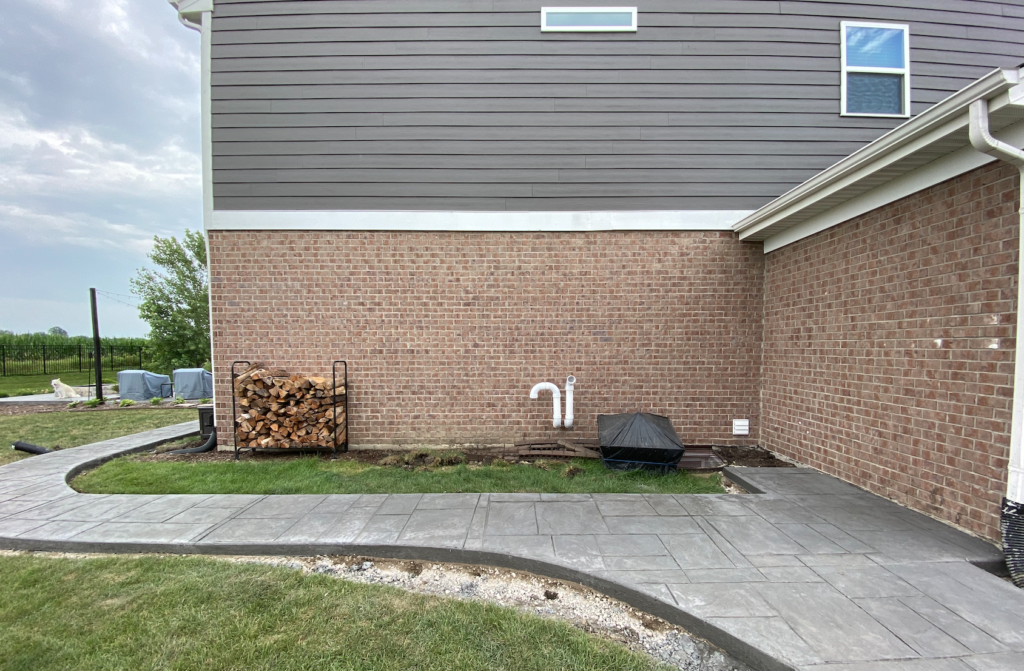
This side area has since undergone a major face lift and looks amazing. More on that shortly! But this is actually a rather important feature because of the added discrete storage.
Our garbage cans were previously hanging out on the side of our garage in our mulch, as most of the neighborhood’s cans do. With the crazy high winds we get we wanted to store ours better to avoid tip overs and garbage flying out. We’ve since had the biggest storm either of us have seen, including 80mph+ winds, and the cans all stayed in tact behind the third garage stall. Well worth the extra planning upfront!
The Finished and Landscaped Walking Path
The path was half of the work in this space. We knew we’d want to grade the ground around it afterwards to avoid a tripping hazard and potential injuries. We hired a wonderful local crew who did it very cost effectively and had it done in one afternoon. This was the only other non-DIY work we hired for this space.
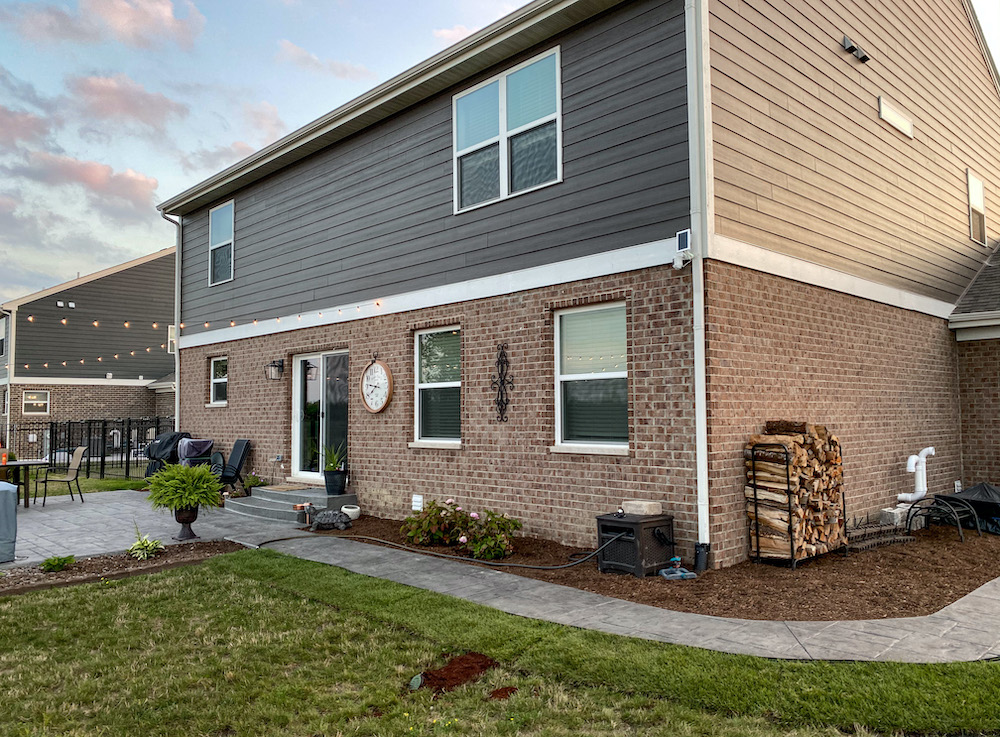
Because it was such a small amount of surface area they recommended sodding for instant gratification. Sounded good to us! We went the sod route on the outside of the path and the inside would be mulch.
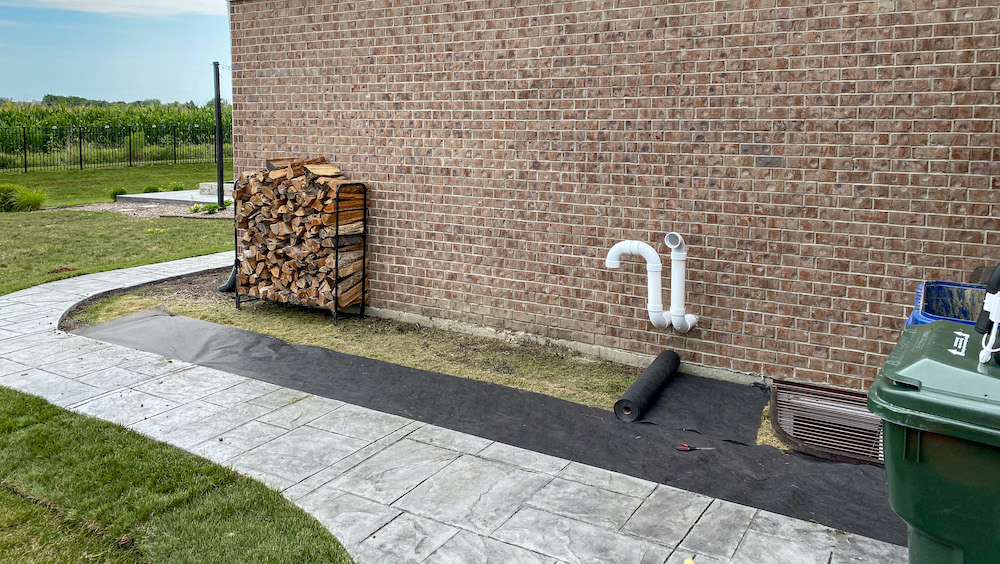
As always, before laying mulch I installed weed barrier over the entire surface area. Everything from garage to back patio. I picked up the 300 foot roll and used over half of it. While a tiny amount of weeds still show up, mostly around the edges, I’d estimate we see 99% less weeds, truly, with the barrier. Totally worth it! Don’t forget to pick up yard staples/fabric pins to hold it down, too. Check out this post for how many I use when laying weed barrier.
DIY Landscaping Tips
I plan on sharing a full post on landscaping and how to effectively DIY it next spring, even if you’re not a green thumb, but here are some quick tips.
- Check sun exposure in that area and check the plants’ tags for a matching recommendation, for example, planting partial shade plants in full sun is a waste of time (spoiler alert: they slowly die).
- Arborvitae (the tall trees outside the fence) are almost indestructible. Make sure they’re watered every other day for the first two weeks after planting and you’re good to go. I have some in full sun and some in partial shade, both doing well!
- Don’t plant too close to your path. Check tags for how big a plant is estimated to get and plant accordingly. Extra open mulch is more beneficial next to your path versus your house so guests have a more comfortable walk.
Have you installed a patio, fire pit or walking path in your yard before? I’d love to hear your pro tips in the comments below!
More Patio and Backyard Content
- Choosing Our Stamped Concrete Patio & Reveal
- Landscaping, Mulching and Decorating Our New Patio
- Installing a DIY Backyard Fire Pit
- One Year Backyard Transformation
This post contains referral/affiliate links. A small commission may be earned if products are purchased through my links. Thank you for supporting the brands that support this blog.

This post contains referral/affiliate links. A small commission may be earned if products are purchased through my links. Thank you for supporting the brands that support this blog.
