
Are you super particular and have a specific vision in mind when decorating? I hear you. I rarely find things that I love 100% as-is. Thankfully, it also rarely takes as much creative talent as people assume to customize items to your vision, you just have to be brave enough to give it a shot. This DIY menu board, for example, took hardly any DIYing at all!

Finding a Chalkboard
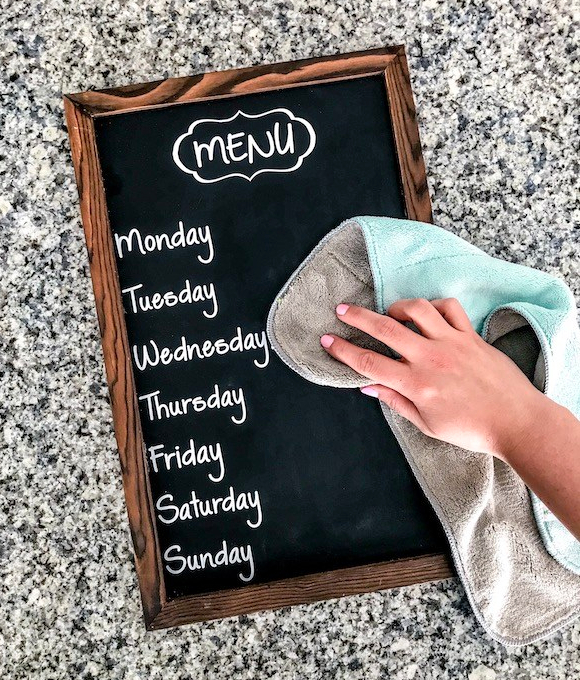
This can be a chalkboard, dry erase board, or whatever other surface you envision for your menu board. Should be a surface that easily erases clean. For my purpose, this chalkboard on Amazon was this size and style I needed.
Side note: I highly recommend microfiber cloths for erasing chalk off your chalkboards, it’s the only thing I’ve ever used that doesn’t leave a streak (fun DIY organizing hack on these coming soon!). I bought this colorful multi pack and designated one for chalkboard erasure only.
Finding Decals
These are from Perfectly UnPerfect Co on Etsy and the labels are these 1.5″ white menu decals. If you own a Cricut you could also print 1.5″ white decals yourself.
Assembling Your Perfect DIY Menu Board
Start by measuring the length of writing space you have and dividing an appropriately even amount of space for each day of the week decal and the menu title decal, if you have one.
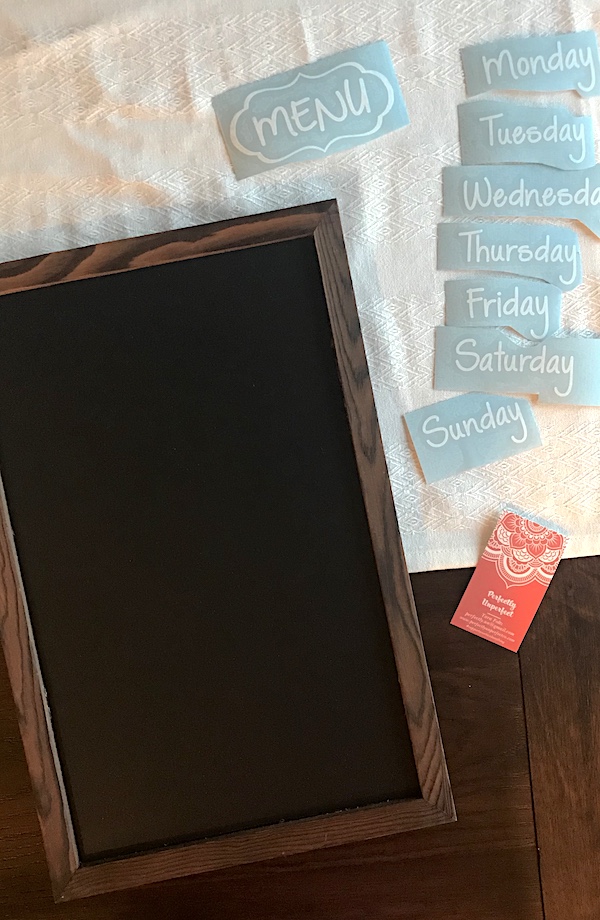
Follow the instructions for your specific labels to apply to the surface. This step is important because you probably don’t have extra boards or labels – read twice, apply once!
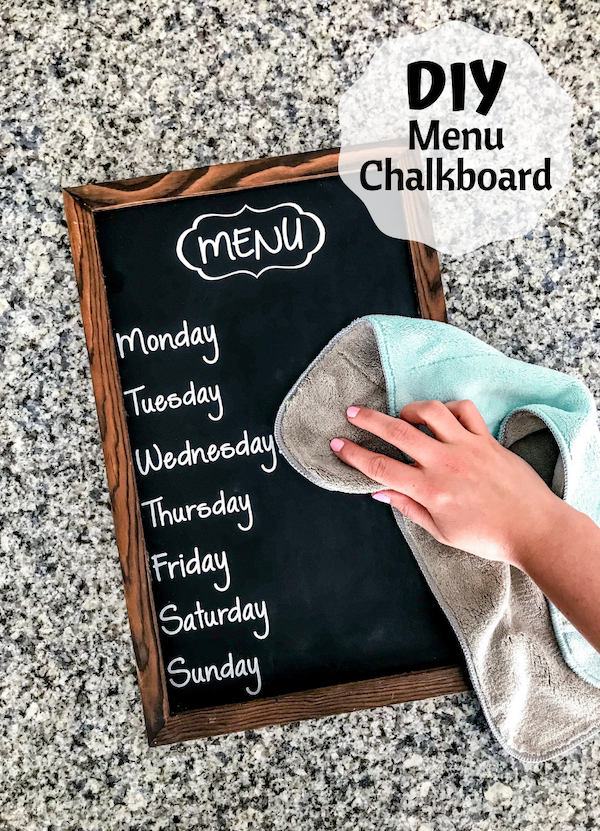
…and that’s it! Never settle, fam. What you want is out there, never settle!
Craving more DIY?
- Try Refinishing and Updating Your Dresser
- Spray Paint Your Outdated Decor
- Hang Some Gorgeous Farmhouse Shelves
This post contains referral/affiliate links. A small commission may be earned if products are purchased through my links. Thank you for supporting the brands that support this blog.

This post contains referral/affiliate links. A small commission may be earned if products are purchased through my links. Thank you for supporting the brands that support this blog.
